【开源鸿蒙跨平台开发先锋训练营】Day3 支持鸿蒙的Flutter请求网络,实现列表功能
本文介绍了在Flutter开发鸿蒙应用时如何进行网络请求。主要使用第三方库http进行HTTP请求,并详细说明了各平台的网络权限配置方法:鸿蒙需在module.json5中添加权限,安卓需修改AndroidManifest.xml,macOS需配置entitlements文件。文章提供了完整的网络请求封装示例,包括HttpClient类、ApiResponse模型和API配置,并展示了如何实现礼物
1.网络请求
1.网络请求用什么?
1.我们用flutter开发鸿蒙需要用到什么库来支持网络请求
是第三方库 package:http
2.为什么要用第三方库 package:http
因为他主要用于http请求,并且支持web,方便使用,在真实项目里面使用是非常多的且支持鸿蒙。
2.如何使用呢?
要想使用前先在项目加上权限请求
- 鸿蒙的网络权限配置
在ohos/entry/src/main/module.json5下添加
"requestPermissions": [
  {
    "name": "ohos.permission.INTERNET"
  }]
另外由于我们是用flutter项目,不可能只开发鸿蒙,以下是安卓开发和macOS的网络权限配置。
- 安卓的网络权限配置
AndroidManifest.xml文件夹下面 加上
<uses-permission android:name="android.permission.INTERNET" />
- macOS的网络权限配置
需要先在终端运行
flutter create --platforms=macos .来提供macOS的支持
macos/Runner/DebugProfile.entitlements和macos/Runner/Release.entitlements添加
<key>com.apple.security.network.client</key>
<true/>
顺便提一嘴 就是 为什么ios不用加网络权限配置,因为ios默认是支持网络访问的,不需要再额外配置权限。
- 将http package添加到依赖中
flutter pub add http
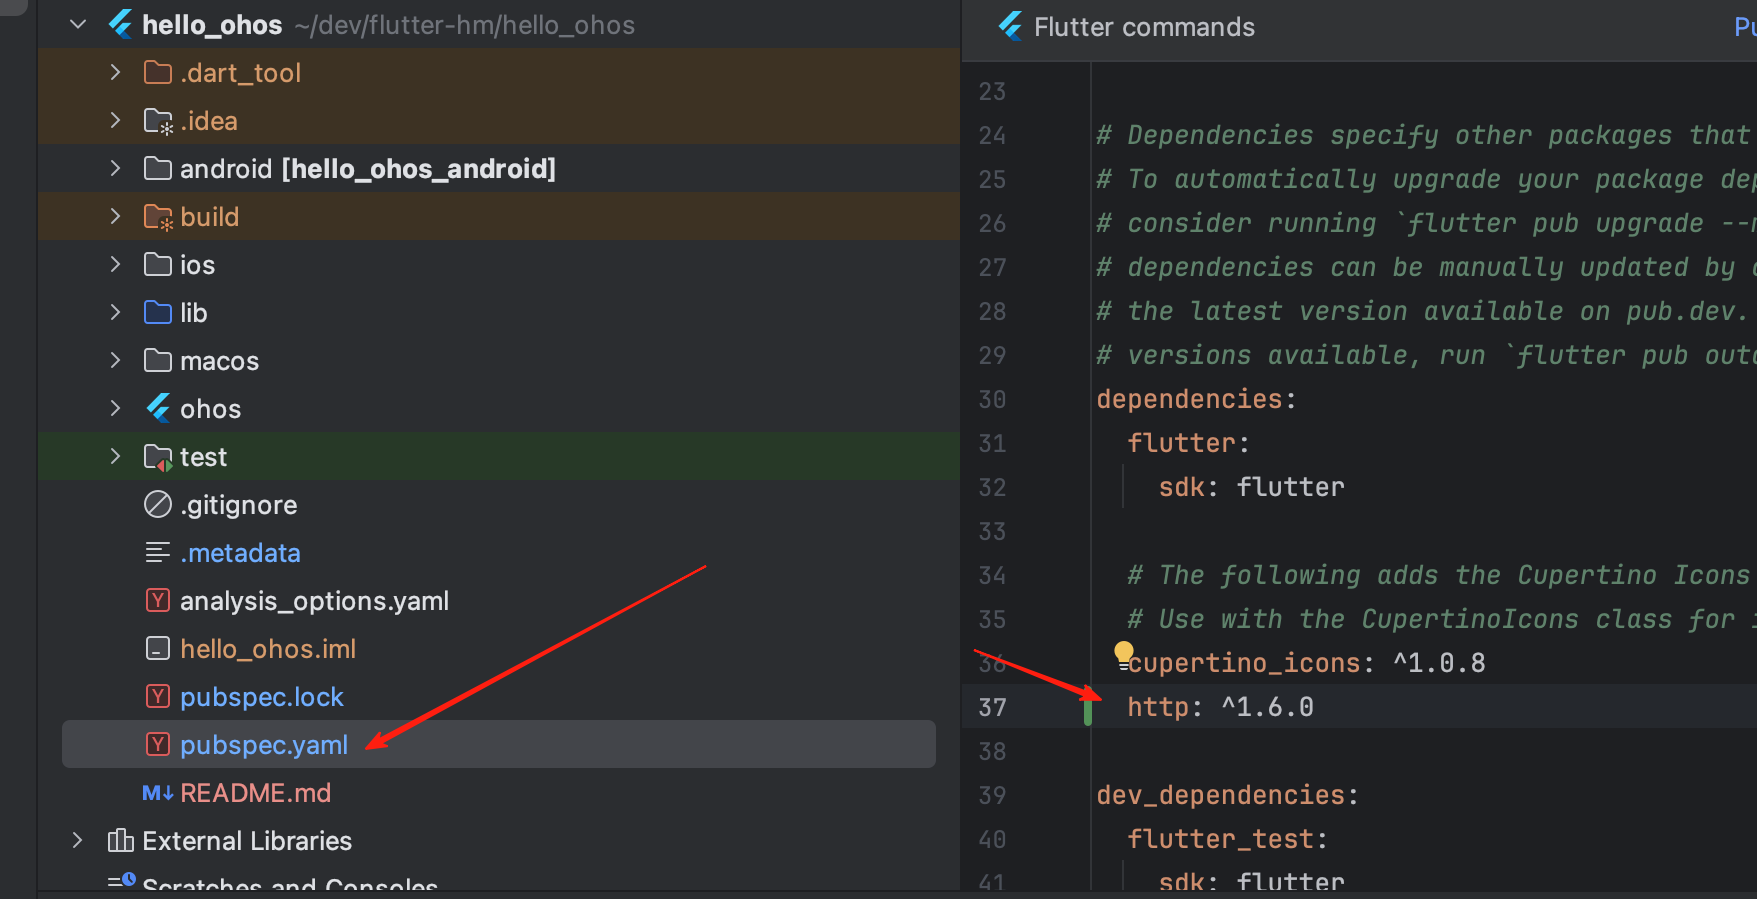
出现了这个的时候 就代表成功了。
flutter pub get
- 先设计项目结构
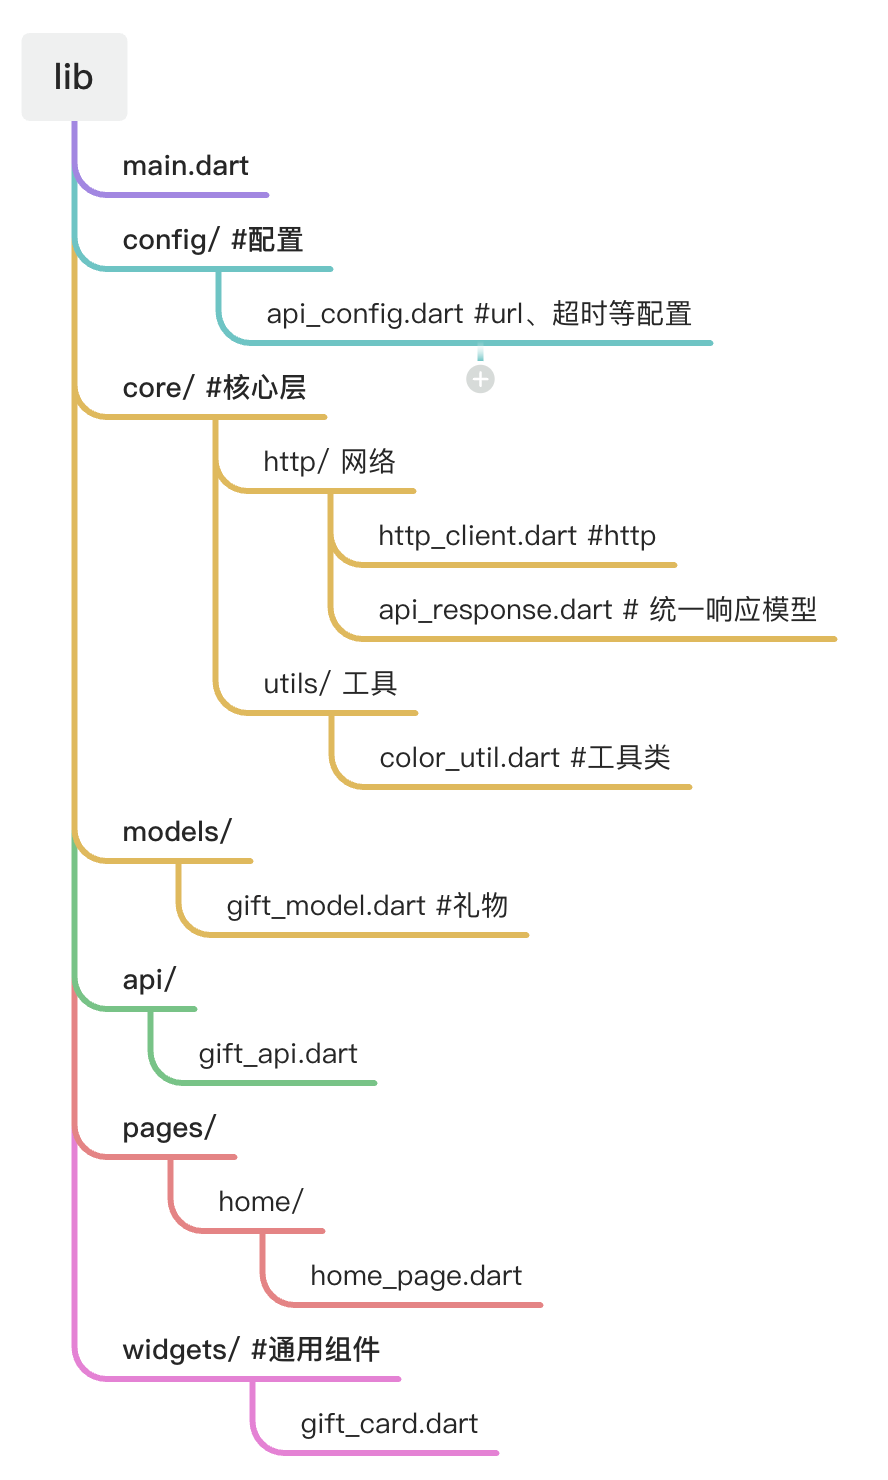
在lib/core/http 里面 封装网络请求
基于package:http的Dart网络请求封装类,有get和post请求。并且把最终的返回结果统一包装成ApiResponse,方便全局使用和错误处理。
2.1.引用依赖
-
convert Dart内部库,用于jsonEncode将对象转为json字符串,jsonDecode是json字符串转为map格式。
-
http 网络请求库 有get,post这些
-
还有自己写api_config配置 里面会写有baseUrl和超时以及环境的区分
-
api_response.dart 是用来统一接口返回结构的封装类,用来规范成功返回,失败返回,以及状态码的。
import 'dart:convert';
import 'package:http/http.dart' as http;
import '../../config/api_config.dart';
import 'api_response.dart';

/// HTTP 客户端
class HttpClient {
  static final HttpClient _instance = HttpClient._internal();
  factory HttpClient() => _instance;
  HttpClient._internal();

  /// GET 请求
  Future<ApiResponse> get(
    String path, {
    Map<String, dynamic>? query,
    Map<String, String>? headers,
  }) async {
    try {
      final uri = Uri.parse('${ApiConfig.baseUrl}$path').replace(
        queryParameters: query?.map((k, v) => MapEntry(k, v.toString())),
      );

      final response = await http
          .get(uri, headers: headers)
          .timeout(Duration(seconds: ApiConfig.connectTimeout));

      return _handleResponse(response);
    } catch (e) {
      return ApiResponse.error('网络请求失败: $e');
    }
  }

  /// POST 请求
  Future<ApiResponse> post(
    String path, {
    Map<String, dynamic>? body,
    Map<String, String>? headers,
  }) async {
    try {
      final uri = Uri.parse('${ApiConfig.baseUrl}$path');

      final response = await http
          .post(
            uri,
            headers: {'Content-Type': 'application/json', ...?headers},
            body: body != null ? jsonEncode(body) : null,
          )
          .timeout(Duration(seconds: ApiConfig.connectTimeout));

      return _handleResponse(response);
    } catch (e) {
      return ApiResponse.error('网络请求失败: $e');
    }
  }

  /// 处理响应
  ApiResponse _handleResponse(http.Response response) {
    try {
      final json = jsonDecode(response.body);
      if (json['success'] == true) {
        return ApiResponse.success(
          json['data'],
          statusCode: response.statusCode,
        );
      } else {
        return ApiResponse.error(
          json['message'] ?? '请求失败',
          statusCode: response.statusCode,
        );
      }
    } catch (e) {
      return ApiResponse.error('数据解析失败: $e', statusCode: response.statusCode);
    }
  }
}

/// 全局 HTTP 客户端实例
final httpClient = HttpClient();
/// 统一 API 响应模型
class ApiResponse<T> {
  final bool success;
  final T? data;
  final String? message;
  final int? statusCode;

  ApiResponse({
    required this.success,
    this.data,
    this.message,
    this.statusCode,
  });

  /// 成功响应
  factory ApiResponse.success(T data, {int? statusCode}) {
    return ApiResponse(success: true, data: data, statusCode: statusCode);
  }

  /// 失败响应
  factory ApiResponse.error(String message, {int? statusCode}) {
    return ApiResponse(
      success: false,
      message: message,
      statusCode: statusCode,
    );
  }
}
在lib/config/api_config.dart里面
/// API 配置
class ApiConfig {
  // 基础 URL
  static const String baseUrl = 'https://xxx';

  // 超时时间(秒)
  static const int connectTimeout = 30;
  static const int receiveTimeout = 30;

  // API 路径
  static const String giftList = '/api/xxx';
}
在lib/api/gift_api.dart里面
import '../config/api_config.dart';
import '../core/http/http_client.dart';
import '../models/gift_model.dart';

/// xxxAPI
class XxxApi {
  /// 获取礼物列表
  static Future<GiftListData?> getGiftList({int gift = 1}) async {
    final result = await httpClient.get(
      ApiConfig.giftList,
      query: {'gift': gift},
    );

    if (result.success && result.data != null) {
      return GiftListData.fromJson(result.data);
    }
    return null;
  }
}
在lib/models/gift_model.dart里面
/// 礼物模型
class Gift {
  final int id;
  final String name;
  final String imageUrl;
  final List<String>? imageUrls;
  final String description;
  final int isVisible;
  final DateTime createdAt;
  final DateTime updatedAt;

  Gift({
    required this.id,
    required this.name,
    required this.imageUrl,
    this.imageUrls,
    required this.description,
    required this.isVisible,
    required this.createdAt,
    required this.updatedAt,
  });

  factory Gift.fromJson(Map<String, dynamic> json) {
    return Gift(
      id: json['id'],
      name: json['name'],
      imageUrl: json['image_url'],
      imageUrls: json['image_urls'] != null
          ? List<String>.from(json['image_urls'])
          : null,
      description: json['description'],
      isVisible: json['is_visible'],
      createdAt: DateTime.parse(json['created_at']),
      updatedAt: DateTime.parse(json['updated_at']),
    );
  }
}

/// 分页信息
class Pagination {
  final int page;
  final int pageSize;
  final int total;
  final int totalPages;

  Pagination({
    required this.page,
    required this.pageSize,
    required this.total,
    required this.totalPages,
  });

  factory Pagination.fromJson(Map<String, dynamic> json) {
    return Pagination(
      page: json['page'],
      pageSize: json['pageSize'],
      total: json['total'],
      totalPages: json['totalPages'],
    );
  }
}

/// 礼物列表响应
class GiftListData {
  final List<Gift> list;
  final Pagination pagination;

  GiftListData({required this.list, required this.pagination});

  factory GiftListData.fromJson(Map<String, dynamic> json) {
    return GiftListData(
      list: (json['list'] as List).map((e) => Gift.fromJson(e)).toList(),
      pagination: Pagination.fromJson(json['pagination']),
    );
  }
}
最后在页面
 Future<void> _fetchData() async {
    setState(() {
      _loading = true;
      _error = null;
    });

    final result = await GiftApi.getGiftList(gift: 1);

    setState(() {
      if (result != null) {
        _giftList = result.list;
      } else {
        _error = '获取数据失败';
      }
      _loading = false;
    });
  }
2.下一步_giftList在界面上回显列表数据
return RefreshIndicator(
      onRefresh: _fetchData,
      child: ListView.builder(
        padding: const EdgeInsets.all(16),
        itemCount: _giftList.length,
        itemBuilder: (context, index) {
          return GiftCard(
            gift: _giftList[index],
            onTap: () {
            },
          );
        },
      ),
    );
在lib/widgets/gift_card.dart 里面
import 'package:flutter/material.dart';
import '../models/gift_model.dart';

/// 礼物组件
class GiftCard extends StatelessWidget {
  final Gift gift;
  final VoidCallback? onTap;

  const GiftCard({super.key, required this.gift, this.onTap});

  @override
  Widget build(BuildContext context) {
    return Card(
      margin: const EdgeInsets.only(bottom: 16),
      clipBehavior: Clip.antiAlias,
      color: Colors.white,
      elevation: 0,
      child: InkWell(
        onTap: onTap,
        child: Padding(
          padding: const EdgeInsets.all(12),
          child: Row(
            crossAxisAlignment: CrossAxisAlignment.start,
            children: [
              // 左边:标题和描述
              Expanded(
                child: Column(
                  crossAxisAlignment: CrossAxisAlignment.start,
                  children: [
                    Text(
                      gift.name,
                      maxLines: 1,
                      overflow: TextOverflow.ellipsis,
                      style: const TextStyle(
                        fontSize: 16,
                        fontWeight: FontWeight.bold,
                      ),
                    ),
                    const SizedBox(height: 8),
                    Text(
                      gift.description,
                      maxLines: 3,
                      overflow: TextOverflow.ellipsis,
                      style: TextStyle(fontSize: 14, color: Colors.grey[600]),
                    ),
                  ],
                ),
              ),
              const SizedBox(width: 12),
              // 右边:图片
              ClipRRect(
                borderRadius: BorderRadius.circular(8),
                child: Image.network(
                  gift.imageUrl,
                  width: 100,
                  height: 100,
                  fit: BoxFit.cover,
                  errorBuilder: (_, __, ___) => Container(
                    width: 100,
                    height: 100,
                    color: Colors.white,
                    child: const Icon(Icons.image_not_supported, size: 40),
                  ),
                ),
              ),
            ],
          ),
        ),
      ),
    );
  }
}
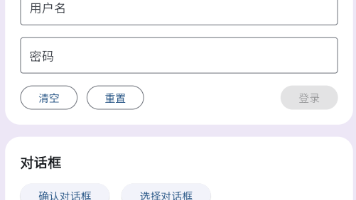
3.最终呈现的效果
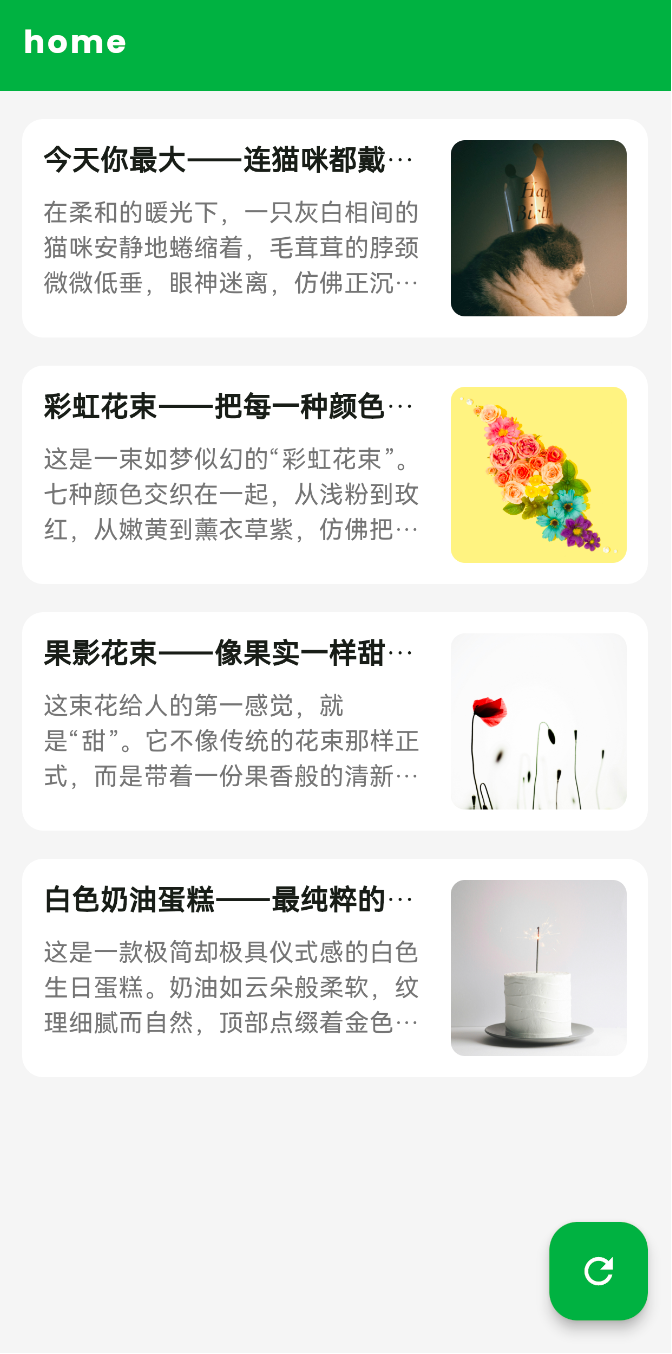
这是flutter最开始的学习样子,新手可以先在这里示例。
import 'package:http/http.dart' as http; // HTTP请求库
import 'package:flutter/material.dart'; // Flutter UI 组件库
import 'package:google_fonts/google_fonts.dart';

// 十六进制颜色扩展,支持 '#ffffff' 格式
extension HexColor on Color {
  static Color fromHex(String hex) {
    hex = hex.replaceAll('#', '');
    return Color(int.parse('FF$hex', radix: 16));
  }
}

void main() {
  runApp(const MyApp()); // TODO 1 程序的入口
}

// TODO 2 创建根组件MyApp
class MyApp extends StatelessWidget {
  /**
   *  为什么用StatelessWidget?
   *  MyApp 只负责配置应用(主题、标题),不需要变化
   *  不变的东西用 StatelessWidget
   *  MyApp
      └── MaterialApp(Material 风格的应用容器)
      ├── title: 应用名称
      ├── theme: 主题配色 #颜色 = 0xFF颜色
      └── home: 首页是 MyHomePage
      colorScheme: ColorScheme.fromSeed(seedColor: Color(0xFFee7637)),
      colorScheme: ColorScheme.fromSeed(seedColor: HexColor.fromHex('#ee7637')),
      为什么colorScheme: ColorScheme.fromSeed(seedColor: Color(0xFFee7637)), 运行到模拟器和设置的颜色色号不一致 模拟器比较浅
      这是因为 ColorScheme.fromSeed() 不是直接使用你的颜色,而是基于你的颜色生成一套配色方案。
      inversePrimary(AppBar 背景色)会被自动计算成较浅的变体。
      backgroundColor: Color(0xFFee7637),  // 直接用你的颜色
      如果想全局控制,可以在 theme 里指定:
      theme: ThemeData(
      colorScheme: ColorScheme.fromSeed(seedColor: Color(0xFFee7637)),
      appBarTheme: AppBarTheme(
      backgroundColor: Color(0xFFee7637),  // 强制指定 AppBar 颜色
      ),
      ),
   */
  const MyApp({super.key});

  @override
  Widget build(BuildContext context) {
    return MaterialApp(
      title: 'L研学',
      theme: ThemeData(
        colorScheme: ColorScheme.fromSeed(seedColor: Color(0xFFee7637)),
        appBarTheme: AppBarTheme(
          backgroundColor: Color(0xFFee7637), // 强制指定 AppBar 颜色
          foregroundColor: Colors.white,  // 标题和图标颜色改为白色
          titleTextStyle: GoogleFonts.poppins(
            color: Colors.white,
            fontSize: 16,
            fontWeight: FontWeight.bold,
            letterSpacing: 1.5,  // 字间距,数值越大间距越大
          ),
        ),

      ),

      home: const MyHomePage(title: '首页'),
    );
  }
}

// TODO 3 创建首页组件
class MyHomePage extends StatefulWidget {
  /**
   *  首页需要显示网络请求结果,数据会变化
      会变的东西用 StatefulWidget
   */
  const MyHomePage({super.key, required this.title});
  final String title; // 接收标题参数

  @override
  State<MyHomePage> createState() => _MyHomePageState();
  /**
 * MyHomePage(外壳,定义参数)
    ↓ 创建
    _MyHomePageState(内核,存放状态和逻辑)
 */
}

// TODO 4 创建状态类 _MyHomePageState
class _MyHomePageState extends State<MyHomePage> {
  String _response = '加载中...'; // 存储请求结果
  bool _loading = true; // 是否正在加载

  // TODO  页面初始化
  @override
  void initState() {
    super.initState(); // 必须先调用父类
    _fetchData(); // 页面创建时自动请求数据 初始化时触发
  }

  // TODO 5 请求方法
  // Future<void>	 异步方法,
  // 返回空 ,async	 标记这是异步方法 ,
  // await	等待异步操作完成
  // setState()	 通知 Flutter "数据变了,请刷新 UI"
  Future<void> _fetchData() async {
    // ① 开始加载
    setState(() {
      _loading = true;
    });

    try {
      // ② 发起 GET 请求
      final response = await http.get(
        Uri.parse('https://jsonplaceholder.typicode.com/posts/1'),
      );
      // ③ 判断结果
      if (response.statusCode == 200) {
        setState(() {
          _response = '请求成功:\n${response.body}';
        });
      } else {
        setState(() {
          _response = '请求失败: ${response.statusCode}';
        });
      }
    } catch (e) {
      // ④ 捕获异常
      setState(() {
        _response = '错误: $e';
      });
    } finally {
      // ⑤ 结束加载
      setState(() {
        _loading = false;
      });
    }
  }

  // TODO 构建UI
  /**
   * Scaffold(页面骨架)
      ├── appBar(顶部栏)
      ├── body(主体内容)
      │     └── Center → Padding → Column
      │           └── _loading ? 转圈 : 文字
      └── floatingActionButton(右下角按钮)

   */
  @override
  Widget build(BuildContext context) {
    return Scaffold(
      // ① 顶部导航栏
      appBar: AppBar(
        title: Text(widget.title),
      ),
      // ② 页面主体
      body: Center(
        child: Padding(
          padding: const EdgeInsets.all(16.0),
          child: Column(
            mainAxisAlignment: MainAxisAlignment.center,
            children: <Widget>[
              // 根据 _loading 状态显示不同内容
              if (_loading)
                const CircularProgressIndicator() // 加载中:转圈
              else
                Expanded(
                  child: SingleChildScrollView(child: Text(_response)),
                ), // 加载完:文字
            ],
          ),
        ),
      ),
      // ③ 浮动按钮(手动刷新)
      floatingActionButton: FloatingActionButton(
        onPressed: _loading ? null : _fetchData,
        tooltip: 'Fetch',
        child: const Icon(Icons.autorenew),
      ),
    );
  }
}
/**
 * 1. import 导入包
    ↓
    2. main() 程序入口
    ↓
    3. MyApp(StatelessWidget)- 应用配置
    ↓
    4. MyHomePage(StatefulWidget)- 页面外壳
    ↓
    5. _MyHomePageState - 页面状态类
    ├── 5.1 定义变量 _response, _loading
    ├── 5.2 initState() 初始化
    ├── 5.3 _fetchData() 请求方法
    └── 5.4 build() 构建 UI

 */
效果如下:
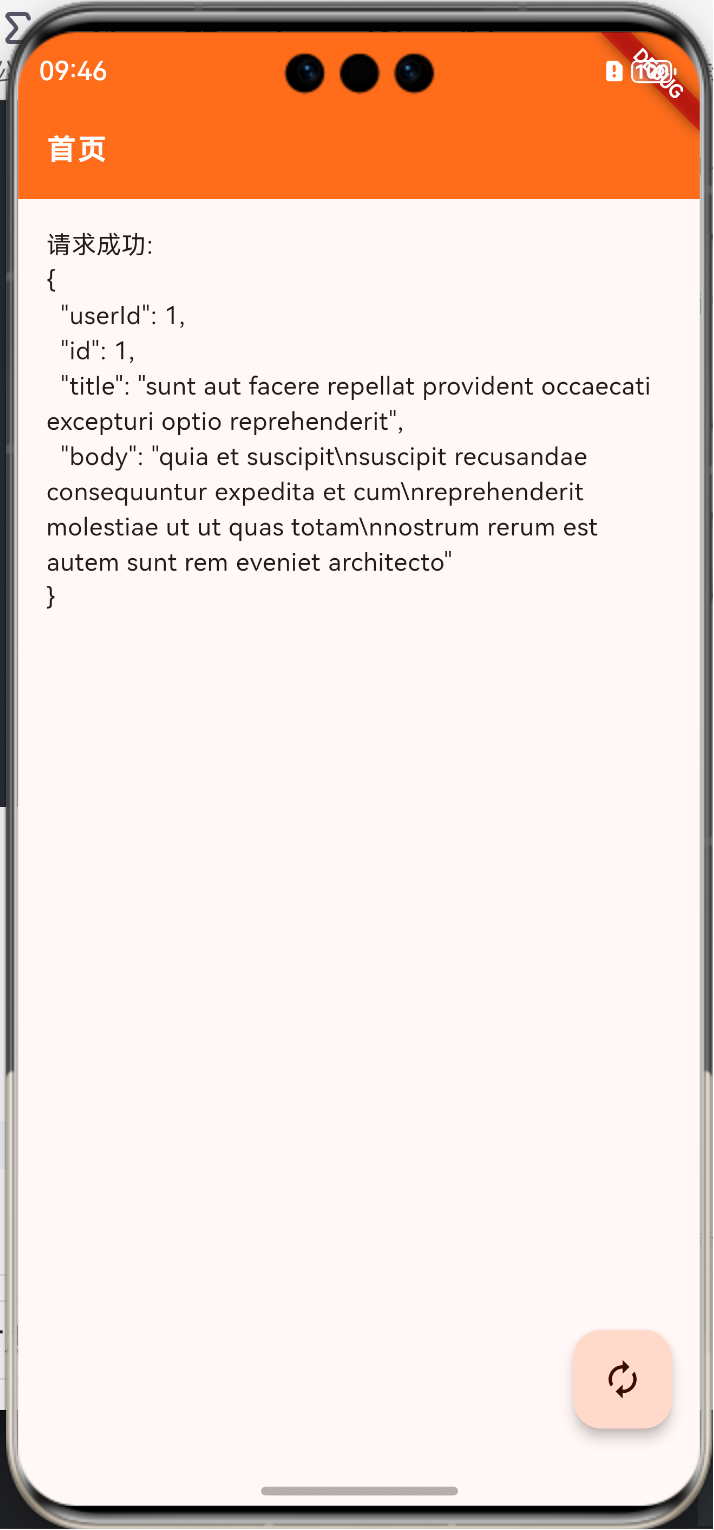
4.最后
欢迎加入开源鸿蒙跨平台社区:
https://openharmonycrossplatform.csdn.net

开源鸿蒙跨平台开发社区汇聚开发者与厂商,共建“一次开发,多端部署”的开源生态,致力于降低跨端开发门槛,推动万物智联创新。
更多推荐


 3
3 0
0- 0


 已为社区贡献4条内容

所有评论(0)