React Native Notifaction IOS
安装 react-native 环境Getting Started · React Native初始化一个项目react-native init FcmTest配置 IOS 的 Identifiers & Profiles1. 配置一个 bundle id:Apple Developer Identifiers我这里的使用的包名是 com.gz.fcmtest在下面勾选 P...
安装 react-native 环境
Getting Started · React Native
初始化一个项目
react-native init FcmTest
配置 IOS 的 Identifiers & Profiles
1. 配置一个 bundle id:
我这里的使用的包名是 com.gz.fcmtest
在下面勾选 Push Notifications


2. 配置一下 Profile
![[外链图片转存失败,源站可能有防盗链机制,建议将图片保存下来直接上传(img-XtpPnr4u-1579590843118)(/react-native/notification/images/firebase-console-7.png)]](https://i-blog.csdnimg.cn/blog_migrate/77e967494a69879223c35d15940b54a9.png)
配置完成后, 下载, 拖进 xcode(或者双击)
3. 配置一个 Key
![[外链图片转存失败,源站可能有防盗链机制,建议将图片保存下来直接上传(img-bk6KCMlu-1579590843120)(/react-native/notification/images/firebase-console-8.png)]](https://i-blog.csdnimg.cn/blog_migrate/0c666b8360a79268bbf66fe90c3304f9.png)
安装 react-native-firebase
1. 安装 react-native-firebase
yarn add react-native-firebase
2. link react-native-firebase 模块
react-native link react-native-firebase
配置 Firebase
1. 到 Firebase Console 创建一下项目
2. 配置一个 IOS 的 Firebase
并把 GoogleService-Info.plist 拷贝到项目的 ./ios/ 目录下
![[外链图片转存失败,源站可能有防盗链机制,建议将图片保存下来直接上传(img-ETU52IyX-1579590843122)(/react-native/notification/images/firebase-console-1.png)]](https://i-blog.csdnimg.cn/blog_migrate/f3379a77db1df9ffbe7d52f9e36e7b62.png)
![[外链图片转存失败,源站可能有防盗链机制,建议将图片保存下来直接上传(img-CBdCzE5x-1579590843123)(/react-native/notification/images/firebase-console-2.png)]](https://i-blog.csdnimg.cn/blog_migrate/a81f0bfadbaa5686d18b6f36a63d1ad7.png)
![[外链图片转存失败,源站可能有防盗链机制,建议将图片保存下来直接上传(img-XSBr5bnv-1579590843124)(/react-native/notification/images/firebase-console-3.png)]](https://i-blog.csdnimg.cn/blog_migrate/cec6fd35313b4d5ffe4e1004591c9216.png)
3. 配置 IOS key
IOS 的 Firebase 设置 --> Cloud Messaging --> iOS app configuration --> APNs Authentication Key --> upload --> AuthKey_YG7xxxxxWQ39.p8
其中 Key Id 和 Team Id 到 Apple Developer 上生成的 Key 详情和账号设置中找
![[外链图片转存失败,源站可能有防盗链机制,建议将图片保存下来直接上传(img-klD8Vnff-1579590843126)(/react-native/notification/images/firebase-console-9.png)]](https://i-blog.csdnimg.cn/blog_migrate/16a59272be4b75a59099ddfc2114ba41.png)
![[外链图片转存失败,源站可能有防盗链机制,建议将图片保存下来直接上传(img-fBBJrrf7-1579590843127)(/react-native/notification/images/firebase-console-10.png)]](https://i-blog.csdnimg.cn/blog_migrate/cce64acfa0d8b6c0ccc1d64ef053af3e.png)
![[外链图片转存失败,源站可能有防盗链机制,建议将图片保存下来直接上传(img-n0XfoleW-1579590843128)(/react-native/notification/images/firebase-console-11.png)]](https://i-blog.csdnimg.cn/blog_migrate/35d9aa99899ec190a87811c70367e4ac.png)
在 ./ios/Podfile 中添加以下内容:
  pod 'Firebase/Core'
  pod 'Firebase/Messaging'
  # pod 'RNFirebase', :path => '../node_modules/react-native-firebase'
在目录 ./ios 下执行
pod install
[外链图片转存失败,源站可能有防盗链机制,建议将图片保存下来直接上传(img-HHdbgWvs-1579590843131)(/react-native/notification/images/firebase-console-4.png)]
xcode 配置
1. xcode 打开项目
在FcmTest目录下, 执行以下命令
xed -b ios
2. 配置 Bundle Identifier 和 Provisioning Profile
Signint & Capabilities -> Signing:
- 不勾选 Automatically manage signing
- 修改 Bundle Identifier 为
com.gz.fcmtest - 选择刚刚配置的 Provisioning Profile (如果选项中没有, 下载 Profile 文件, 双击后就有了)
![[外链图片转存失败,源站可能有防盗链机制,建议将图片保存下来直接上传(img-A4GrbyxK-1579590843132)(/react-native/notification/images/firebase-console-12.png)]](https://i-blog.csdnimg.cn/blog_migrate/cc542486520e869732f188c22f07baa6.png)
3. 添加消息推送后后台模块
Signint & Capabilities -> Signing --> + Capability
添加 Push Notifications 和 Background Modes --> Remote notifications
![[外链图片转存失败,源站可能有防盗链机制,建议将图片保存下来直接上传(img-tHxvfhGb-1579590843134)(/react-native/notification/images/firebase-console-13.png)]](https://i-blog.csdnimg.cn/blog_migrate/fdca324847a146ea737e589c4440b820.png)
4. 其他设置
1. 右键单击 `Libraries` --> `Add Files To <YourProject>` 添加`./node_modules/react-native-firebase/ios/RNFirebase.xcodeproj`
2. 右键单击 `Libraries` --> `Add Files To <YourProject>` 添加 `GoogleService-Info.plist`
3. Build Phases --> Link Binary With Libraries 添加 UserNotifications.framework 和 libRNFirebase.a
4. Build Setting --> Header Search Paths, 添加 $(SRCROOT)/../node_modules/react-native-firebase/ios/RNFirebase
![[外链图片转存失败,源站可能有防盗链机制,建议将图片保存下来直接上传(img-UutcyJsx-1579590843135)(/react-native/notification/images/firebase-console-14.png)]](https://i-blog.csdnimg.cn/blog_migrate/9fd21b15129d2c342f963c5a5d3f117d.png)
![[外链图片转存失败,源站可能有防盗链机制,建议将图片保存下来直接上传(img-2WbLVBGK-1579590843137)(/react-native/notification/images/firebase-console-15.png)]](https://i-blog.csdnimg.cn/blog_migrate/aa8da53fbde33544883b8c4e820146c5.png)
![[外链图片转存失败,源站可能有防盗链机制,建议将图片保存下来直接上传(img-o38FX3Jj-1579590843138)(/react-native/notification/images/firebase-console-16.png)]](https://i-blog.csdnimg.cn/blog_migrate/6080755a1222714f243efafe92f05eff.png)
5. 在 AppDelegate 中添加 Notifications
在 AppDelegate.h 中 添加
#import <UserNotifications/UserNotifications.h>


@interface AppDelegate : UIResponder <UIApplicationDelegate, RCTBridgeDelegate, UNUserNotificationCenterDelegate>
修改后的 AppDelegate.h 文件内容:
#import <React/RCTBridgeDelegate.h>
#import <UIKit/UIKit.h>

// GZ Add this line
#import <UserNotifications/UserNotifications.h>

//@interface AppDelegate : UIResponder <UIApplicationDelegate, RCTBridgeDelegate>

// GZ Add UNUserNotificationCenterDelegate
@interface AppDelegate : UIResponder <UIApplicationDelegate, RCTBridgeDelegate, UNUserNotificationCenterDelegate>

@property (nonatomic, strong) UIWindow *window;

@end
在 AppDelegate.m
添加头部
#import <Firebase.h>
#import "RNFirebaseNotifications.h"
#import "RNFirebaseMessaging.h"
- (BOOL)application:(UIApplication *)application didFinishLaunchingWithOptions:(NSDictionary *)launchOptions {} 中添加:
  [FIRApp configure];
  [[UNUserNotificationCenter currentNotificationCenter] setDelegate:self];
  [RNFirebaseNotifications configure];
添加以下方法:
- (void)application:(UIApplication *)application didReceiveRemoteNotification:(nonnull NSDictionary *)userInfo
fetchCompletionHandler:(nonnull void (^)(UIBackgroundFetchResult))completionHandler{
  [[RNFirebaseNotifications instance] didReceiveRemoteNotification:userInfo fetchCompletionHandler:completionHandler];
}

- (void)application:(UIApplication *)application didRegisterUserNotificationSettings:(UIUserNotificationSettings *)notificationSettings {
  [[RNFirebaseMessaging instance] didRegisterUserNotificationSettings:notificationSettings];
}

-(void) userNotificationCenter:(UNUserNotificationCenter *)center didReceiveNotificationResponse:(UNNotificationResponse *)response withCompletionHandler:(void (^)(void))completionHandler {

  [[RNFirebaseMessaging instance] didReceiveRemoteNotification:response.notification.request.content.userInfo];
  completionHandler();
}
修改 moduleName 和 Bundle Identifier 一样
修改后的 AppDelegate.m 文件内容:
#import "AppDelegate.h"

#import <React/RCTBridge.h>
#import <React/RCTBundleURLProvider.h>
#import <React/RCTRootView.h>

#import <Firebase.h>
#import "RNFirebaseNotifications.h"
#import "RNFirebaseMessaging.h"

@implementation AppDelegate

- (BOOL)application:(UIApplication *)application didFinishLaunchingWithOptions:(NSDictionary *)launchOptions
{
  [FIRApp configure];
  [[UNUserNotificationCenter currentNotificationCenter] setDelegate:self];
  [RNFirebaseNotifications configure];


  RCTBridge *bridge = [[RCTBridge alloc] initWithDelegate:self launchOptions:launchOptions];
  RCTRootView *rootView = [[RCTRootView alloc] initWithBridge:bridge
                                                   moduleName:@"FcmTest"
                                            initialProperties:nil];

  rootView.backgroundColor = [[UIColor alloc] initWithRed:1.0f green:1.0f blue:1.0f alpha:1];

  self.window = [[UIWindow alloc] initWithFrame:[UIScreen mainScreen].bounds];
  UIViewController *rootViewController = [UIViewController new];
  rootViewController.view = rootView;
  self.window.rootViewController = rootViewController;
  [self.window makeKeyAndVisible];
  return YES;
}

- (NSURL *)sourceURLForBridge:(RCTBridge *)bridge
{
#if DEBUG
  return [[RCTBundleURLProvider sharedSettings] jsBundleURLForBundleRoot:@"index" fallbackResource:nil];
#else
  return [[NSBundle mainBundle] URLForResource:@"main" withExtension:@"jsbundle"];
#endif
}

@end
这时可能会有代码错误, 打不到库, 可以一次尝试:
- xcode : Clean Build Folder
- xcode : Build
- 项目的
./ios目录下执行: pod install
React Native 代码处理
修改 App.js
import React, {Component} from 'react';
import {AsyncStorage, View, Text, Alert} from 'react-native';
import firebase from 'react-native-firebase';

export default class App extends Component {
  async componentDidMount() {
    this.checkPermission();
    this.createNotificationListeners(); //add this line
  }

  //Remove listeners allocated in createNotificationListeners()
  componentWillUnmount() {
    this.notificationListener();
    this.notificationOpenedListener();
  }

  async createNotificationListeners() {
    /*
     * Triggered when a particular notification has been received in foreground
     * */
    this.notificationListener = firebase
      .notifications()
      .onNotification(notification => {
        const {title, body} = notification;
        this.showAlert(title, body);
      });

    /*
     * If your app is in background, you can listen for when a notification is clicked / tapped / opened as follows:
     * */
    this.notificationOpenedListener = firebase
      .notifications()
      .onNotificationOpened(notificationOpen => {
        const {title, body} = notificationOpen.notification;
        this.showAlert(title, body);
      });

    /*
     * If your app is closed, you can check if it was opened by a notification being clicked / tapped / opened as follows:
     * */
    const notificationOpen = await firebase
      .notifications()
      .getInitialNotification();
    if (notificationOpen) {
      const {title, body} = notificationOpen.notification;
      this.showAlert(title, body);
    }
    /*
     * Triggered for data only payload in foreground
     * */
    this.messageListener = firebase.messaging().onMessage(message => {
      //process data message
      console.log(JSON.stringify(message));
    });
  }

  showAlert(title, body) {
    Alert.alert(
      title,
      body,
      [{text: 'OK', onPress: () => console.log('OK Pressed')}],
      {cancelable: false},
    );
  }

  //1
  async checkPermission() {
    const enabled = await firebase.messaging().hasPermission();
    if (enabled) {
      this.getToken();
    } else {
      this.requestPermission();
    }
  }

  //3
  async getToken() {
    let fcmToken = await AsyncStorage.getItem('fcmToken');
    if (!fcmToken) {
      fcmToken = await firebase.messaging().getToken();
      if (fcmToken) {
        // user has a device token
        await AsyncStorage.setItem('fcmToken', fcmToken);
      }
    }
  }

  //2
  async requestPermission() {
    try {
      await firebase.messaging().requestPermission();
      // User has authorised
      this.getToken();
    } catch (error) {
      // User has rejected permissions
      console.log('permission rejected');
    }
  }

  render() {
    return (
      <View style={{flex: 1}}>
        <Text>Welcome to React Native!</Text>
      </View>
    );
  }
}
处理权限
在应用程序可以获得任何通知之前,在iOS中特别要求用户许可至关重要。如果用户不允许您的应用接收通知,则除非用户从“设置”中明确更改通知,否则它永远不会获得通知。
在componentDidMount中,我们检查用户是否已授予接收推送通知的权限。
如果尚未向我们的应用授予权限,请在requestPermission方法中请求用户。如果成功分配了权限,则继续进行令牌提取,否则优雅地忽略该事实。
如果先前获取了令牌,则可以从AsyncStorage中检索它。如果未找到令牌,请请求Firebase并将其保存在AsyncStorage中。
监听通知
我们现在准备好听取推送通知事件。在继续之前,您应该了解Firebase支持的不同类型的通知。
仅通知消息:这些是Firebase SDK自动处理的显示消息。通知被扔到设备托盘。
通知+可选数据消息:这些消息也由Firebase SDK处理。这里唯一的区别是当用户点击通知时,您的应用会收到与该通知相关联的有效负载。
仅数据消息:这些类型的通知仅由app处理。除非app明确指出,否则不会在设备托盘上抛出任何通知。在iOS中,这些类型的通知也称为“无声推送通知”。
Firebase 发送消息
在 Cloud Message 发送测试消息
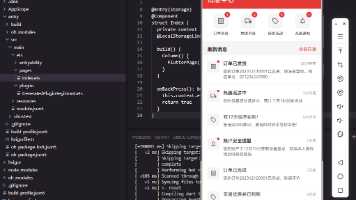
IOS 的体验很好:
- 退出 APP 依然可以收到消息通知
- 可以控制是否有提示音
- 可以设置 Badge
- 不需要翻墙
- 到达率100%
参考
React Native:使用FCM集成推送通知_lwqldsyzx的博客-CSDN博客
Google | 了解 Firebase 项目 | Firebase
React-Native坑1:Invariant Violation:Application 项目名 has not been registered.

开源鸿蒙跨平台开发社区汇聚开发者与厂商,共建“一次开发,多端部署”的开源生态,致力于降低跨端开发门槛,推动万物智联创新。
更多推荐


 0
0 0
0- 0


 已为社区贡献4条内容

所有评论(0)