Kotlin协程
考虑到文章的篇幅问题,我把这些问题和答案以及我多年面试所遇到的问题和一些面试资料做成了PDF文档《互联网大厂面试真题解析、进阶开发核心学习笔记、全套讲解视频、实战项目源码讲义》点击传送门即可获取!)]既有适合小白学习的零基础资料,也有适合3年以上经验的小伙伴深入学习提升的进阶课程,基本涵盖了95%以上Android开发知识点,真正体系化!由于文件比较大,这里只是将部分目录截图出来,每个节点里面都包
@JvmStatic
public actual val Unconfined: CoroutineDispatcher = kotlinx.coroutines.Unconfined
@JvmStatic
public actual val Main: MainCoroutineDispatcher get() = MainDispatcherLoader.dispatcher
}
Default,IO
Default,IO其实内部用的是一个线程池,下面逐个解析,看实现原理
default
- Default会根据useCoroutinesScheduler属性(默认为true)去获取对应的线程池
- DefaultScheduler(useCoroutinesScheduler=ture):kotlin自己实现的线程池逻辑
- CommonPool(useCoroutinesScheduler=false):java类库中的Executor实现线程池逻辑
internal actual fun createDefaultDispatcher(): CoroutineDispatcher =
if (useCoroutinesScheduler) DefaultScheduler else CommonPool
internal object DefaultScheduler : ExperimentalCoroutineDispatcher() {
…
}
//委托类
public open class ExperimentalCoroutineDispatcher(
private val corePoolSize: Int,
private val maxPoolSize: Int,
private val idleWorkerKeepAliveNs: Long,
private val schedulerName: String = “CoroutineScheduler”
) : ExecutorCoroutineDispatcher() {
}
//java类库中的Executor实现线程池逻辑
internal object CommonPool : ExecutorCoroutineDispatcher() {}
//共同父类,定义行为
public abstract class ExecutorCoroutineDispatcher: CoroutineDispatcher(), Closeable {}
ExperimentalCoroutineDispatcher
- DefaultScheduler的主要实现都在它的父类ExperimentalCoroutineDispatcher中
public open class ExperimentalCoroutineDispatcher(
private val corePoolSize: Int,
private val maxPoolSize: Int,
private val idleWorkerKeepAliveNs: Long,
private val schedulerName: String = “CoroutineScheduler”
) : ExecutorCoroutineDispatcher() {
public constructor(
corePoolSize: Int = CORE_POOL_SIZE,
maxPoolSize: Int = MAX_POOL_SIZE,
schedulerName: String = DEFAULT_SCHEDULER_NAME
) : this(corePoolSize, maxPoolSize, IDLE_WORKER_KEEP_ALIVE_NS, schedulerName)
…//省略构造
//创建CoroutineScheduler实例
private fun createScheduler() = CoroutineScheduler(corePoolSize, maxPoolSize, idleWorkerKeepAliveNs, schedulerName)
override val executor: Executorget() = coroutineScheduler
override fun dispatch(context: CoroutineContext, block: Runnable): Unit =
try {
//dispatch方法委托到CoroutineScheduler的dispatch方法
coroutineScheduler.dispatch(block)
} catch (e: RejectedExecutionException) {
…
}
override fun dispatchYield(context: CoroutineContext, block: Runnable): Unit =
try {
//dispatchYield方法委托到CoroutineScheduler的dispatchYield方法
coroutineScheduler.dispatch(block, tailDispatch = true)
} catch (e: RejectedExecutionException) {
…
}
internal fun dispatchWithContext(block: Runnable, context: TaskContext, tailDispatch: Boolean) {
try {
//dispatchWithContext方法委托到CoroutineScheduler的dispatchWithContext方法
coroutineScheduler.dispatch(block, context, tailDispatch)
} catch (e: RejectedExecutionException) {
…
}
}
override fun close(): Unit = coroutineScheduler.close()
//实现请求阻塞
public fun blocking(parallelism: Int = BLOCKING_DEFAULT_PARALLELISM): CoroutineDispatcher {
require(parallelism > 0) { “Expected positive parallelism level, but have $parallelism” }
return LimitingDispatcher(this, parallelism, null, TASK_PROBABLY_BLOCKING)
}
//实现请求数量限制
public fun limited(parallelism: Int): CoroutineDispatcher {
require(parallelism > 0) { “Expected positive parallelism level, but have KaTeX parse error: Expected 'EOF', got '}' at position 14: parallelism" }̲ require(parall…corePoolSize), but have $parallelism” }
return LimitingDispatcher(this, parallelism, null, TASK_NON_BLOCKING)
}
…//省略一些供测试的方法,更好的跟踪同步状态
}
IO
- IO的实现其实是LimitingDispatcher
val IO: CoroutineDispatcher = LimitingDispatcher(
this,
systemProp(IO_PARALLELISM_PROPERTY_NAME, 64.coerceAtLeast(AVAILABLE_PROCESSORS)),
“Dispatchers.IO”,
TASK_PROBABLY_BLOCKING
)
LimitingDispatcher
- IO的实现类会有一些最大请求限制,以及队列处理
private class LimitingDispatcher(
private val dispatcher: ExperimentalCoroutineDispatcher,
private val parallelism: Int,
private val name: String?,
override val taskMode: Int
) : ExecutorCoroutineDispatcher(), TaskContext, Executor {
//同步阻塞队列
private val queue = ConcurrentLinkedQueue()
//cas计数
private val inFlightTasks = atomic(0)
override fun dispatch(context: CoroutineContext, block: Runnable) = dispatch(block, false)
private fun dispatch(block: Runnable, tailDispatch: Boolean) {
var taskToSchedule = block
while (true) {
if (inFlight <= parallelism) {
//LimitingDispatcher的dispatch方法委托给了DefaultScheduler的dispatchWithContext方法
dispatcher.dispatchWithContext(taskToSchedule, this, tailDispatch)
return
}
…//省略了一些队列处理逻辑
}
}
}
CoroutineScheduler
- Default、IO其实都是共享CoroutineScheduler线程池,Kotlin实现了一套线程池两种调度策略
- 通过内部的mode区分
fun dispatch(block: Runnable, taskContext: TaskContext = NonBlockingContext, tailDispatch: Boolean = false) {
…
if (task.mode == TASK_NON_BLOCKING) {
if (skipUnpark) return
signalCpuWork()
} else {
signalBlockingWork(skipUnpark = skipUnpark)
}
}
Mode
| Type | Mode |
|---|---|
| Default | TASK_NON_BLOCKING |
| IO | TASK_PROBABLY_BLOCKING |
处理策略
| Type | Mode |
|---|---|
| Default | CoroutineScheduler最多有corePoolSize个线程被创建,corePoolSize它的取值为max(2, CPU核心数), |
| 即它会尽量的等于CPU核心数 | |
| IO | 创建比corePoolSize更多的线程来运行IO型任务,但不能大于maxPoolSize |
| 1.公式:max(corePoolSize, min(CPU核心数 * 128, 2^21 - 2)),即大于corePoolSize,小于2^21 - 2 | |
| 2.2^21 - 2是一个很大的数约为2M,但是CoroutineScheduler是不可能创建这么多线程的,所以就需要外部限制提交的任务数 | |
| 3.Dispatchers.IO构造时就通过LimitingDispatcher默认限制了最大线程并发数parallelism为max(64, CPU核心数),即最多只能提交parallelism个任务到CoroutineScheduler中执行,剩余的任务被放进队列中等待。 |
适合场景
| Type | Mode |
|---|---|
| Default | 1.CPU密集型任务的特点是执行任务时CPU会处于忙碌状态,任务会消耗大量的CPU资源 |
| 2.复杂计算、视频解码等,如果此时线程数太多,超过了CPU核心数,那么这些超出来的线程是得不到CPU的执行的,只会浪费内存资源 | |
| 3.因为线程本身也有栈等空间,同时线程过多,频繁的线程切换带来的消耗也会影响线程池的性能 | |
| 4.对于CPU密集型任务,线程池并发线程数等于CPU核心数才能让CPU的执行效率最大化 | |
| IO | 1.IO密集型任务的特点是执行任务时CPU会处于闲置状态,任务不会消耗大量的CPU资源 |
| 2.网络请求、IO操作等,线程执行IO密集型任务时大多数处于阻塞状态,处于阻塞状态的线程是不占用CPU的执行时间 | |
| 3.此时CPU就处于闲置状态,为了让CPU忙起来,执行IO密集型任务时理应让线程的创建数量更多一点,理想情况下线程数应该等于提交的任务数,对于这些多创建出来的线程,当它们闲置时,线程池一般会有一个超时回收策略,所以大部分情况下并不会占用大量的内存资源 | |
| 4.但也会有极端情况,所以对于IO密集型任务,线程池并发线程数应尽可能地多才能提高CPU的吞吐量,这个尽可能地多的程度并不是无限大,而是根据业务情况设定,但肯定要大于CPU核心数。 |
Unconfined
- 任务执行在默认的启动线程。之后由调用
resume的线程决定恢复协程的线程。
internal object Unconfined : CoroutineDispatcher() {
//为false为不需要dispatch
override fun isDispatchNeeded(context: CoroutineContext): Boolean = false
override fun dispatch(context: CoroutineContext, block: Runnable) {
// 只有当调用yield方法时,Unconfined的dispatch方法才会被调用
// yield() 表示当前协程让出自己所在的线程给其他协程运行
val yieldContext = context[YieldContext]
if (yieldContext != null) {
yieldContext.dispatcherWasUnconfined = true
return
}
throw UnsupportedOperationException("Dispatchers.Unconfined.dispatch function can only be used by the yield function. " +
"If you wrap Unconfined dispatcher in your code, make sure you properly delegate " +
“isDispatchNeeded and dispatch calls.”)
}
}
- 每一个协程都有对应的Continuation实例,其中的resumeWith用于协程的恢复,存在于DispatchedContinuation
DispatchedContinuation
- 我们重点看resumeWith的实现以及类委托
internal class DispatchedContinuation(
@JvmField val dispatcher: CoroutineDispatcher,
@JvmField val continuation: Continuation
) : DispatchedTask(MODE_UNINITIALIZED), CoroutineStackFrame, Continuation by continuation {
…
override fun resumeWith(result: Result) {
val context = continuation.context
val state = result.toState()
if (dispatcher.isDispatchNeeded(context)) {
_state = state
resumeMode = MODE_ATOMIC
dispatcher.dispatch(context, this)
} else {
executeUnconfined(state, MODE_ATOMIC) {
withCoroutineContext(this.context, countOrElement) {
continuation.resumeWith(result)
}
}
}
}
…
}
解析如下:
-
DispatchedContinuation通过类委托实现了在resumeWith()方法之前的代码逻辑添加
-
通过isDispatchNeeded(是否需要dispatch,Unconfined=false,default,IO=true)判断做不同处理
-
true:调用协程的CoroutineDispatcher的dispatch方法(上文有解析)
-
false:调用executeUnconfined方法
private inline fun DispatchedContinuation<*>.executeUnconfined(
contState: Any?, mode: Int, doYield: Boolean = false,
block: () -> Unit
): Boolean {
assert { mode != MODE_UNINITIALIZED }
val eventLoop = ThreadLocalEventLoop.eventLoop
if (doYield && eventLoop.isUnconfinedQueueEmpty) return false
return if (eventLoop.isUnconfinedLoopActive) {
_state = contState
resumeMode = mode
eventLoop.dispatchUnconfined(this)
true
} else {
runUnconfinedEventLoop(eventLoop, block = block)
false
}
}
- 从threadlocal中取出eventLoop(eventLoop和当前线程相关的),判断是否在执行Unconfined任务
- 如果在执行则调用EventLoop的dispatchUnconfined方法把Unconfined任务放进EventLoop中
- 如果没有在执行则直接执行
internal inline fun DispatchedTask<*>.runUnconfinedEventLoop(
eventLoop: EventLoop,
block: () -> Unit
) {
eventLoop.incrementUseCount(unconfined = true)
try {
block()
while (true) {
if (!eventLoop.processUnconfinedEvent()) break
}
} catch (e: Throwable) {
handleFatalException(e, null)
} finally {
eventLoop.decrementUseCount(unconfined = true)
}
}
- 执行block()代码块,即上文提到的resumeWith()
- 调用processUnconfinedEvent()方法实现执行剩余的Unconfined任务,知道全部执行完毕跳出循环
EventLoop
- EventLoop是存放与threadlocal,所以是跟当前线程相关联的,而EventLoop也是CoroutineDispatcher的一个子类
internal abstract class EventLoop : CoroutineDispatcher() {
…
//双端队列实现存放Unconfined任务
private var unconfinedQueue: ArrayQueue<DispatchedTask<>>? = null
//从队列的头部移出Unconfined任务执行
public fun processUnconfinedEvent(): Boolean {
val queue = unconfinedQueue ?: return false
val task = queue.removeFirstOrNull() ?: return false
task.run()
return true
}
//把Unconfined任务放进队列的尾部
public fun dispatchUnconfined(task: DispatchedTask<>) {
val queue = unconfinedQueue ?:
ArrayQueue<DispatchedTask<*>>().also { unconfinedQueue = it }
queue.addLast(task)
}
…
}
解析如下:
- 内部通过双端队列实现存放Unconfined任务
- EventLoop的dispatchUnconfined方法用于把Unconfined任务放进队列的尾部
- rocessUnconfinedEvent方法用于从队列的头部移出Unconfined任务执行
Main
- 是把协程运行在平台相关的只能操作UI对象的Main线程,但是根据不同平台有不同的实现
| 平台 | 实现 |
|---|---|
| kotlin/js | kotlin对JavaScript的支持,提供了转换kotlin代码,kotlin标准库的能力,npm包管理能力 |
| 在kotlin/js上Dispatchers.Main等效于Dispatchers.Default | |
| kotlin/native | 将kotlin代码编译为无需虚拟机就可运行的原生二进制文件的技术, 它的主要目的是允许对不需要或不可能使用虚拟机的平台进行编译,例如嵌入式设备或iOS |
| 在kotlin/native上Dispatchers.Main等效于Dispatchers.Default | |
| kotlin/JVM | 需要虚拟机才能编译的平台,例如Android就是属于kotlin/JVM,对于kotlin/JVM我们需要引入对应的dispatcher,例如Android就需要引入kotlinx-coroutines-android库,它里面有Android对应的Dispatchers.Main实现,其实就是把任务通过Handler运行在Android的主线程 |
3.3、CoroutineName Element
- 协程名称,可以自定义,方便调试分析
public data class CoroutineName(
val name: String
) : AbstractCoroutineContextElement(CoroutineName) {
public companion object Key : CoroutineContext.Key
override fun toString(): String = “CoroutineName($name)”
}
3.4、CoroutineExceptionHandler Element
- 协程异常处理器,默认创建的协程都会有一个异常处理器,也可以手动指定。
var coroutineContext = Job() +
Dispatchers.Main +
//手动添加指定异常处理器
CoroutineExceptionHandler { coroutineContext, throwable ->
Log.e(
“CoroutineException”,
“CoroutineExceptionHandler: $throwable”
)
} +
CoroutineName(“asyncConcurrent”)
- 但是只对launch方法启动的根协程有效,而对async启动的根协程无效
async启动的根协程默认会捕获所有未捕获异常并把它放在Deferred中,等到用户调用Deferred的await方法才抛出,也就是需要手动加try-catch
CASE
协程的使用场景变化自如,异常处理的情况也就比较多
- 非SupervisorJob情况下,字协程抛出的异常会委托给父协程的CoroutineExceptionHandler处理,子协程的CoroutineExceptionHandler并不会执行
- SupervisorJob情况下,不会产生异常传播,即自己的CoroutineExceptionHandler可以接收到异常
- 子协程同时抛出多个异常时,CoroutineExceptionHandler只会捕捉第一个异常,后续的异常存于第一个异常的suppressed数组之中
- 取消协程时会抛出CancellationException,但是所有的CoroutineExceptionHandler不会接收到,只能通过try-catch实现捕获
3.5、CoroutineContext结构
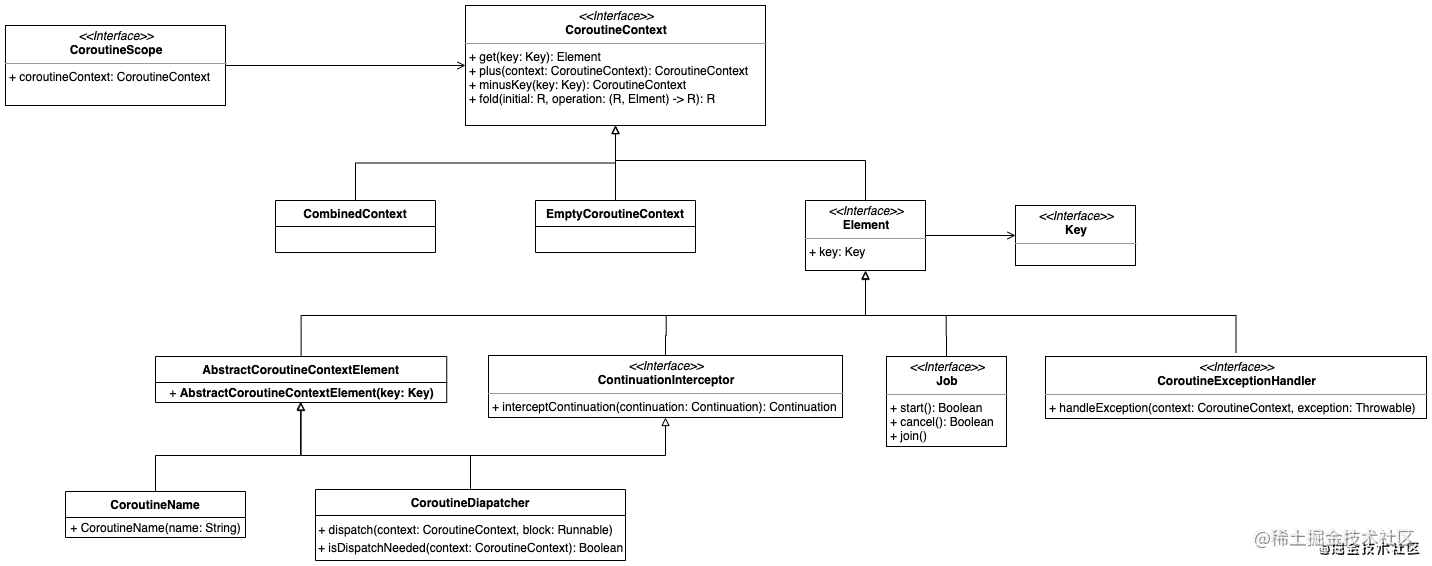
- CoroutineContext是一个特殊的集合,同时包含了Map和Set的特点
- 集合内部的元素Element是根据key去对应(Map特点),但是不允许重复(Set特点)
- Element之间可以通过+号进行组合
- 每一个Element都继承与CoroutineContext
public interface CoroutineContext {
//操作符[]重载,可以通过CoroutineContext[Key]来获取与Key关联的Element
public operator fun get(key: Key): E?
//它是一个聚集函数,提供了从left到right遍历CoroutineContext中每一个Element的能力,并对每一个Element做operation操作
public fun fold(initial: R, operation: (R, Element) -> R): R
//操作符+重载,可以CoroutineContext + CoroutineContext这种形式把两个CoroutineContext合并成一个
public operator fun plus(context: CoroutineContext): CoroutineContext =
if (context === EmptyCoroutineContext) this else
context.fold(this) { acc, element ->
val removed = acc.minusKey(element.key)
if (removed === EmptyCoroutineContext) element else {
val interceptor = removed[ContinuationInterceptor]
if (interceptor == null) CombinedContext(removed, element) else {
val left = removed.minusKey(ContinuationInterceptor)
if (left === EmptyCoroutineContext) CombinedContext(element, interceptor) else
CombinedContext(CombinedContext(left, element), interceptor)
}
}
}
//返回一个新的CoroutineContext,这个CoroutineContext删除了Key对应的Element
public fun minusKey(key: Key<*>): CoroutineContext
//Key定义,空实现
public interface Key
//Element定义,每个Element都是一个CoroutineContext
public interface Element : CoroutineContext {
…
}
}
这里使用了Kotlin的operator操作符重载实现了各种策略
- 除了plus方法,CoroutineContext中的其他三个方法都被CombinedContext、Element、EmptyCoroutineContext重写
- CombinedContext:CoroutineContext集合结构的实现,它里面是一个递归定义
- Element:CombinedContext中的元素
- EmptyCoroutineContext:一个空的CoroutineContext,它里面是空实现
CombinedContext
internal class CombinedContext(
private val left: CoroutineContext,
private val element: Element
) : CoroutineContext, Serializable {
…
}
- CombinedContext包含left和element元素
- left可能是element或者是CombinedContext
- element就是element
get方法
- 可以通过CoroutineContext[Key]来获取与Key关联的Element
override fun get(key: Key): E? {
var cur = this
while (true) {
//element是否匹配,如果是则直接返回,即匹配成功
cur.element[key]?.let { return it }
//没有匹配成功则从left开始寻找
val next = cur.left
//如果left是CombinedContext,则改变next,重复上述步骤
if (next is CombinedContext) {
cur = next
} else {
//匹配成功则返回
return next[key]
}
}
}
fold方法
- 提供了从left到right遍历CoroutineContext中每一个Element的能力,并对每一个Element做operation操作
//operation是一个函数指针,可以执行函数引用
public override fun fold(initial: R, operation: (R, Element) -> R): R =
//对left做fold操作,把left做完fold操作的的返回结果和element做operation操作
operation(left.fold(initial, operation), element)
minusKey方法
- 返回一个新的CoroutineContext,这个CoroutineContext删除了Key对应的Element
public override fun minusKey(key: Key<*>): CoroutineContext {
//element是否匹配,如果是则直接返回供删除,即匹配成功
element[key]?.let { return left }
//没有匹配成功则从left开始寻找
val newLeft = left.minusKey(key)
return when {
//如果left中不存在目标element,则当前CombinedContext肯定不包含目标元素,直接返回当前
newLeft === left -> this
//如果left之中存在目标element,删除目标element后,left等于空,返回当前CombinedContext的element
newLeft === EmptyCoroutineContext -> element
//如果left之中存在目标element,删除目标element后,left不等于空,创建新的CombinedContext并返回
else -> CombinedContext(newLeft, element)
}
}
结构图
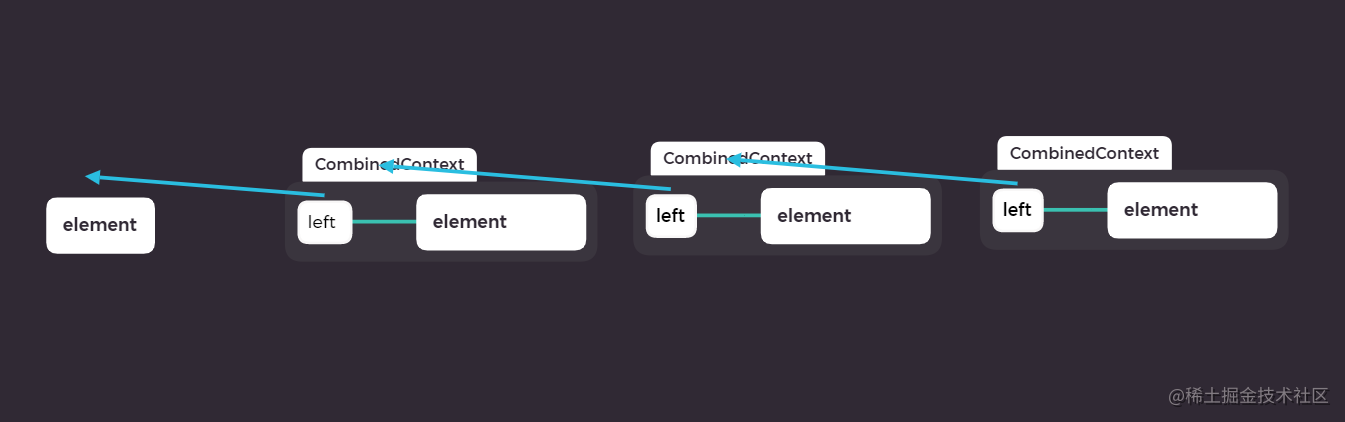
- 整体像链表,left就是指向下一个结点的指针,
- get、minusKey操作逻辑流程都是先访问当前element,不满足,再访问left的element,顺序都是从right到left
- fold的操作逻辑流程是先访问left,直到递归到最后的element,然后再从left到right的返回,从而访问了所有的element。
plus方法
此方法是CoroutineContext的实现,内部分为元素合并和拦截器处理
自我介绍一下,小编13年上海交大毕业,曾经在小公司待过,也去过华为、OPPO等大厂,18年进入阿里一直到现在。
深知大多数初中级Android工程师,想要提升技能,往往是自己摸索成长或者是报班学习,但对于培训机构动则近万的学费,着实压力不小。自己不成体系的自学效果低效又漫长,而且极易碰到天花板技术停滞不前!
因此收集整理了一份《2024年Android移动开发全套学习资料》,初衷也很简单,就是希望能够帮助到想自学提升又不知道该从何学起的朋友,同时减轻大家的负担。
既有适合小白学习的零基础资料,也有适合3年以上经验的小伙伴深入学习提升的进阶课程,基本涵盖了95%以上Android开发知识点,真正体系化!
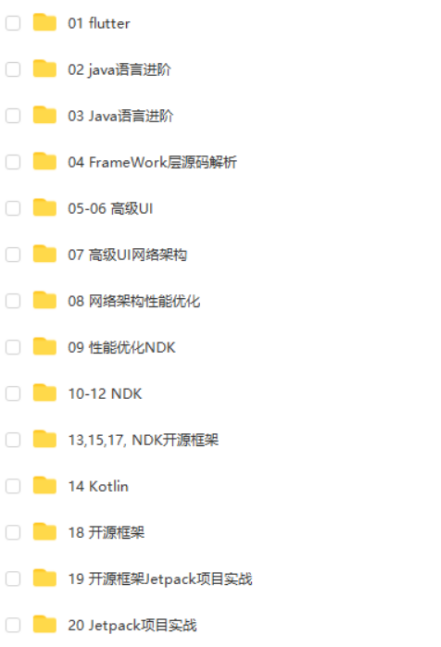
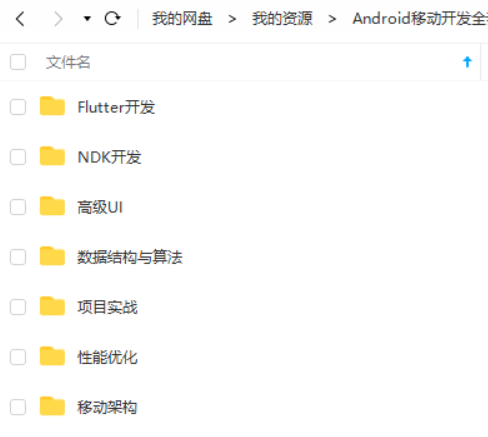
由于文件比较大,这里只是将部分目录截图出来,每个节点里面都包含大厂面经、学习笔记、源码讲义、实战项目、讲解视频,并且会持续更新!
如果你觉得这些内容对你有帮助,可以扫码获取!!(备注:Android)

最后
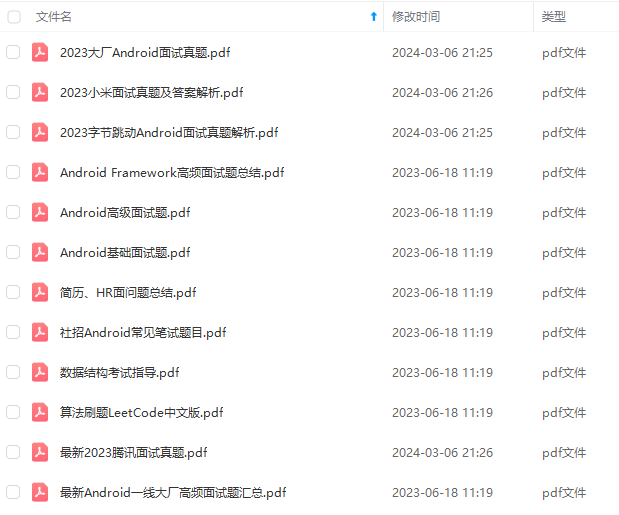
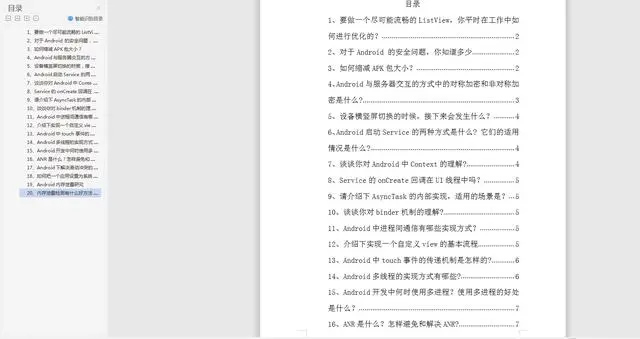
考虑到文章的篇幅问题,我把这些问题和答案以及我多年面试所遇到的问题和一些面试资料做成了PDF文档
喜欢的朋友可以关注、转发、点赞 感谢!
《互联网大厂面试真题解析、进阶开发核心学习笔记、全套讲解视频、实战项目源码讲义》点击传送门即可获取!
)]
既有适合小白学习的零基础资料,也有适合3年以上经验的小伙伴深入学习提升的进阶课程,基本涵盖了95%以上Android开发知识点,真正体系化!
由于文件比较大,这里只是将部分目录截图出来,每个节点里面都包含大厂面经、学习笔记、源码讲义、实战项目、讲解视频,并且会持续更新!
如果你觉得这些内容对你有帮助,可以扫码获取!!(备注:Android)
最后
考虑到文章的篇幅问题,我把这些问题和答案以及我多年面试所遇到的问题和一些面试资料做成了PDF文档
[外链图片转存中…(img-xhorXCEI-1712661802370)]
[外链图片转存中…(img-bQMgaRVp-1712661802371)]
喜欢的朋友可以关注、转发、点赞 感谢!
《互联网大厂面试真题解析、进阶开发核心学习笔记、全套讲解视频、实战项目源码讲义》点击传送门即可获取!

开源鸿蒙跨平台开发社区汇聚开发者与厂商,共建“一次开发,多端部署”的开源生态,致力于降低跨端开发门槛,推动万物智联创新。
更多推荐
 10
10 0
0- 0


 已为社区贡献13条内容

所有评论(0)