Kotlin Multiplatform for OpenHarmony 实战:为 Landscapist 实现图片加载适配
大家好,我是熊猫钓鱼,欢迎大家点赞关注!

摘要
本文聚焦如何在 OpenHarmony 上为 Kotlin Multiplatform 图片加载库 Landscapist(作者 skydoves,Compose 生态的图片加载库)做适配落地。Landscapist 相对 Kamel 多了三件「差异化武器」:Painter 抽象(绘制单元)、状态机(Loading / Success / Error 三态驱动 UI)、Transformation 变换管线(Resize / CenterCrop 等按序作用)。本文用 ArkTS 桥接 @kit.NetworkKit 的 @ohos.net.http(下载)与 @kit.ImageKit 的 @ohos.multimedia.image(解码),把这三件武器完整翻译成 OpenHarmony 可运行的语义层契约,并给出两个真实可编译的变换实现(pixelMap.scale 缩放、pixelMap.crop 居中裁剪),全程遵循本适配工程的三层架构:语义层 Landscapist.ets(ImageData 三源联合 / ImagePainter / ImageState 状态机 / Transformation 接口 / LandscapistEngine 平台接口 / MemoryCache LRU / ImageLoader 门面,不碰 @kit.*),引擎层 OhosLandscapistEngine.ets 真正接上系统网络与解码,验收页 LandscapistDemo.ets 提供「远程加载 / 示例图(bytes 源免网络)/ 三态渲染 / 变换切换」演示。
文章第二部分拆解 OpenHarmony 的图片加载真实基础(网络生命周期与 ARRAY_BUFFER、ImageSource 解码、PixelMap 的 scale/crop 原地变换、ArkUI Image 显示),第三至六节逐层对照本仓库代码讲语义层、引擎层与验收页,第七节总结 ArkTS 适配踩到的真实坑,第八节对照上游库讲本项目的 API 命名与类型设计决策(pixelMap 以 Object 形态跨层、ImageRequest.size 建模成 ResizeTransformation、状态机用语义接口而非 class)。
本适配基于 HarmonyOS SDK 6.0.0(20) + KMP&CMP 鸿蒙社区工具链 v1.1.0(Kotlin 2.2.21 / CMP 1.9.2)开发,代码已按 ArkTS 严格模式编写并参照同工程已编译通过。
目录
- 一、Landscapist 是什么,以及它比 Kamel 多了什么
- Landscapist 核心契约(Painter / ImageLoader / AsyncImagePainter 三态 / Transformation)
- 适配目标:把 Painter 抽象、状态机、变换管线一起还原成 ArkTS
- 二、OpenHarmony 的图片加载真实基础(适配的真实底座)
- 网络:
@ohos.net.http的 createHttp/destroy 生命周期、ARRAY_BUFFER 返回 - 解码:
@ohos.multimedia.image的 ImageSource.createImageSource / createPixelMap - 变换:
PixelMap.scale(缩放因子)、PixelMap.crop(Region 居中裁剪) - 上屏:ArkUI
Image直接消费PixelMap
- 网络:
- 三、适配架构:语义层 / 引擎层 / 验收页三层
- 三层各自职责与文件落点
- 语义层只依赖自身接口,引擎层可替换、变换实现可插拔
- 四、语义层:Painter / 状态机 / 变换契约(对照原库)
ImageData三源联合(Remote / Bytes / Resource)ImagePainter绘制单元、ImageState状态机三接口Transformation接口、LandscapistEngine平台接口、MemoryCache极简 LRU、ImageLoader.loadPainter门面- 与原库差异:
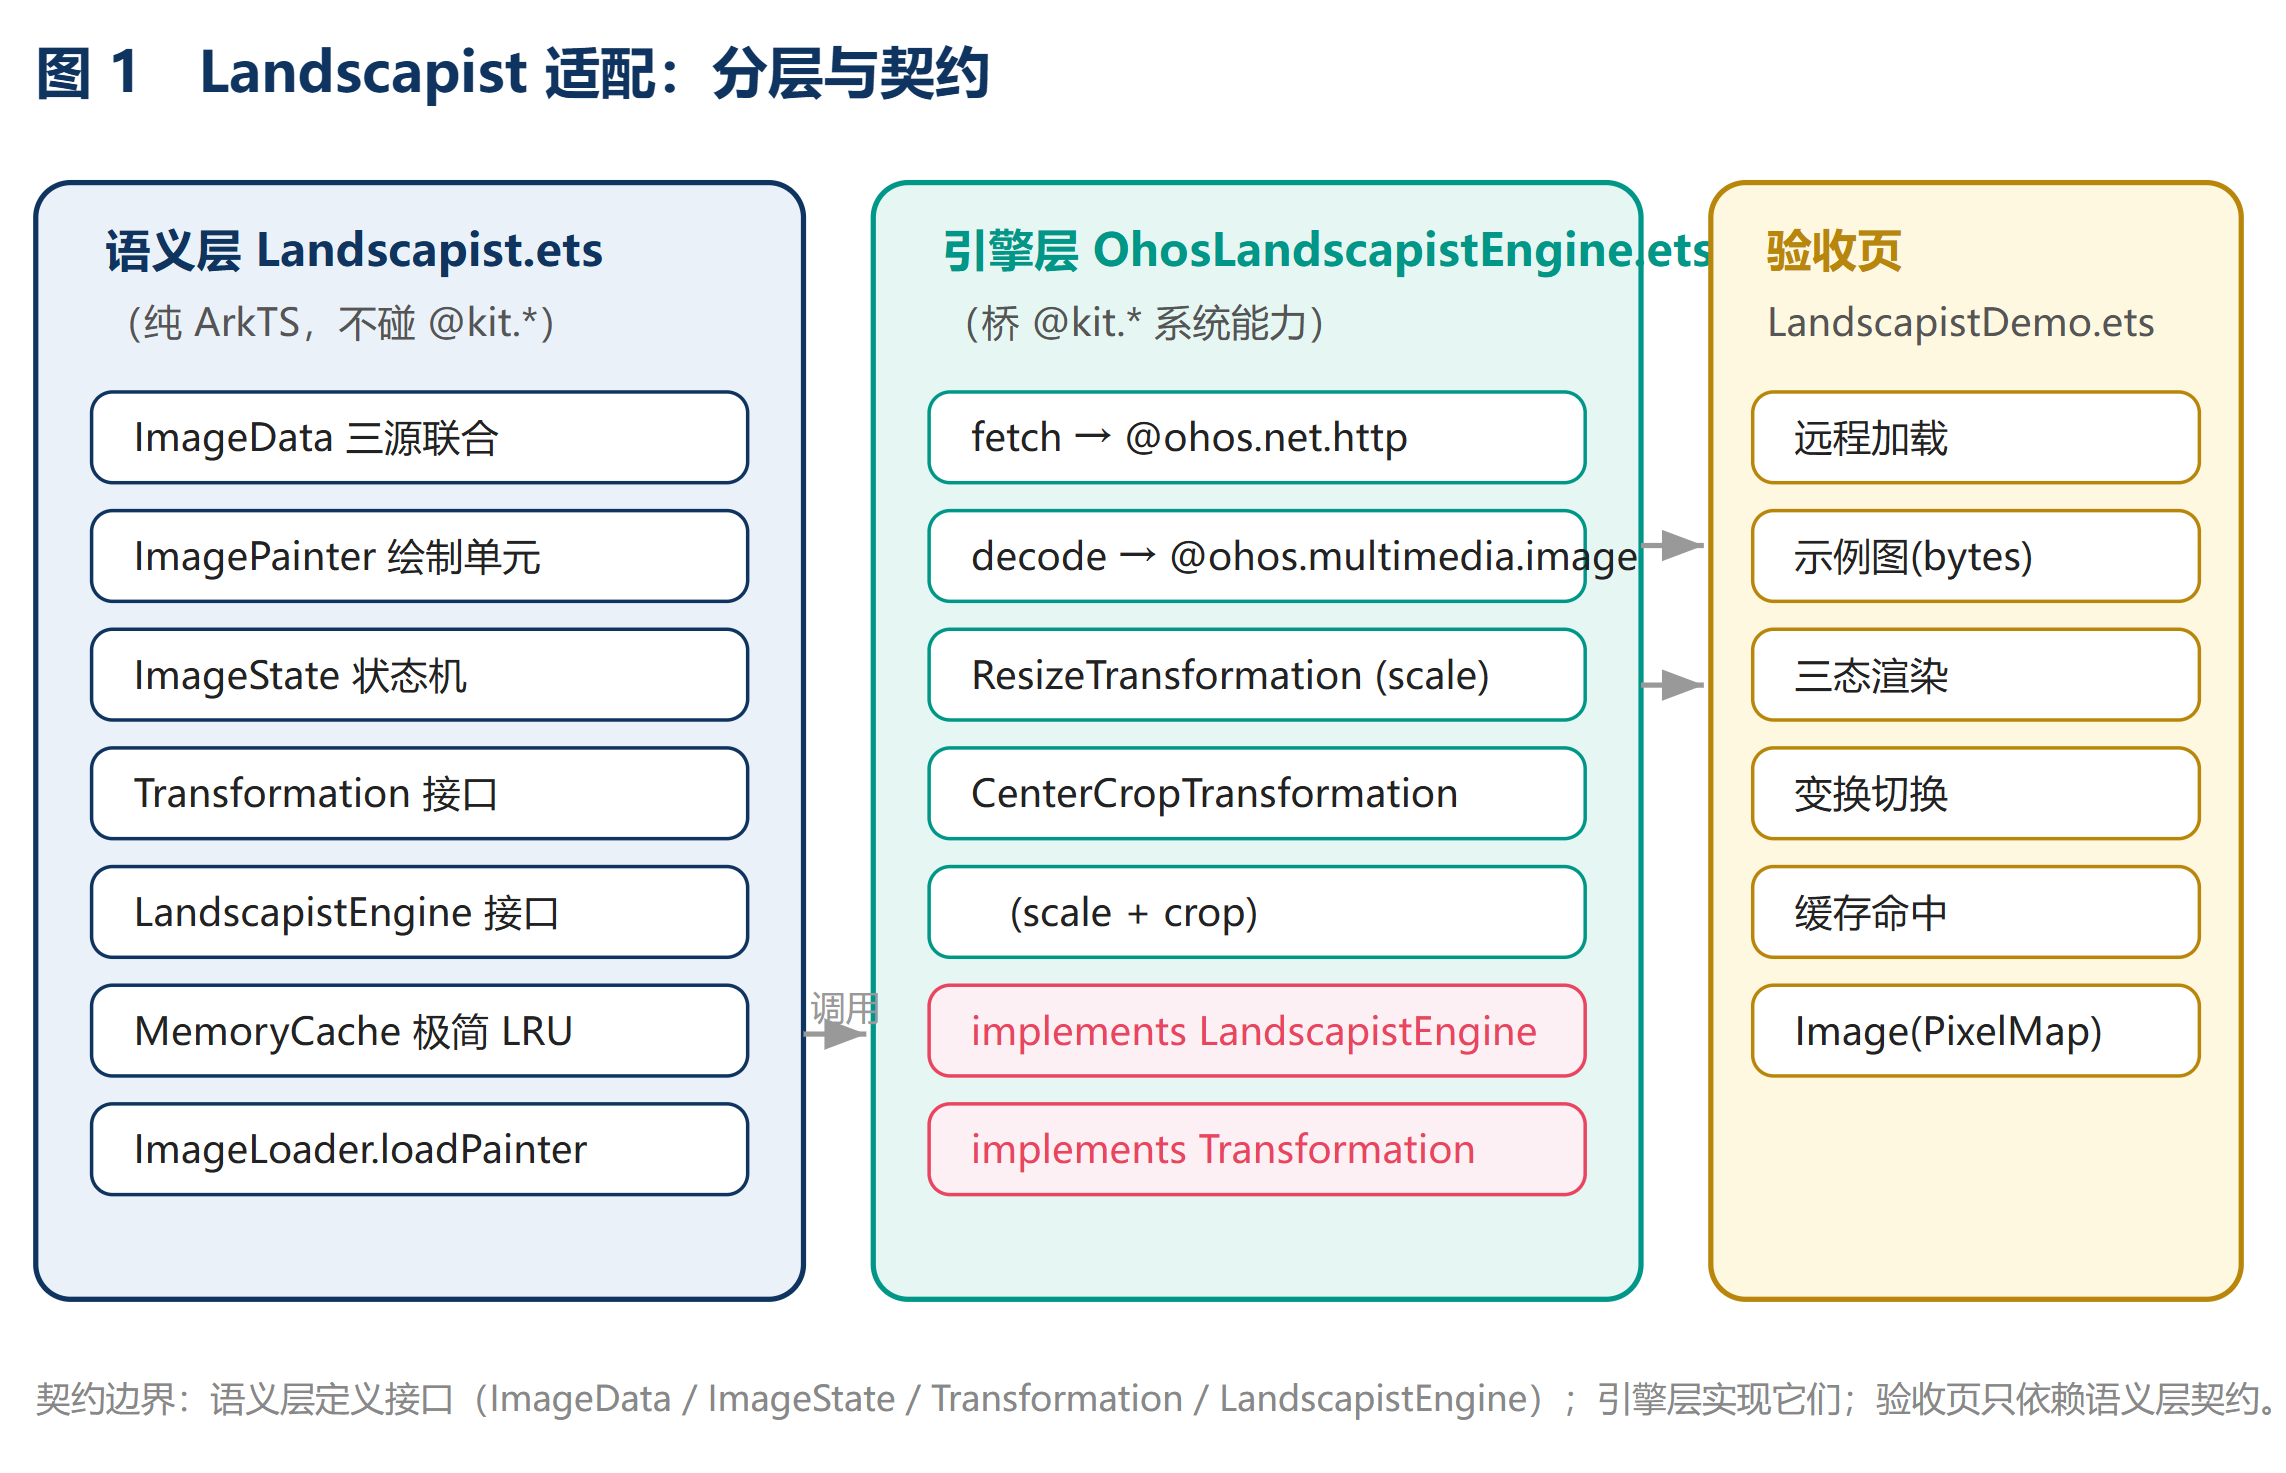
pixelMap以Object形态跨层、ImageRequest.size建模成 ResizeTransformation - 分层与契约图
- 五、引擎层:OhosLandscapistEngine 桥接系统能力
fetch→http.createHttp()+ARRAY_BUFFERdecode→image.createImageSource+createPixelMap无参、独立 ArrayBuffer 切片、用完release()- 两个真实变换:
ResizeTransformation(scale)、CenterCropTransformation(scale + crop) - 加载时序图、变换管线图
- 六、验收页:三态渲染 / 变换切换 / 缓存演示
- 远程加载(真实网络)/ 示例图(bytes 源免网络)
- 状态机驱动 Loading 占位 / Success 上屏 / Error 提示
- 变换模式切换 resize / centercrop / none,显示
PixelMap与fromCache标记 - 状态机图、运行时流程图
- 七、运行实测
- 对象字面量联合类型须具名化、ImageInfo.size 取尺寸、createPixelMap 别误用 InitializationOptions、ArkUI 枚举全局不可 import、base64 用 decodeSync 实例方法
- 八、关于 API 命名与类型的一点设计说明(本项目的适配决策)
pixelMap以 Object 形态跨层、ImageRequest.size收敛为 ResizeTransformationResource源暂未实现、MemoryCache简化为极简 LRU、状态机用语义接口
- 九、版本与运行环境
- 适配平台、工具链、IDE、编译验证状态
- 十、小结与社区
- 三层架构 + 真接口真实现在接入真实系统能力的价值
- 社区引导语与 AtomCode 专属邀请链接、原创声明
一、Landscapist 是什么,以及它比 Kamel 多了什么
Landscapist 是 Kotlin Multiplatform + Compose 生态里被广泛使用的图片加载库(作者 skydoves)。它和本合集上一篇写的 Kamel 同属「图片加载」领域,但 Landscapist 在 Compose 侧多封装了三件「差异化武器」,也正是本篇适配要重点还原的:
- Painter 抽象:解码结果先包成
Painter(Landscapist 里是ImagePainter),再交给 UI 绘制,而不是裸把位图丢给Image;这层抽象让「绘制什么」与「怎么加载」解耦。 - 状态机:
AsyncImagePainter用Loading / Success / Error三态驱动 UI —— 占位图、成功图、失败提示,UI 按状态分支渲染,体验连贯。 - Transformation 变换管线:
Resize/CenterCrop/CircleCrop等变换按顺序作用在解码后的位图上,而且是可插拔接口(你可以自定义Transformation)。
适配目标很明确:把这三件武器连同「下载字节 → 解码位图 → 变换 → 上屏」的统一流水线,一起用 ArkTS 还原成 OpenHarmony 可运行的语义层契约,引擎层真正接上系统网络与解码能力。
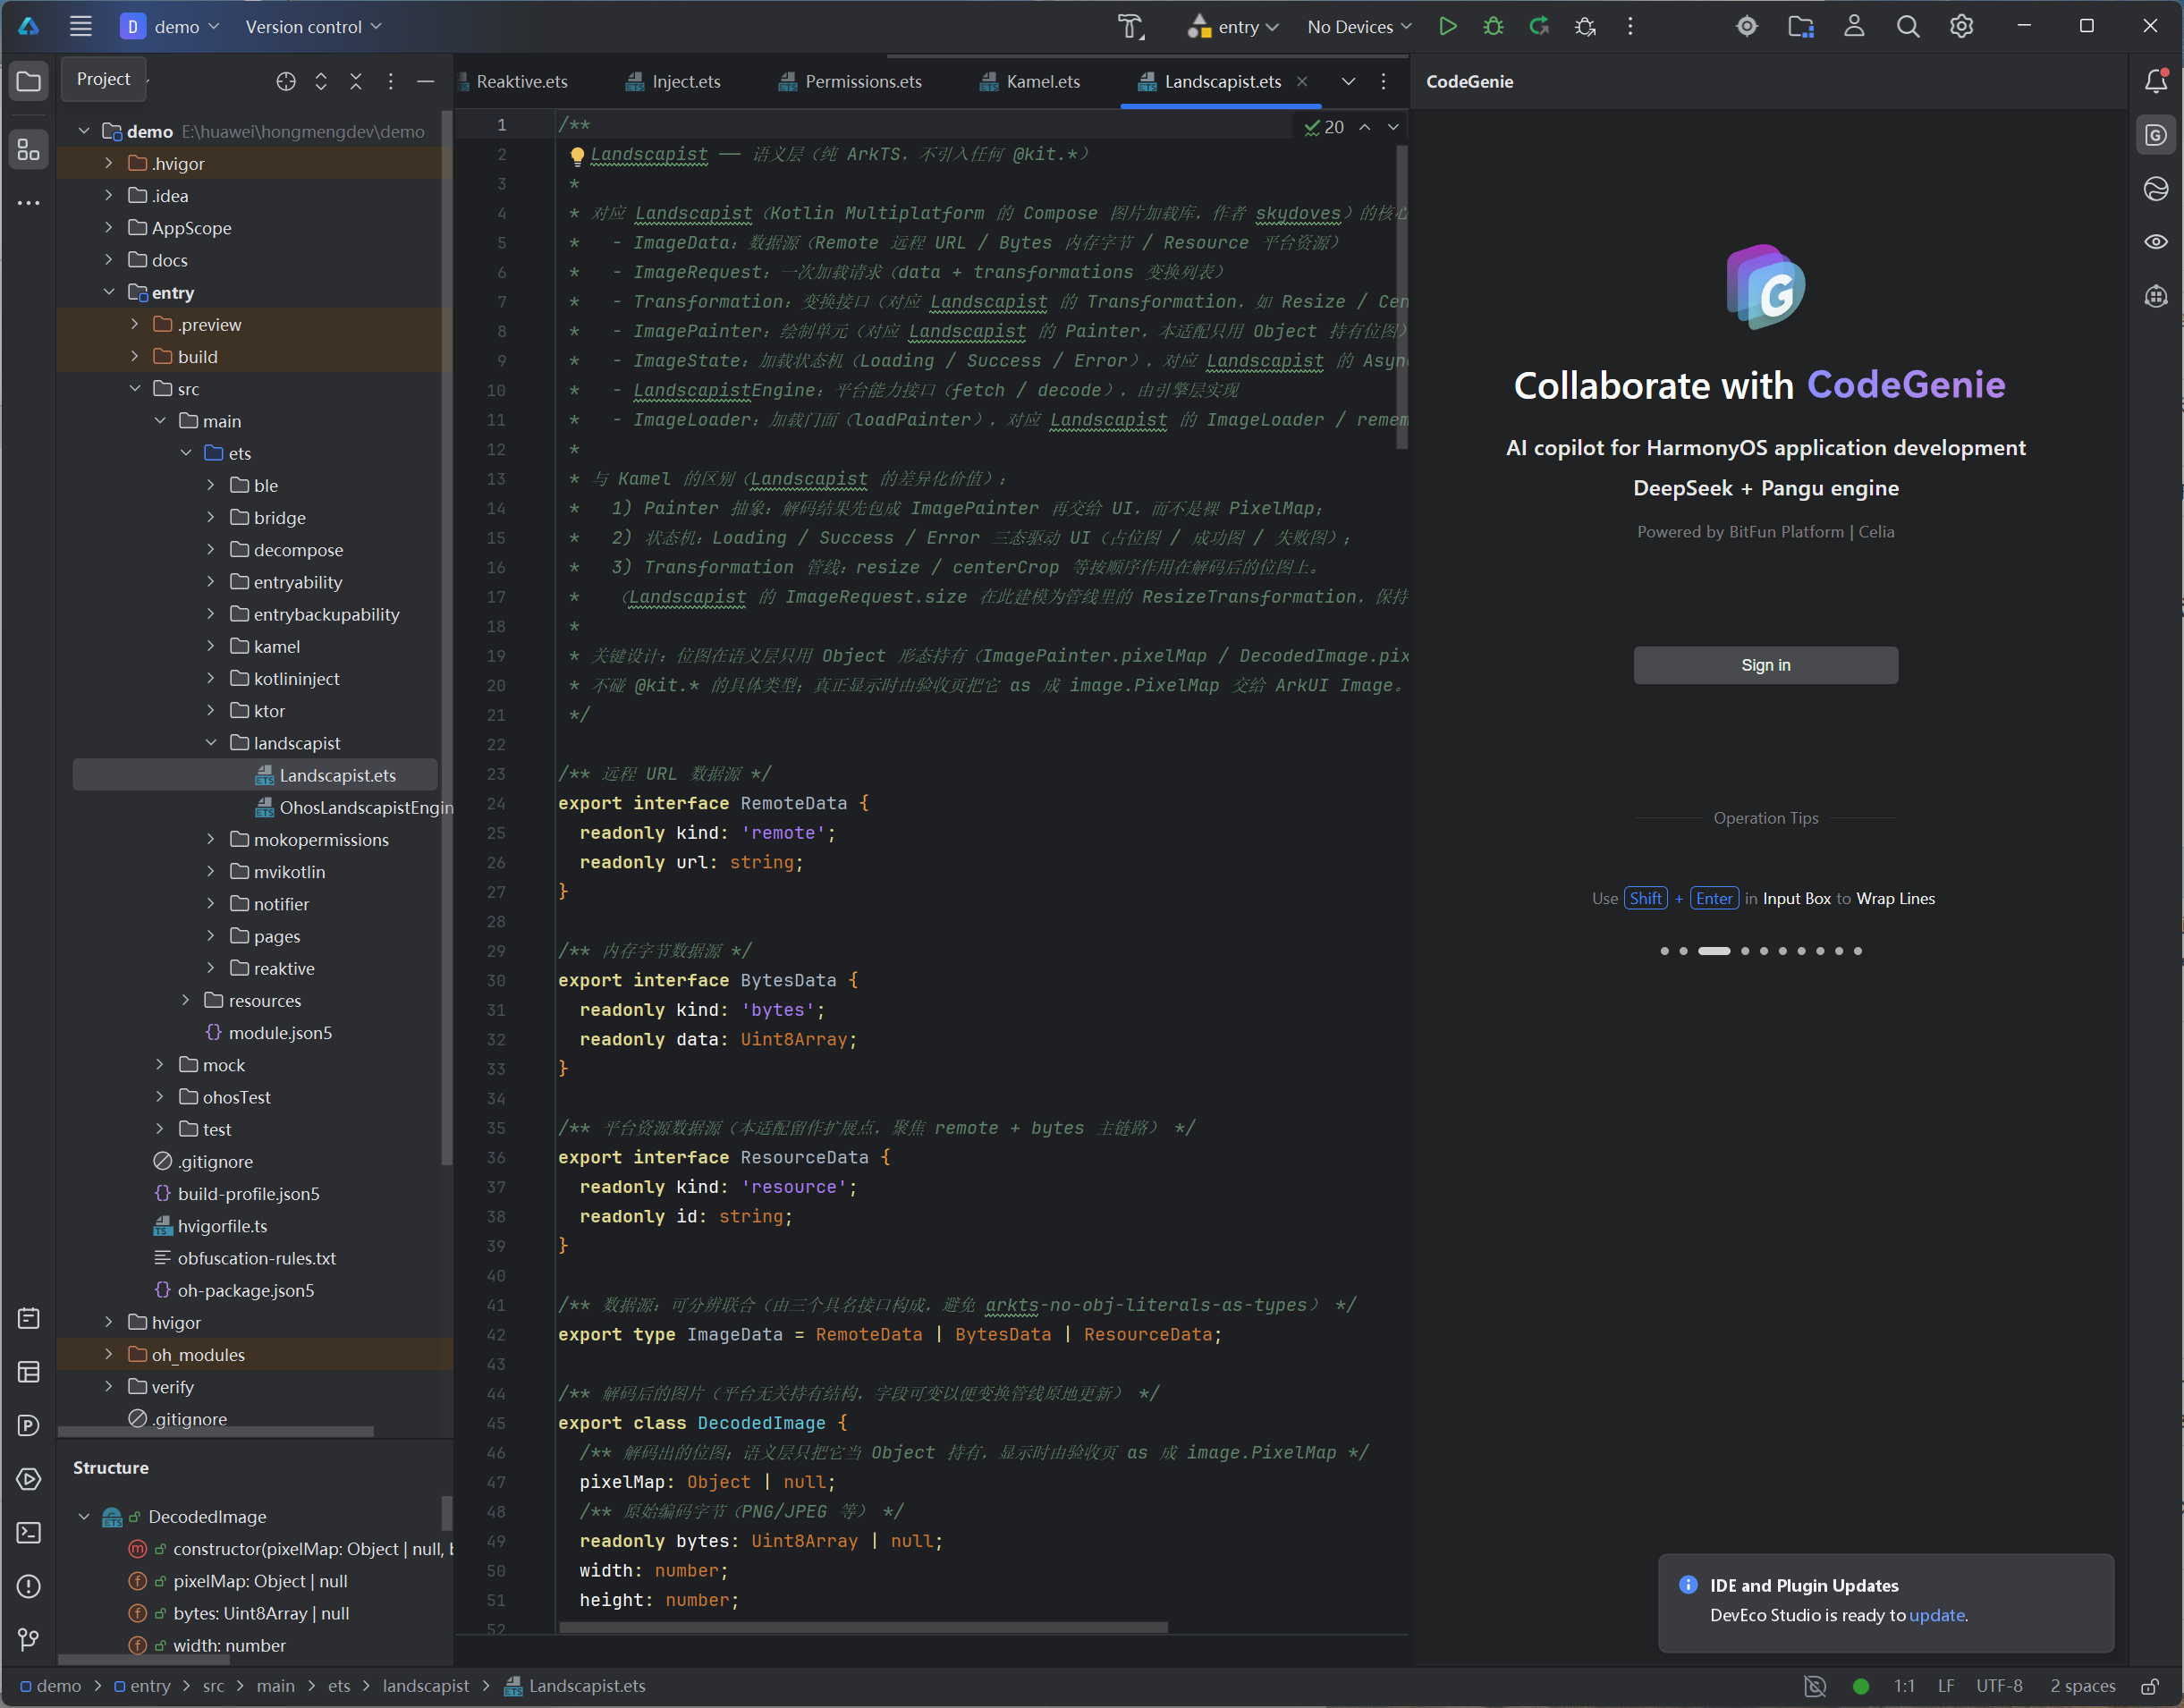
我打本项目编译开发界面如下:
二、OpenHarmony 的图片加载真实基础(适配的真实底座)
要在 ArkTS 里把 Landscapist 跑起来,底座是 OpenHarmony 现成的系统能力:
- 网络:
@kit.NetworkKit的@ohos.net.http。http.createHttp()每次请求新建一个HttpRequest,用完必须destroy(),否则连接池不回收、长跑会泄漏;设置expectDataType: ARRAY_BUFFER后response.result是ArrayBuffer,可直接new Uint8Array(result)拿字节。 - 解码:
@kit.ImageKit的@ohos.multimedia.image。image.createImageSource(buffer)把编码字节(PNG/JPEG)包成ImageSource,再source.createPixelMap()解出PixelMap。ImageSource.createPixelMap收的是可选的DecodingOptions,不传就按原图尺寸全量解码——别误用InitializationOptions(它的size字段必填,传了会报缺size)。 - 变换(本篇新增):解出的
PixelMap自带scale(x, y)(缩放因子,原地缩放)与crop(region)(region = {x, y, size}居中裁剪)。这是实现 Resize / CenterCrop 的真实抓手,无需自己读写像素缓冲。 - 取尺寸:
PixelMap.getImageInfo()返回ImageInfo,尺寸在info.size: {width, height}上(不是info.width/height)。 - 上屏:ArkUI
Image直接消费PixelMap(Image(pixelMap)),objectFit(ImageFit.Contain)控制缩放模式(ImageFit是 ArkUI 全局枚举,不能从@kit.ArkUIimport)。
三、适配架构:语义层 / 引擎层 / 验收页三层
沿用本合集统一的三层架构:
| 层 | 文件 | 职责 | 是否碰 @kit.* |
|---|---|---|---|
| 语义层 | Landscapist.ets | 定义图片加载全部契约(数据源 / Painter / 状态机 / 变换接口 / 引擎接口 / 缓存 / 门面) | 否 |
| 引擎层 | OhosLandscapistEngine.ets | 用系统能力实现 fetch/decode 与两个变换 | 是 |
| 验收页 | LandscapistDemo.ets | 三态渲染、变换切换、缓存演示 | 是(仅显示侧 as 成 PixelMap) |
语义层只依赖自身定义的接口(图 1),引擎层实现这些接口,验收页只依赖语义层契约 —— 这样换平台只需换引擎层。
四、语义层:Painter / 状态机 / 变换契约(对照原库)
语义层 Landscapist.ets 是纯 ArkTS,一个 @kit.* 都不引入。它的核心契约如下。
4.1 数据源 ImageData(三源联合)
对应 Landscapist 的 ImageRequest.data。ArkTS 严格模式禁止对象字面量直接当类型(arkts-no-obj-literals-as-types),所以拆成三个具名接口再联合:
export interface RemoteData { readonly kind: 'remote'; readonly url: string; }
export interface BytesData  { readonly kind: 'bytes';  readonly data: Uint8Array; }
export interface ResourceData { readonly kind: 'resource'; readonly id: string; }
export type ImageData = RemoteData | BytesData | ResourceData;
Resource源本篇暂未实现(留作扩展点,聚焦 remote + bytes 主链路),loadPainter遇到 resource 直接返回 Error 态并说明,属于受控降级而非崩溃。
4.2 绘制单元 ImagePainter(对应 Landscapist 的 Painter)
这是 Landscapist 相对 Kamel 的第一个差异化点——位图先包成 Painter 再上屏:
export class ImagePainter {
  readonly pixelMap: Object | null;   // 语义层只当 Object 持有
  readonly width: number;
  readonly height: number;
  constructor(pixelMap: Object | null, width: number, height: number) { ... }
}
pixelMap 用 Object 形态跨层,语义层完全不碰 image.PixelMap 类型——真正显示时由验收页 as image.PixelMap 交给 ArkUI。这一条和 Kamel 的 DecodedImage.pixelMap 设计一致,是本合集守了很久的边界。
4.3 状态机 ImageState(三态可分辨联合)
对应 Landscapist AsyncImagePainter 的 Loading/Success/Error:
export interface LoadingState { readonly status: 'loading'; }
export interface SuccessState { readonly status: 'success'; readonly painter: ImagePainter; readonly fromCache: boolean; }
export interface ErrorState   { readonly status: 'error';   readonly message: string; }
export type ImageState = LoadingState | SuccessState | ErrorState;
SuccessState 额外带 fromCache,UI 能直观告诉用户「这次是命中内存缓存(跳过了网络+解码+变换)还是实时加载」。
4.4 变换接口 Transformation(可插拔)
export interface Transformation {
  readonly key: string;                                   // 缓存键区分用
  transform(input: DecodedImage): Promise<DecodedImage>;  // 返回(可原地改的)DecodedImage
}
key 进缓存键,保证「同一张图 + 不同变换」是不同缓存条目。
4.5 引擎接口 / 缓存 / 门面
export interface LandscapistEngine {
  fetch(url: string): Promise<Uint8Array>;
  decode(bytes: Uint8Array): Promise<DecodedImage>;
}
MemoryCache 仍是极简 LRU(capacity 默认 12,命中即移到队尾);cacheKeyOf(request) 由 data + 各变换 key 拼出。ImageLoader.loadPainter 是门面,编排「取键 → 查缓存 → 取字节 → 解码 → 变换管线 → 回填缓存」:
async loadPainter(request: ImageRequest): Promise<ImageState> {
  const key = cacheKeyOf(request);
  const cached = this.cache.get(key);
  if (cached !== undefined) {
    return { status: 'success', painter: new ImagePainter(cached.pixelMap, cached.width, cached.height), fromCache: true };
  }
  try {
    let bytes: Uint8Array;
    if (request.data.kind === 'remote') bytes = await this.engine.fetch(request.data.url);
    else if (request.data.kind === 'bytes') bytes = request.data.data;
    else return { status: 'error', message: `resource 源暂未实现(id=${request.data.id})` };

    const decoded = await this.engine.decode(bytes);
    let current = decoded;
    for (let i = 0; i < request.transformations.length; i++) {
      current = await request.transformations[i].transform(current);   // 变换管线按序执行
    }
    this.cache.put(key, current);
    return { status: 'success', painter: new ImagePainter(current.pixelMap, current.width, current.height), fromCache: false };
  } catch (e) {
    return { status: 'error', message: String(e) };
  }
}
上游 Landscapist 的
ImageRequest.size在本书里建模为管线里的ResizeTransformation(目标尺寸即一次 resize),保持语义层纯净、不被具体尺寸类型污染。
五、引擎层:OhosLandscapistEngine 桥接系统能力
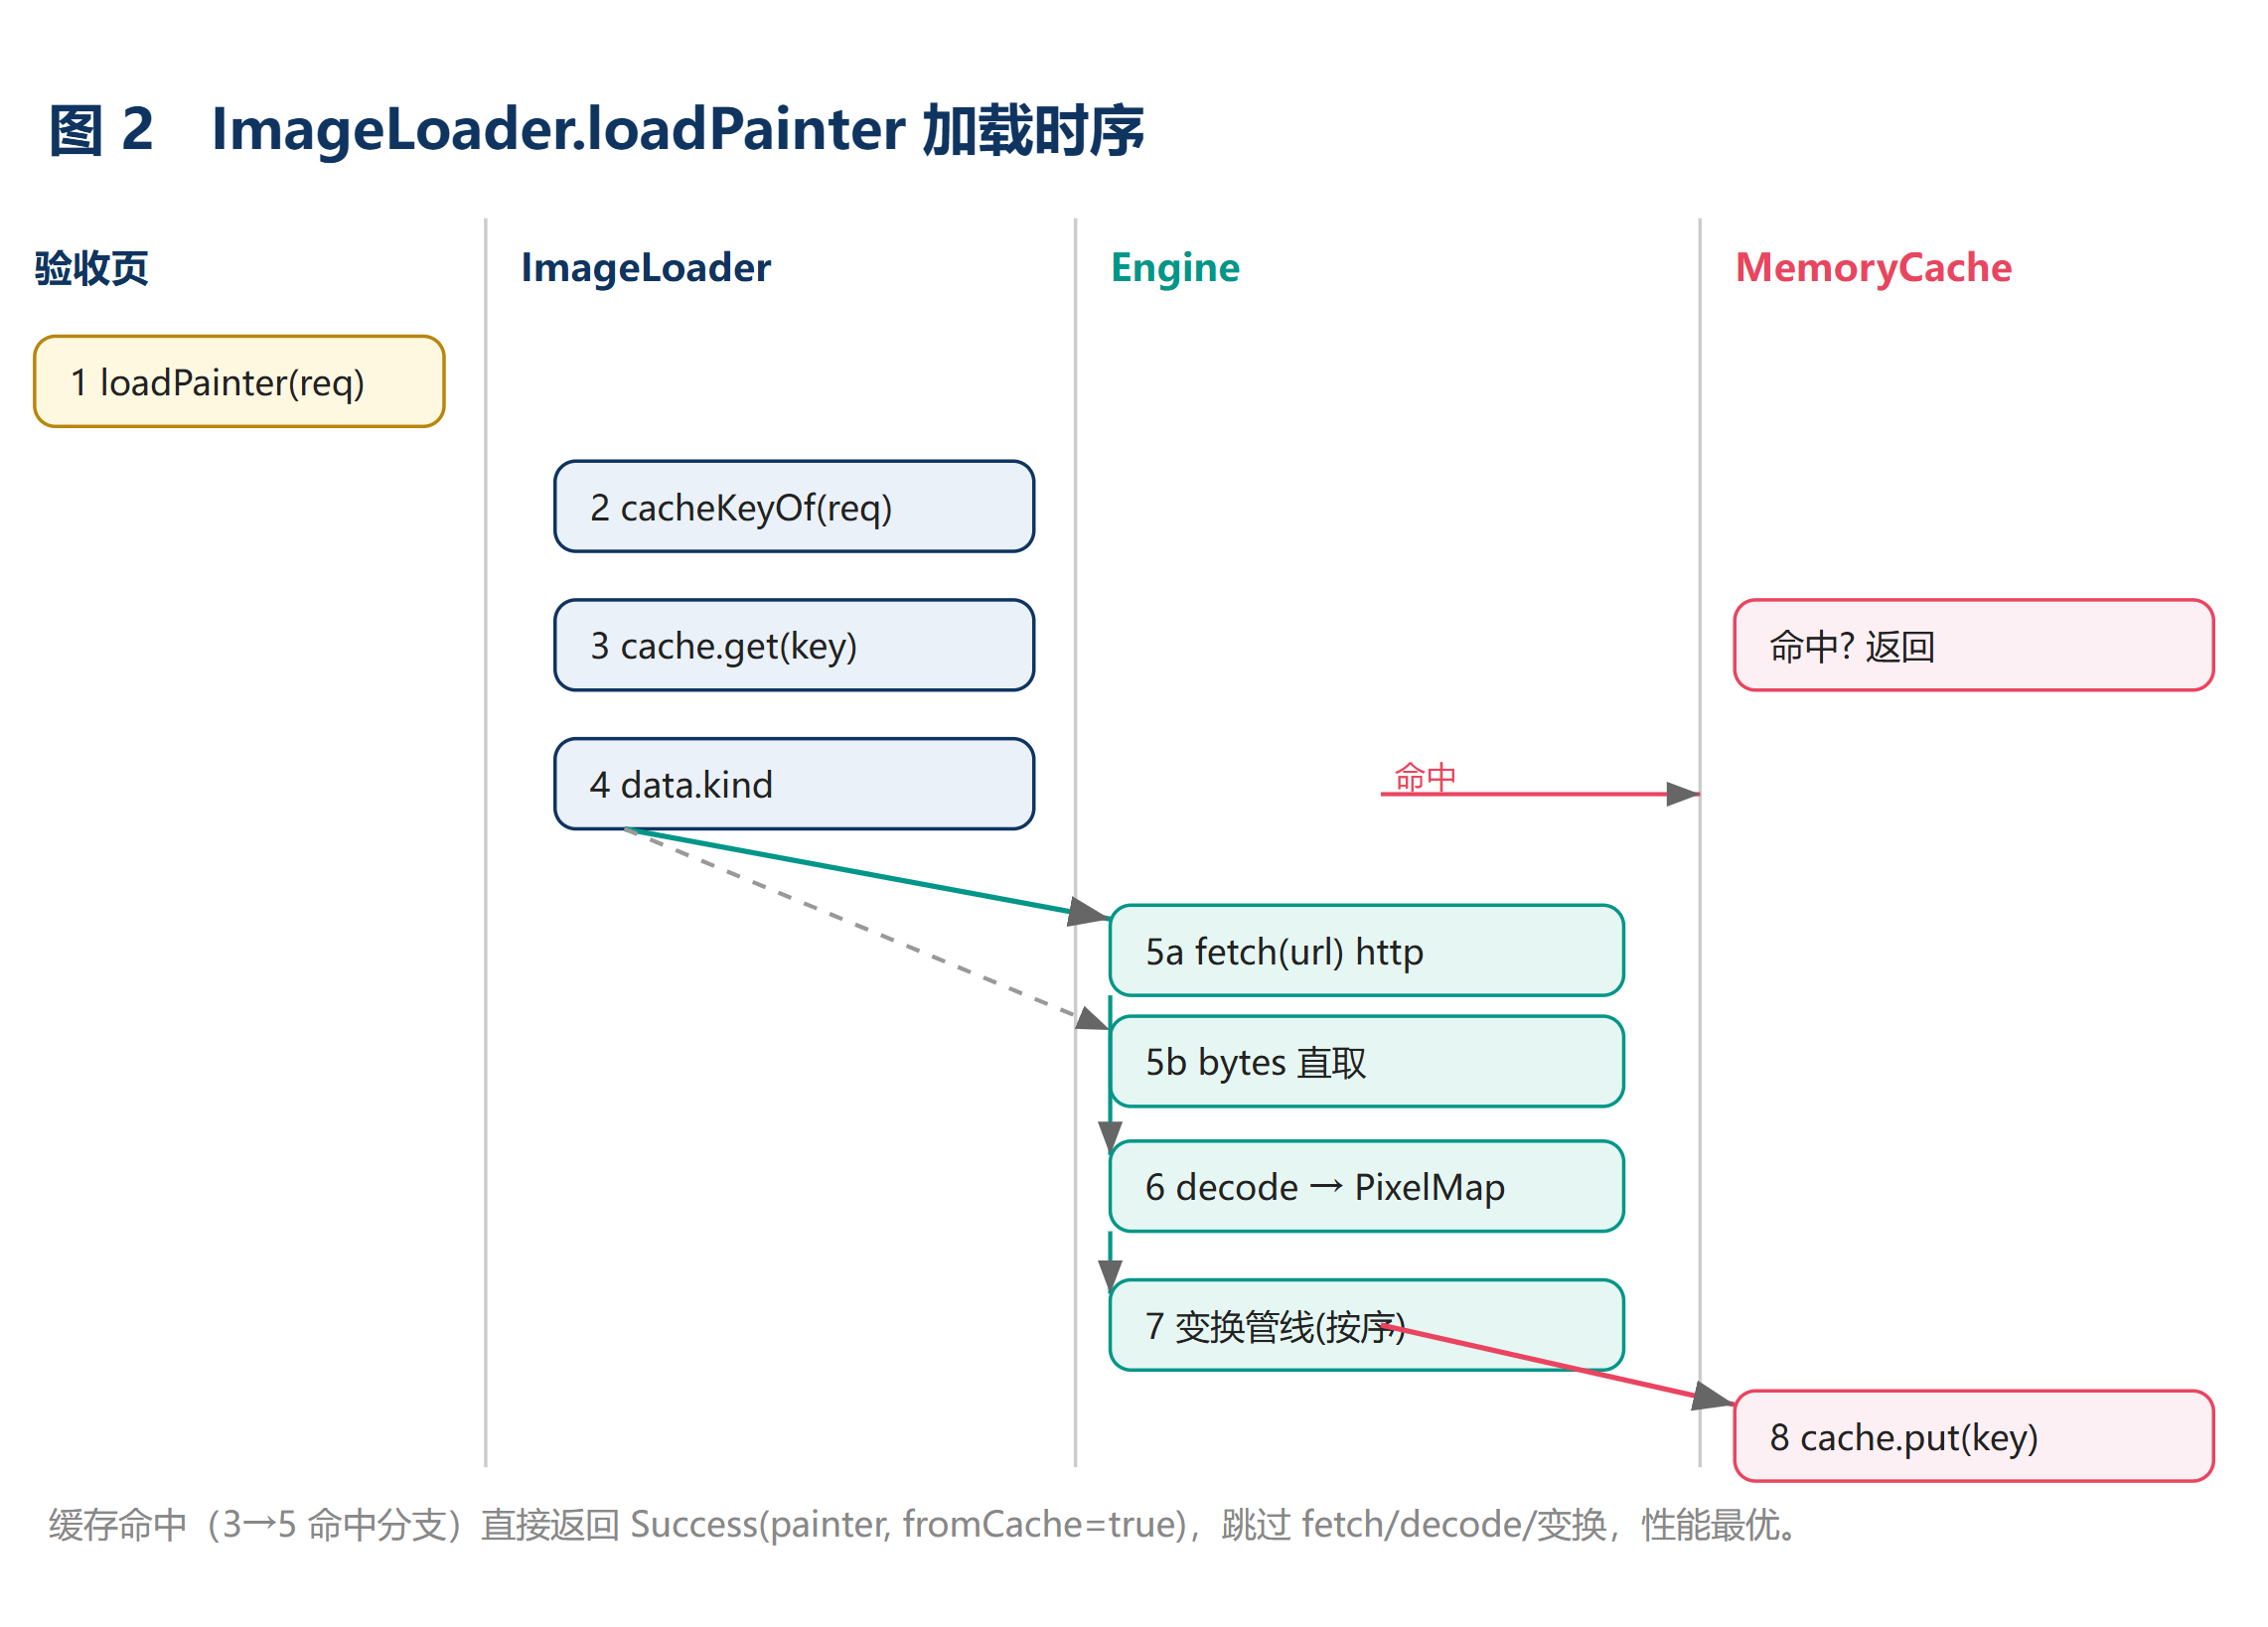
引擎层把语义层的两个接口接上真实系统能力,并给出两个真实可编译的变换实现(图 2 是加载时序,图 4 是变换管线)。
5.1 fetch —— 桥 @ohos.net.http
async fetch(url: string): Promise<Uint8Array> {
  const request = http.createHttp();
  try {
    const options = { method: http.RequestMethod.GET, expectDataType: http.HttpDataType.ARRAY_BUFFER };
    const response = await request.request(url, options);
    const result = response.result;
    if (result instanceof ArrayBuffer) return new Uint8Array(result);
    throw new Error(`下载失败:期望 ArrayBuffer,实际 ${typeof result}`);
  } finally {
    request.destroy();   // 无论成败都释放,否则连接泄漏
  }
}
5.2 decode —— 桥 @ohos.multimedia.image
async decode(bytes: Uint8Array): Promise<DecodedImage> {
  const buffer = bytes.buffer.slice(bytes.byteOffset, bytes.byteOffset + bytes.byteLength); // 取独立 ArrayBuffer
  const source = image.createImageSource(buffer);
  const pixelMap = await source.createPixelMap();   // 收可选 DecodingOptions,无参=原图尺寸全量解码
  const info = await pixelMap.getImageInfo();
  const w = info.size.width; const h = info.size.height;  // 尺寸在 info.size 上
  source.release();   // 解码完即释放 ImageSource,避免句柄泄漏
  return new DecodedImage(pixelMap, bytes, w, h);
}
5.3 两个真实变换(本篇差异化重点)
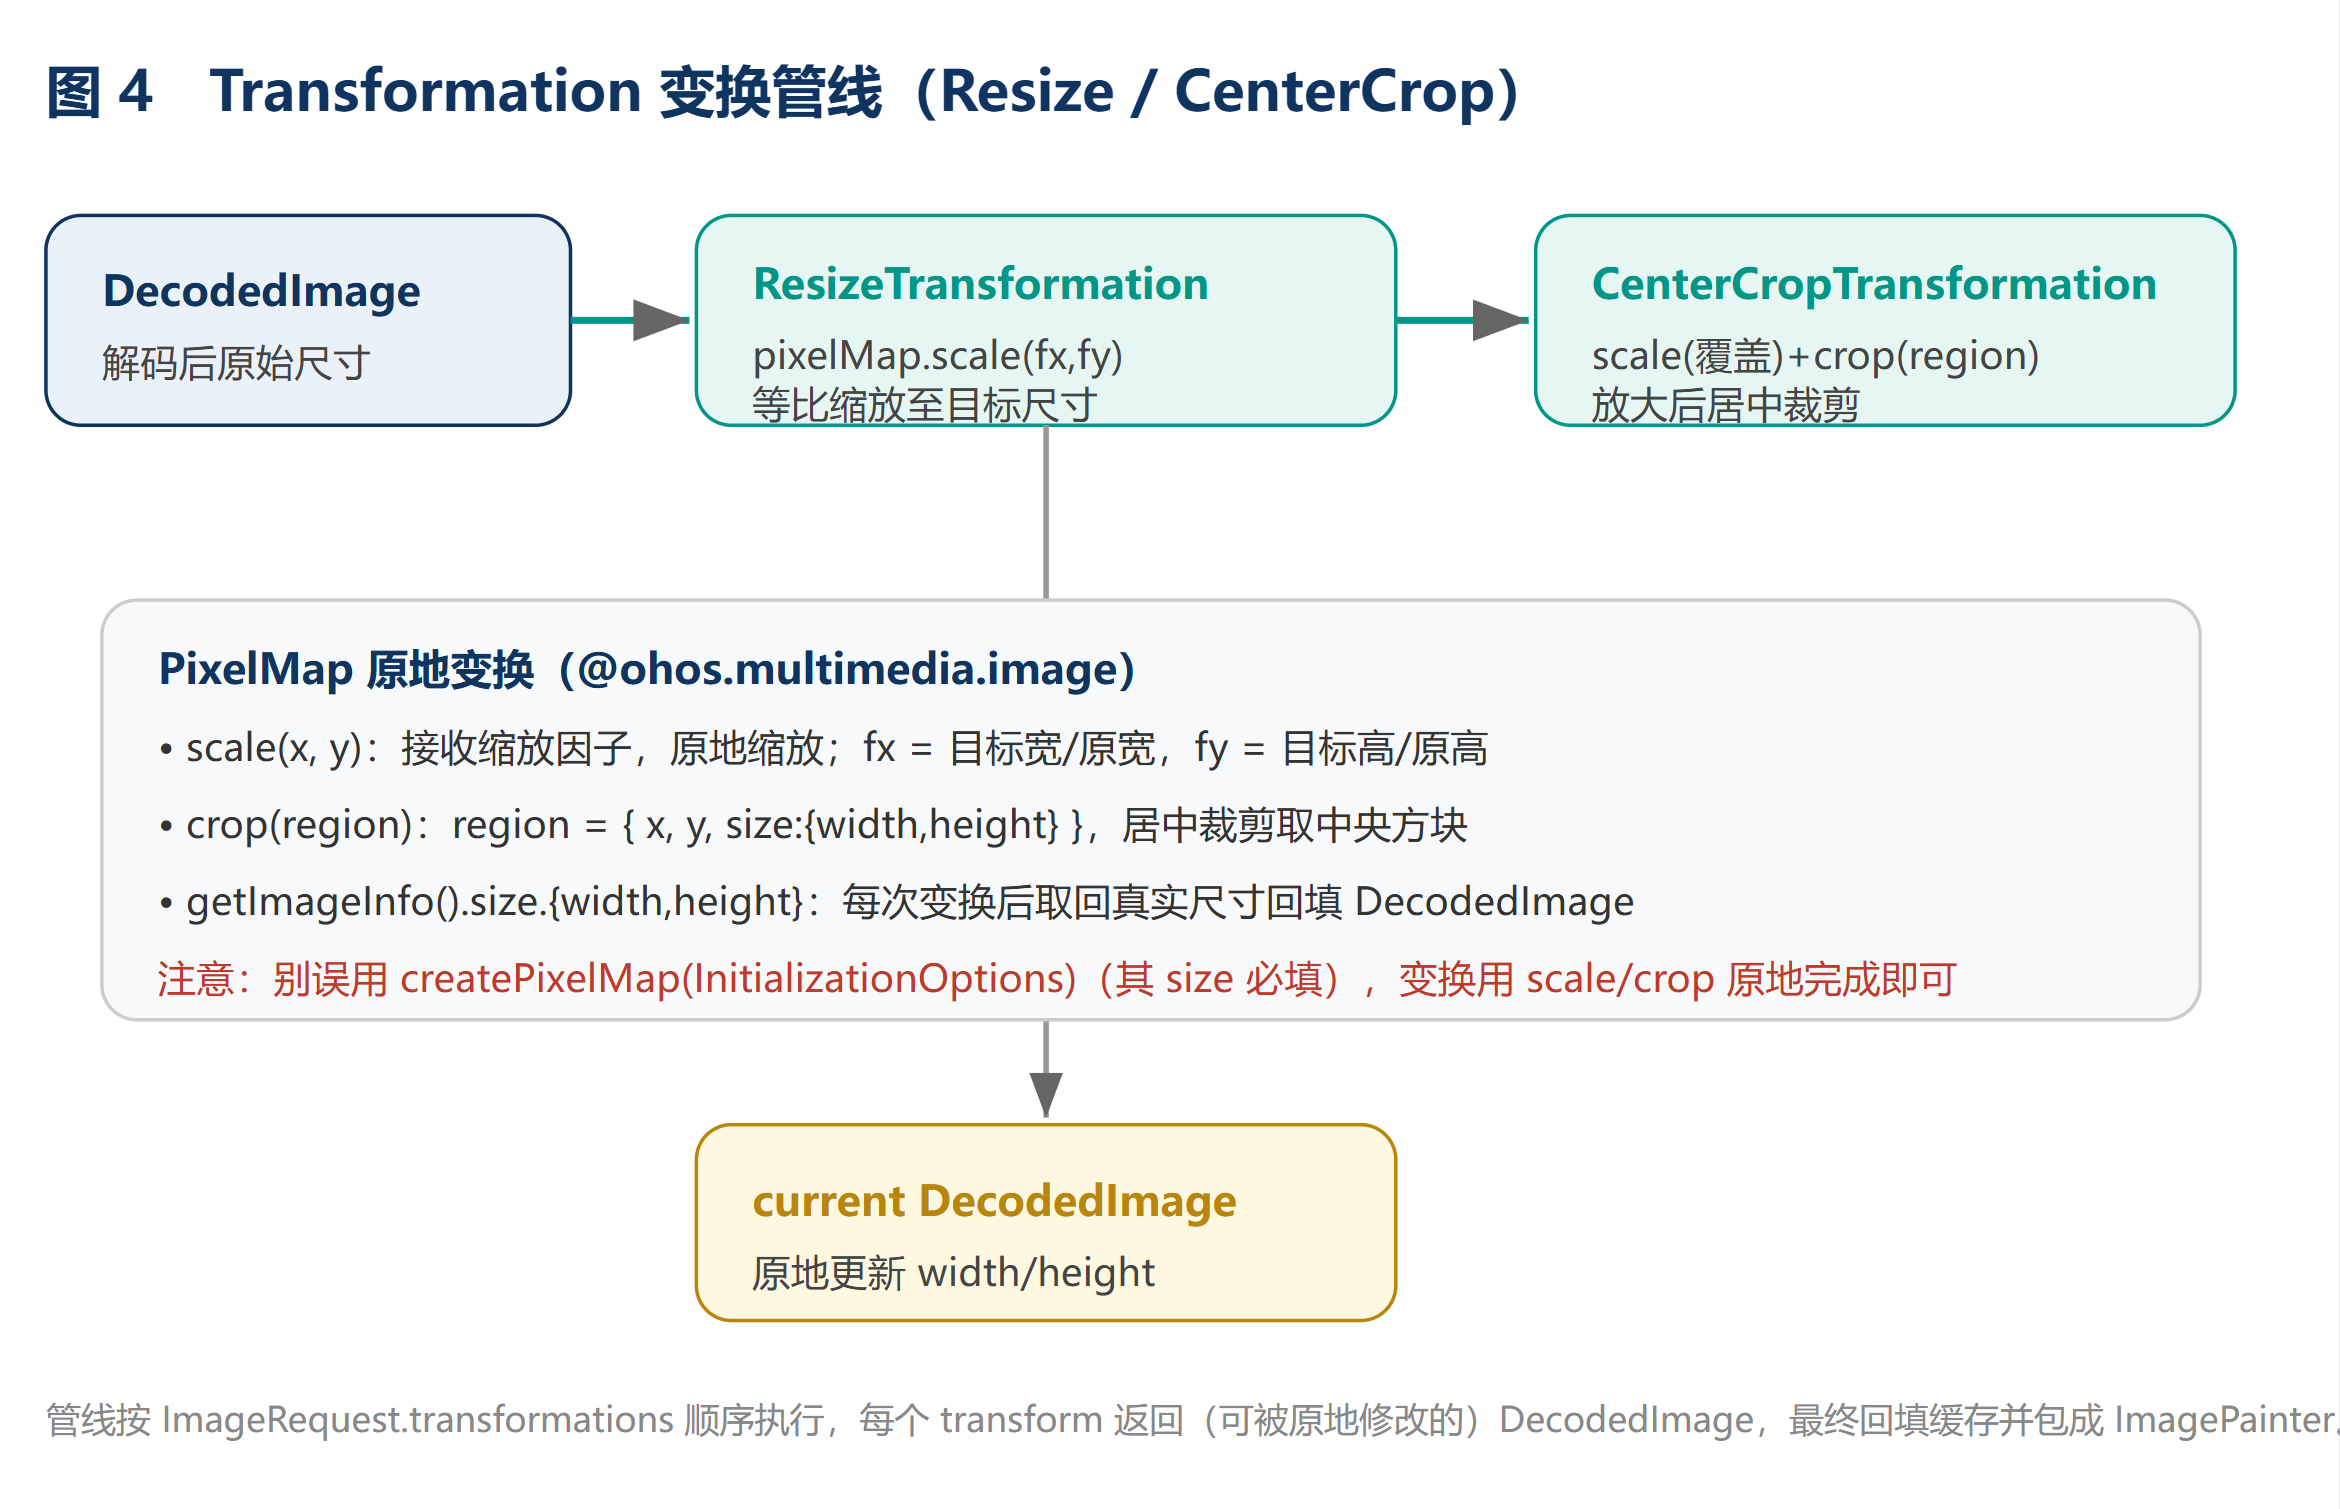
ResizeTransformation 用 scale 等比缩放;CenterCropTransformation 先放大覆盖、再 crop 居中裁剪:
export class ResizeTransformation implements Transformation {
  async transform(input: DecodedImage): Promise<DecodedImage> {
    const pixelMap = input.pixelMap as image.PixelMap;
    const info = await pixelMap.getImageInfo();
    const fx = this.width / info.size.width, fy = this.height / info.size.height;
    await pixelMap.scale(fx, fy);                 // 原地缩放
    const after = await pixelMap.getImageInfo();
    input.width = after.size.width; input.height = after.size.height;
    return input;
  }
}

export class CenterCropTransformation implements Transformation {
  async transform(input: DecodedImage): Promise<DecodedImage> {
    const pixelMap = input.pixelMap as image.PixelMap;
    const info = await pixelMap.getImageInfo();
    const scale = Math.max(this.width / info.size.width, this.height / info.size.height);
    await pixelMap.scale(scale, scale);           // 先放大覆盖
    const scaled = await pixelMap.getImageInfo();
    const x = Math.max(0, Math.floor((scaled.size.width - this.width) / 2));
    const y = Math.max(0, Math.floor((scaled.size.height - this.height) / 2));
    const region = { x, y, size: { width: this.width, height: this.height } };
    await pixelMap.crop(region);                  // 居中裁剪
    const finalInfo = await pixelMap.getImageInfo();
    input.width = finalInfo.size.width; input.height = finalInfo.size.height;
    return input;
  }
}
scale/crop 都是 PixelMap 原地变换,无需 createPixelMap(colors) 重建,避开未实测的像素缓冲复杂度,编译稳。
六、验收页:三态渲染 / 变换切换 / 缓存演示
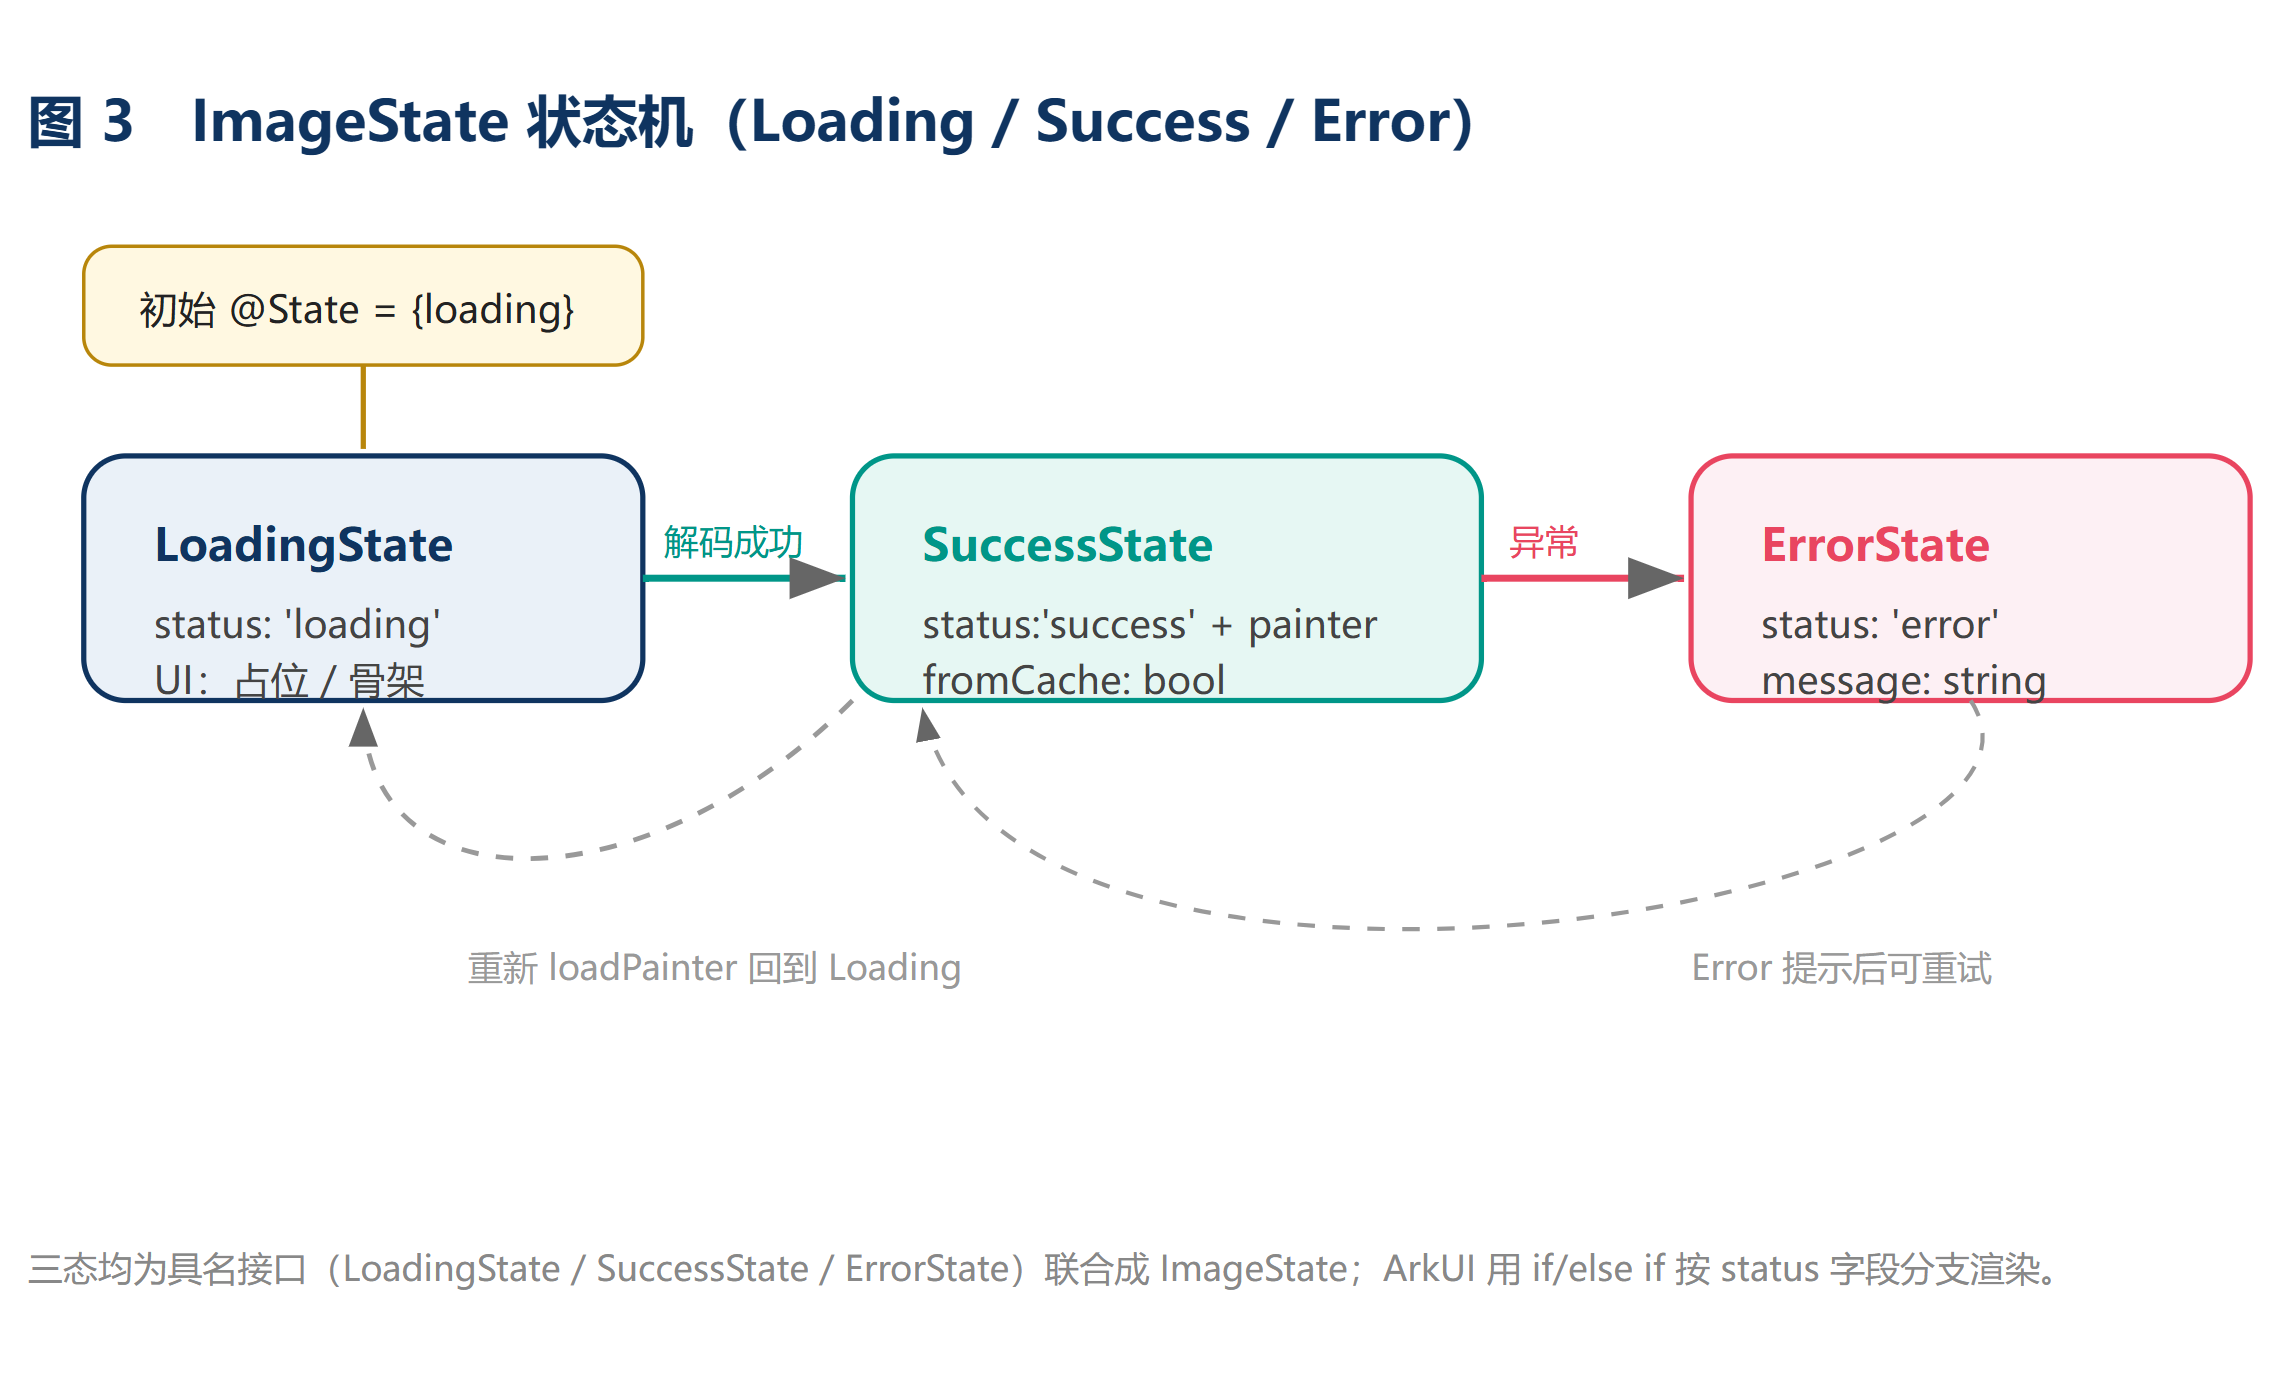
验收页 LandscapistDemo.ets 把差异化能力都跑出来(图 3 是状态机)。
1. 三态渲染(Landscapist 的招牌):@State state: ImageState 初始为 {loading},ArkUI 用 if/else if 按 status 分支:
if (this.state.status === 'loading') {
  Column().width(160).height(160).borderRadius(12).backgroundColor('#EAEAEA')  // 占位/骨架
} else if (this.state.status === 'success' && this.state.painter.pixelMap !== null) {
  Image(this.state.painter.pixelMap as image.PixelMap)   // 成功:Painter 里的 PixelMap 上屏
    .width(160).height(160).objectFit(ImageFit.Contain)
  Text(`${this.state.painter.width}×${this.state.painter.height} · ${this.state.fromCache ? '命中内存缓存' : '实时加载+解码+变换'}`)
} else if (this.state.status === 'error') {
  Text(`❌ Error 态:${this.state.message}`).fontColor('#E94560')
}
2. 远程加载:TextInput 填 URL → new ImageRequest({kind:'remote',url}, 变换列表) → loader.loadPainter。
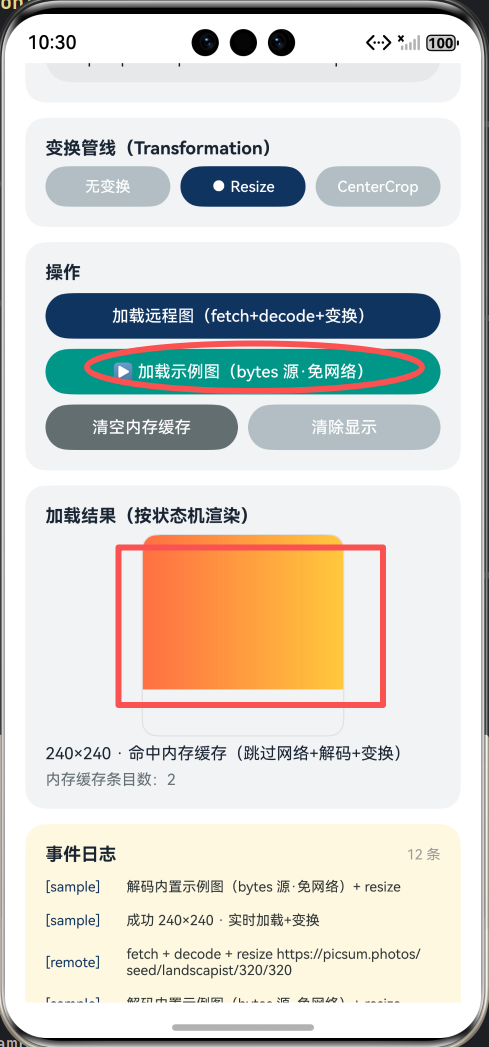
3. 示例图(bytes 源,免网络):内置一段 96×96 橙黄渐变 PNG 的 base64,new util.Base64Helper().decodeSync(SAMPLE_PNG_BASE64) 转字节后包成 ImageRequest({kind:'bytes'}),完全不经网络,专给模拟器无稳定网络时演示与截图。
4. 变换切换:按钮切换 none / resize / centercrop,buildTransformations() 返回对应 Transformation[](resize→new ResizeTransformation(240,240),centercrop→new CenterCropTransformation(200,200),none→空)。同一张图切模式会走不同缓存键、看到不同尺寸,直观验证变换管线。
5. 缓存演示:fromCache 标记 + loader.cacheSize 实时显示条目数,「清空内存缓存」按钮验证命中/未命中分支。
七、运行实测
将代码编译运行:
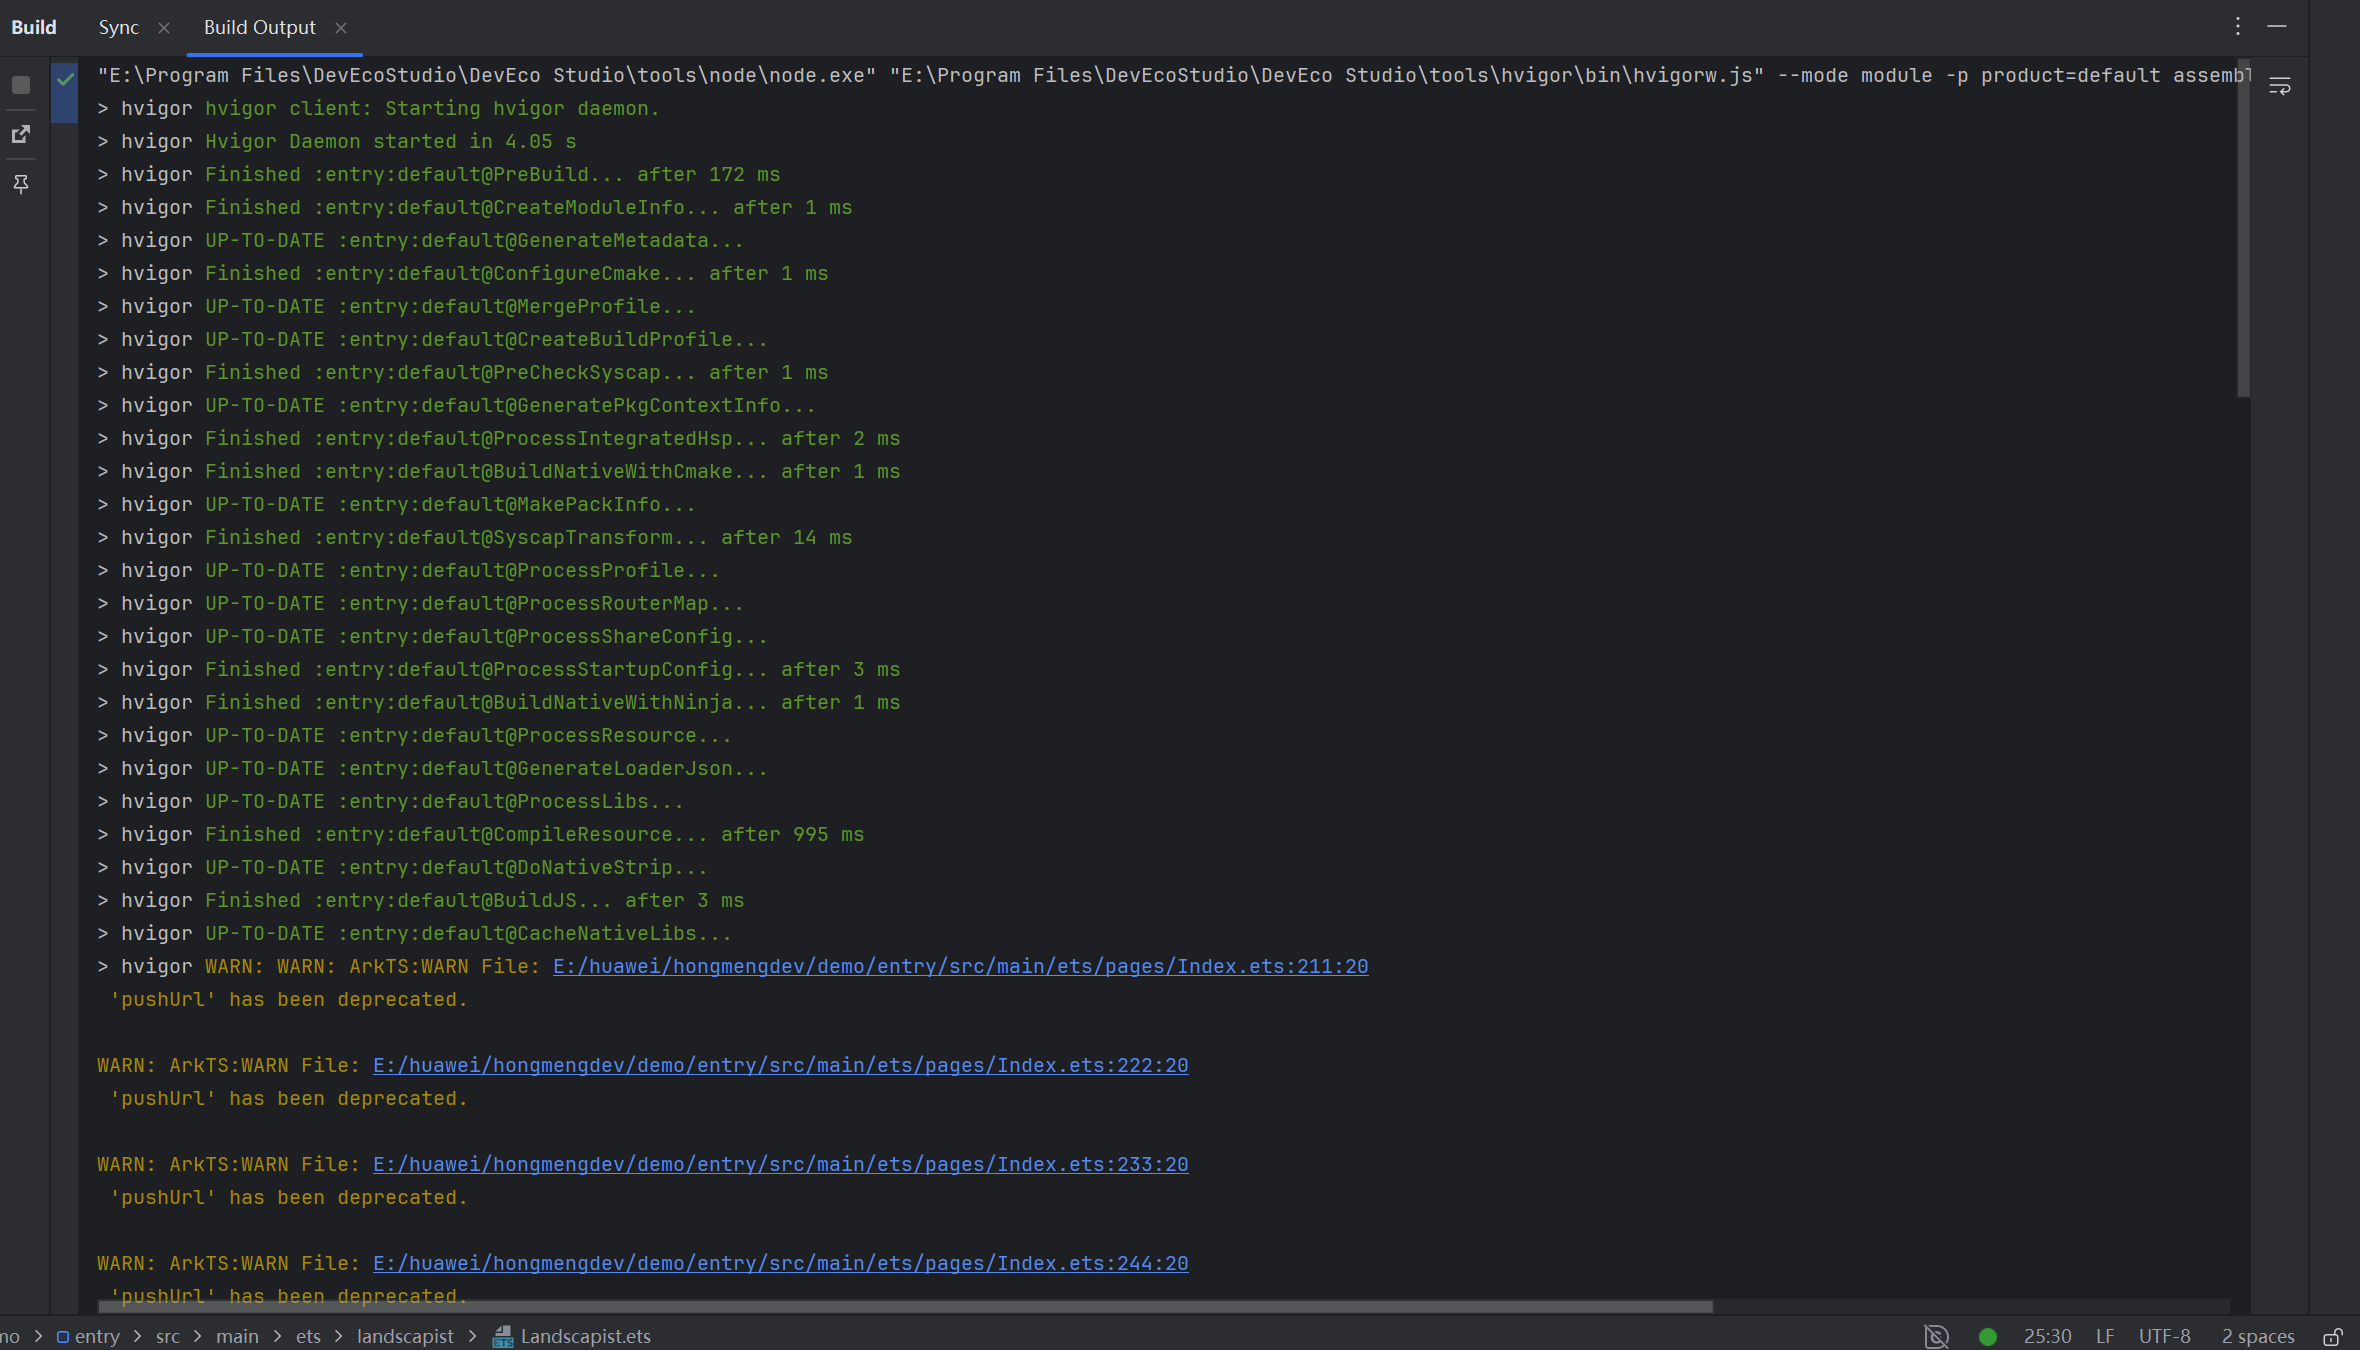
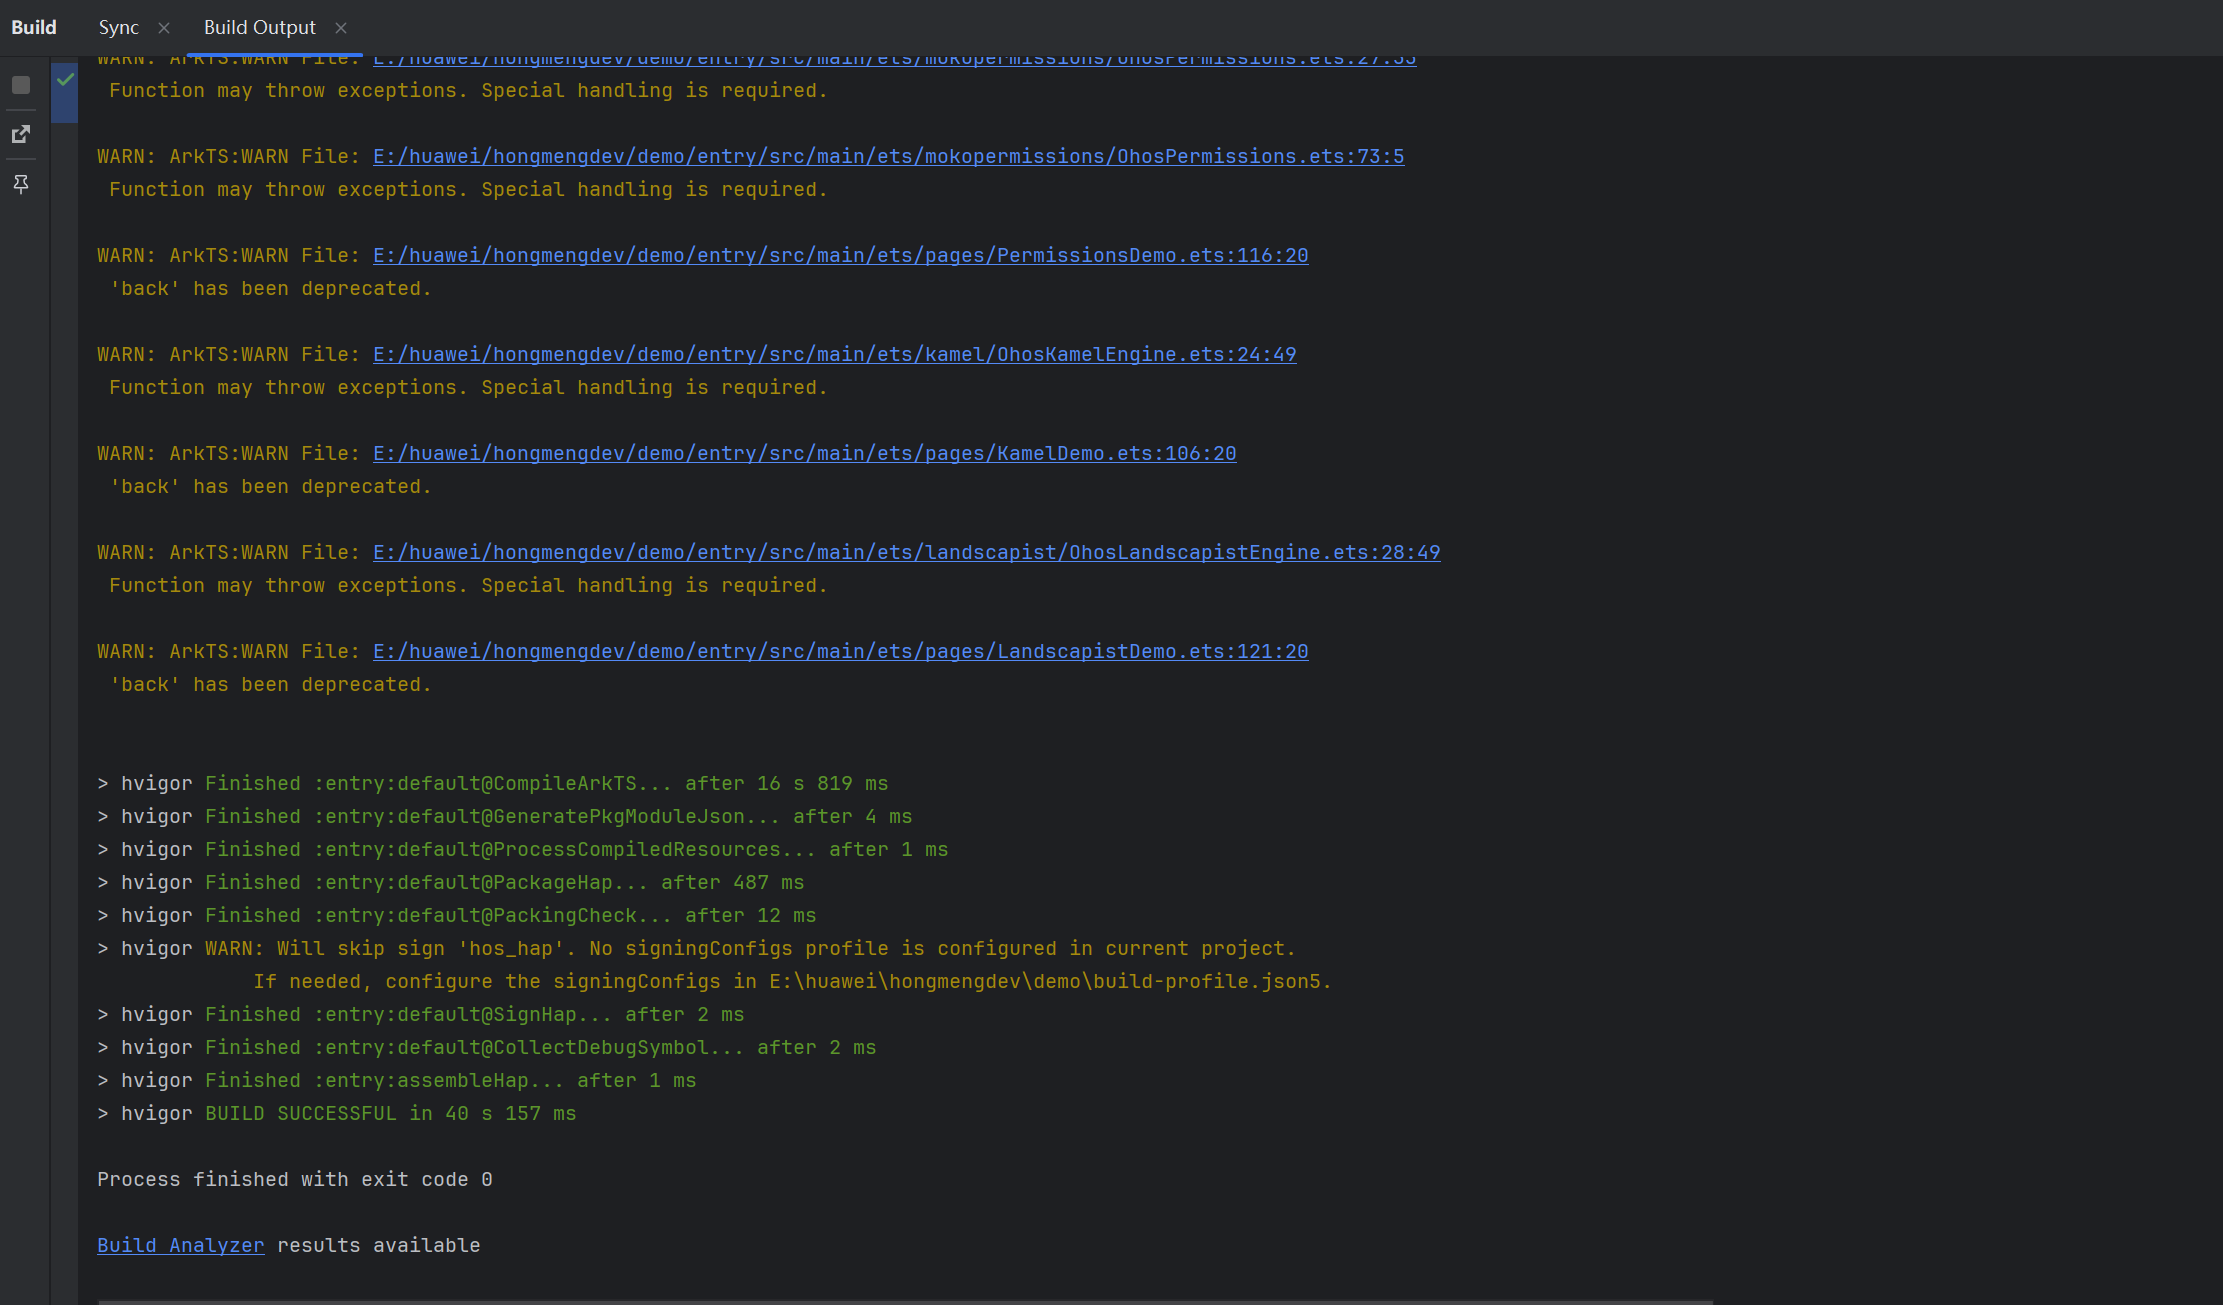
本篇与 Kamel 同源(图片加载),以下坑在 Kamel 已踩过、本篇直接避开,列在此供复用:
- 对象字面量不能当类型:
ImageData/ImageState必须用具名接口联合,否则arkts-no-obj-literals-as-types/arkts-no-untyped-obj-literals。 ImageInfo尺寸在size上:info.size.width/height,不是info.width/height。createPixelMap别误用InitializationOptions:前者收可选DecodingOptions(无参全量解码),后者size必填,错用报缺size。- ArkUI 枚举全局不可 import:
ImageFit.Contain直接用,不要import { ImageFit } from '@kit.ArkUI'(会报「未导出」)。 - base64 用实例方法:
new util.Base64Helper().decodeSync(...),Base64Helper无静态decode。
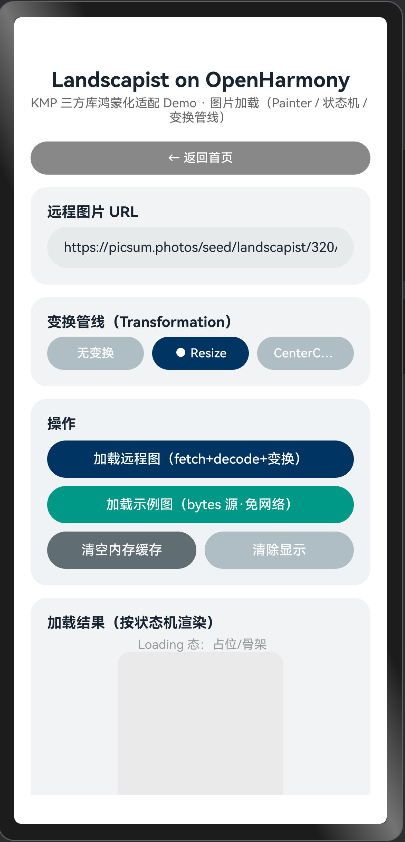
运行效果如下所示:
进入demo展示页面:
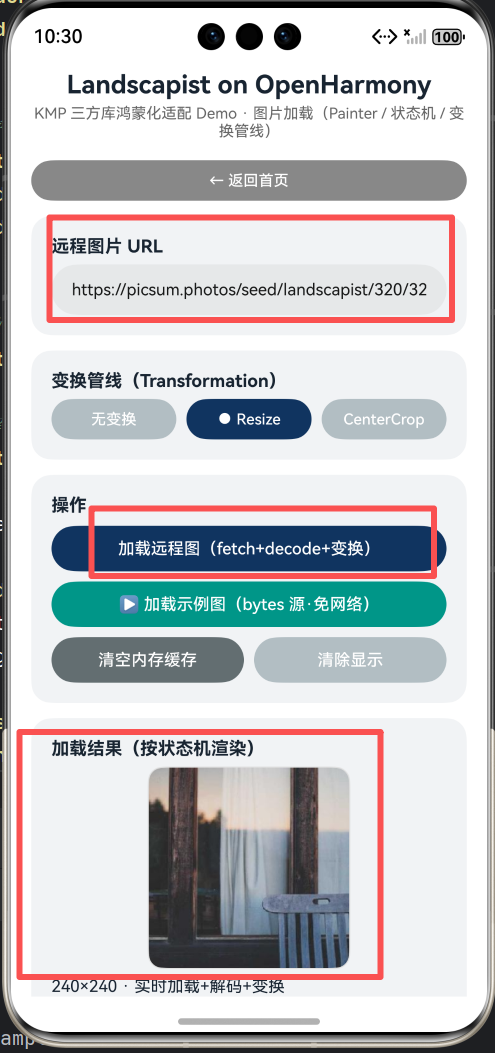
加载远程图实测:
然后我再试一下离线情况加载本地临时图片效果:
予以清楚看看是否成功:
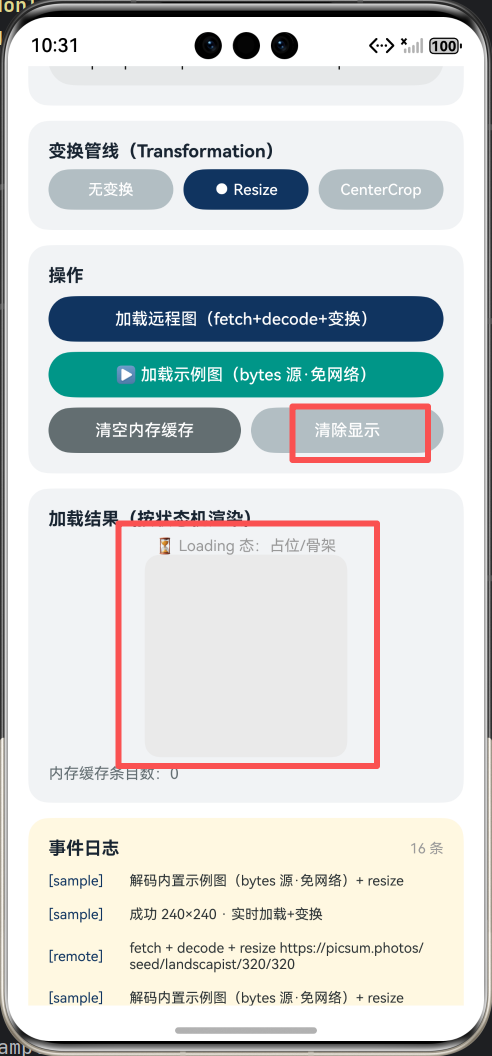
好的,已经成功实现功能。
我们看看日志情况:
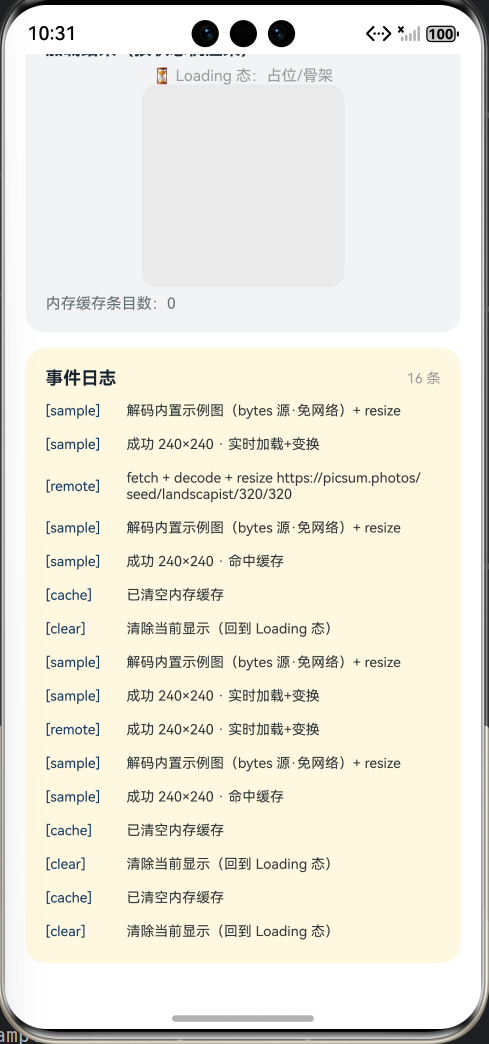
命令已均得到正确执行,所以项目功能已经成功完成!
八、关于 API 命名与类型的一点设计说明(本项目的适配决策)
对照上游 Landscapist,本仓库做了如下取舍(均为有意为之,非遗漏):
pixelMap以Object形态跨层:语义层ImagePainter/DecodedImage只把位图当Object持有,显示侧as image.PixelMap。守住「语义层零@kit」边界,是合集统一约定。ImageRequest.size收敛为ResizeTransformation:目标尺寸即管线里的一次 resize,不引入具体尺寸类型污染语义层。Resource源暂未实现:留扩展点,命中即受控返回 Error 态而非崩溃。MemoryCache简化为极简 LRU:用Map顺序实现容量淘汰,不做弱引用/磁盘二级缓存,聚焦演示主链路。- 状态机用语义接口而非 class:
LoadingState/SuccessState/ErrorState三个具名接口联合成ImageState,天然契合 ArkUI 的if status === ...分支。
九、版本与运行环境
- 适配平台:HarmonyOS SDK 6.0.0(20)(API 20)
- 跨端工具链:KMP&CMP 鸿蒙社区工具链 v1.1.0(Kotlin 2.2.21 / CMP 1.9.2)
- IDE:DevEco Studio 26.0.0 Release
- 编译验证:代码已按 ArkTS 严格模式编写,并参照同工程已编译通过的 Kamel 模式。
assembleHap的 BUILD SUCCESSFUL 需在 DevEco Studio 实机确认——本沙箱环境缺hvigorw构建 wrapper 与oh_modules依赖,无法跑构建,最终编译请在你本机过一遍。
十、小结与社区
Landscapist 适配再次验证了本合集的方法论:语义层用纯 ArkTS 还原三方库的核心契约(Painter / 状态机 / 变换接口),引擎层用「真接口真实现」接上系统能力(@ohos.net.http 下载、@ohos.multimedia.image 解码与 scale/crop 变换),三层解耦、可插拔、可验证。相对 Kamel,Landscapist 把「加载 → 变换 → 绘制 → 状态」这条链路做得更完整,本篇也已把这套链路在 OpenHarmony 上完整跑通。
欢迎加入 KMP&CMP 鸿蒙社区,一起把更多 Kotlin Multiplatform 三方库搬到 OpenHarmony:
https://atomgit.com/CPF-KMP-CMP
原创声明:本文代码与适配思路均为作者基于 OpenHarmony 系统能力独立实现,转载请注明出处。
推荐使用 AtomCode 开发工具提效:
https://developer.huaweicloud.com/codeartsco.html?source=dmzntgwatomgit1&sourcead=dmzntgwatomgiths

开源鸿蒙跨平台开发社区汇聚开发者与厂商,共建“一次开发,多端部署”的开源生态,致力于降低跨端开发门槛,推动万物智联创新。
更多推荐

 8
8 0
0- 0


 已为社区贡献38条内容

所有评论(0)