【Openharmony】应用自启动开发指导文档
一、开发环境
本文示例是通过 DevEco Studio 6.1.0 Release(即 6.1.0.830)版本进行开发的,SDK 版本为 API 23。
二、详细开发步骤及代码
1. 在 DevEco Studio 中新建普通的应用工程
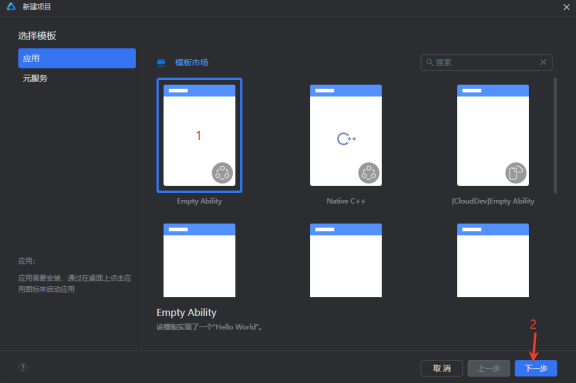
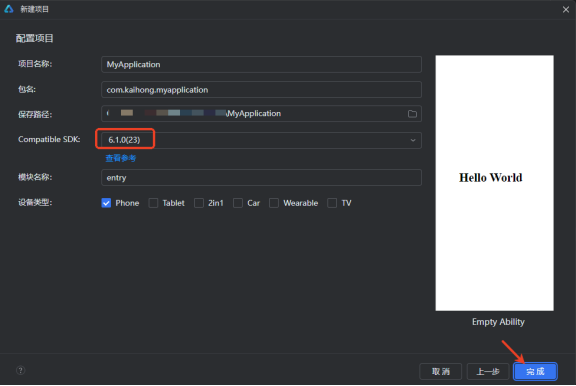
2. 创建服务文件
新建一个 ServiceExtAbility 文件夹,并新建一个 ServiceExtAbility 文件。
import { ServiceExtensionAbility, Want } from '@kit.AbilityKit';
import { BusinessError } from '@kit.BasicServicesKit';

const TAG = 'demonotexit_ServiceExtAbility';

// 开机自启时系统/Launcher 可能仍在初始化,立即拉起 UI 容易触发 16000050
const START_UI_DELAY_MS = 3000;

export default class ServiceExtAbility extends ServiceExtensionAbility {
  private hasStartedUi: boolean = false;

  onCreate(_want: Want) {
    console.log(TAG + " start")
    this.scheduleStartEntryAbility()
  }

  onRequest(_want: Want, _startId: number) {
    console.log(`${TAG}, onRequest, want: ${_want.abilityName}`)
    this.scheduleStartEntryAbility()
  }

  onDisconnect(_want: Want) {
    console.log(`${TAG}, onDisconnect, want: ${_want.abilityName}`);
  }

  onDestroy() {
    console.log(`${TAG}, onDestroy`)
  }

  private scheduleStartEntryAbility(): void {
    if (this.hasStartedUi) {
      return;
    }
    this.hasStartedUi = true;
    setTimeout(() => {
      this.startEntryAbility();
    }, START_UI_DELAY_MS);
  }

  // 拉起本应用的页面
  private startEntryAbility(): void {
    console.log(TAG + " into startAbility")
    let want: Want = {
      deviceId: '', // deviceId为空表示本设备
      bundleName: 'com.kaihong.demonotexit',
      moduleName: 'entry',
      abilityName: 'EntryAbility',
    };

    try {
      this.context.startAbility(want).then(() => {
        console.log(`${TAG}, startAbility succeed`);
      }).catch((err: BusinessError) => {
        this.hasStartedUi = false;
        console.error(`${TAG}, Failed to startAbility. Code: ${err.code}, message: ${err.message}`);
      });
    } catch (err) {
      this.hasStartedUi = false;
      let error = err as BusinessError;
      console.error(`${TAG}, Failed to startAbility. Code: ${error.code}, message: ${error.message}`);
    }
  }
}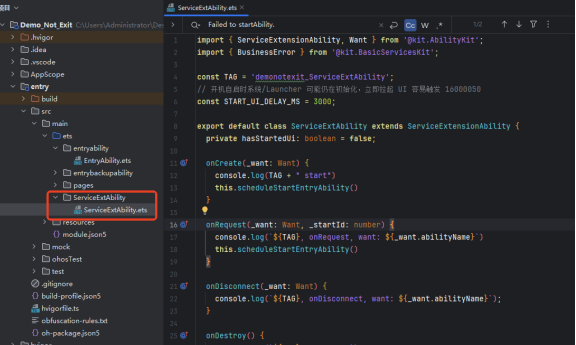
说明:此应用需要拉起前台 EntryAbility 页面,可在此服务文件中调用
startAbility()方法拉起应用(上述代码已写入此方法)。
3. 设置应用全屏,不可退出
正常可退出的应用无需此步骤。
在 EntryAbility.ets 文件中写入关键代码:
// 设置全屏 不可退出
const mainWindow = windowStage.getMainWindowSync()
await mainWindow.setWindowMode(window.WindowMode.FULLSCREEN)
await mainWindow.setWindowSystemBarEnable([])
windowStage.disableWindowDecor()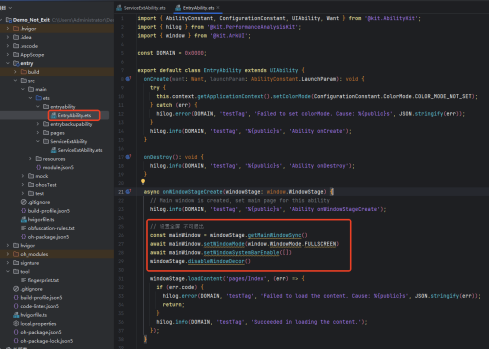
4. 在 module.json5 中修改配置信息
修改 1:修改应用入口为 ServiceExtAbility
"mainElement": "ServiceExtAbility",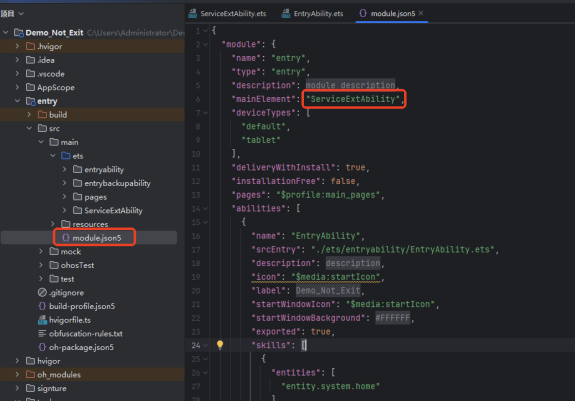
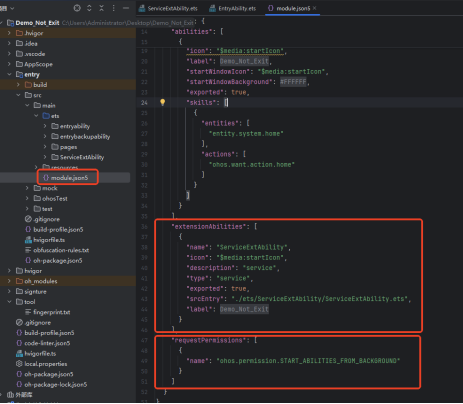
修改 2:增加扩展服务配置
"extensionAbilities": [
  {
    "name": "ServiceExtAbility",
    "icon": "$media:startIcon",
    "description": "service",
    "type": "service",
    "exported": true,
    "srcEntry": "./ets/ServiceExtAbility/ServiceExtAbility.ets",
    "label": "$string:EntryAbility_label"
  }
],
修改 3:增加系统权限
"requestPermissions": [
  {
    "name": "ohos.permission.START_ABILITIES_FROM_BACKGROUND"
  }
]
以上应用服务自启代码已编写完成,接下来进行服务安装配置流程。
三、服务安装配置流程
1. 获取指纹 finger
可参考OpenHarmony应用开发技巧-如何获取证书指纹(6.1 版本获取方式与 3.2 版本类似),本文以新建空模块的方式获取。
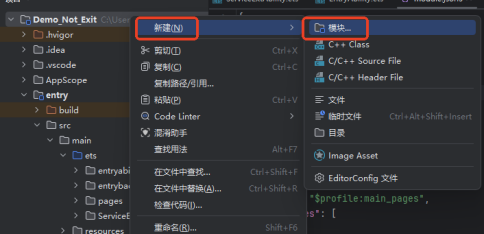
步骤 1:在工程中创建新 Module,File > New > Module > Empty Ability。一直点击 Next 直到创建成功。
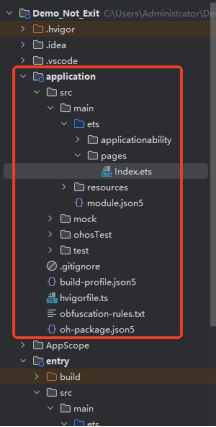
步骤 2:执行 Run > Run 'application',将新创建的 Module 的 HAP 包安装到系统中。
步骤 3:执行 hdc shell "bm dump -n {工程包名} | grep finger" 命令打印出 HAP 的 finger 信息,然后删除新创建的 Module,恢复工程。

2. 配置应用特权
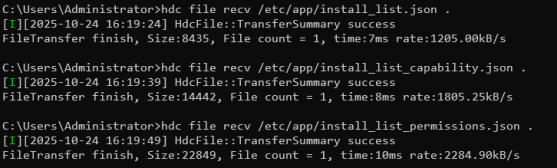
导出开发板中的三个 json 配置文件,指令:
hdc file recv /etc/app/install_list.json .
hdc file recv /etc/app/install_list_capability.json .
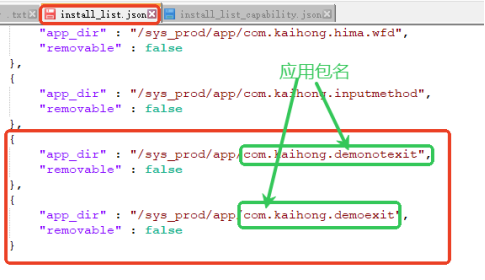
hdc file recv /etc/app/install_list_permissions.json .- install_list.json:配置默认安装应用列表
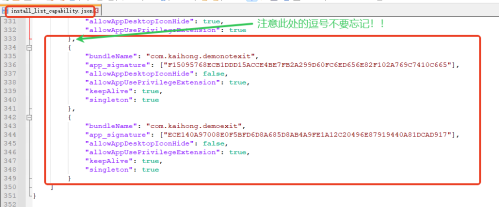
- install_list_capability.json:应用配置
- install_list_permissions.json:应用权限
在以上三个文件添加自己应用的配置信息(需要服务 bundleName 和 finger)。
本文档只是演示,故 install_list_permissions.json 不做修改,如果需要授予敏感权限,可在该文件中配置。
将修改后的文件推入系统,然后重启。

3. 安装应用 hap 包
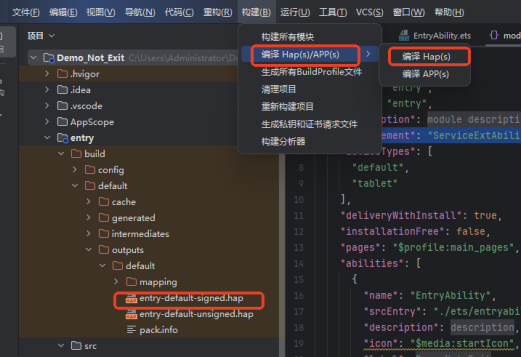
构建编译 hap
bat 方式推入安装服务应用 hap 包
hdc.exe shell mount -o remount,rw /
hdc.exe shell rm -rf /system/app/com.kaihong.demonotexit
hdc.exe shell mkdir /system/app/com.kaihong.demonotexit
hdc.exe file send demonotexit.hap /system/app/com.kaihong.demonotexit
hdc shell chmod 777 system/app/com.kaihong.demonotexit/demonotexit.hap
hdc shell bm install -r -p system/app/com.kaihong.demonotexit/demonotexit.hap -u 0
pause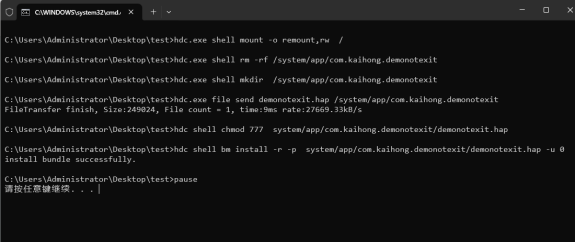
重启设备
4. 验证
设备重启后,查看应用的界面是否被拉起即可。

开源鸿蒙跨平台开发社区汇聚开发者与厂商,共建“一次开发,多端部署”的开源生态,致力于降低跨端开发门槛,推动万物智联创新。
更多推荐

 3
3 0
0- 0


 已为社区贡献2条内容

所有评论(0)