Flutter OpenHarmony 三方库 qrcode_flutter 二维码生成与扫描适配详解
功能说明相机扫码实时从相机摄像头扫描二维码相册识别从相册图片中识别二维码闪光灯控制控制相机闪光灯的开关暂停/恢复暂停和恢复扫码功能库为 Flutter 应用提供了完整的二维码处理功能,在 OpenHarmony 平台上已经完成了完整适配。:核心控制器,管理扫码生命周期:相机预览视图,可嵌入任意 Widget 树闪光灯控制:通过torchMode控制闪光灯开关暂停/恢复:灵活控制扫码状态相册识别:从
欢迎加入开源鸿蒙跨平台社区:https://openharmonycrossplatform.csdn.net
1. 引言
在 Flutter 应用开发中,二维码功能是一个常见需求,包括二维码生成和二维码扫描。qrcode_flutter 是一个功能完善的二维码处理库,支持从相机实时扫描二维码、从相册图片中识别二维码,以及闪光灯控制等功能。在 OpenHarmony 平台上,该库已经完成了适配工作,开发者可以直接引入使用。
本文将详细介绍 qrcode_flutter 库在 OpenHarmony 环境下的使用方法,包括核心 API 讲解、完整的应用级示例代码,以及常见问题解答。
当前环境说明:
- Flutter 版本:3.27.5
- HarmonyOS 版本:6.0
- qrcode_flutter 版本:3.0.0(OpenHarmony 适配版)
源码仓库:
- OpenHarmony 适配版本:https://atomgit.com/openharmony-sig/fluttertpc_qrcode_flutter.git
2. qrcode_flutter 库概述
2.1 库简介
qrcode_flutter 是一个二维码处理库,提供了以下核心功能:
| 功能 | 说明 |
|---|---|
| 相机扫码 | 实时从相机摄像头扫描二维码 |
| 相册识别 | 从相册图片中识别二维码 |
| 闪光灯控制 | 控制相机闪光灯的开关 |
| 暂停/恢复 | 暂停和恢复扫码功能 |
2.2 引入方式
在 pubspec.yaml 文件中添加以下依赖配置:
dependencies:
  qrcode_flutter_ohos:
    git:
      url: https://atomgit.com/openharmony-sig/fluttertpc_qrcode_flutter.git
      path: ohos
      ref: master
  image_picker:
    git:
      url: https://atomgit.com/openharmony-tpc/flutter_packages.git
      path: packages/image_picker/image_picker
说明:
- OpenHarmony 版本需要使用
ohos路径下的代码- 导入时使用
package:qrcode_flutter_ohos/qrcode_flutter_ohos.dart- 相册识别功能需要配合
image_picker库使用
3. 核心 API 讲解
3.1 QRCaptureController - 扫码控制器
QRCaptureController 是二维码扫描的核心控制类,负责管理相机扫码的整个生命周期。它通过平台接口(Platform Interface)与底层 OpenHarmony 相机模块进行通信,实现扫码功能的控制。
构造函数
QRCaptureController()
说明: 构造函数无参数,创建一个扫码控制器实例。内部会自动初始化平台接口实例。
核心方法详解
pause() - 暂停扫码
void pause()
功能: 暂停相机扫码功能,停止识别二维码。调用后相机预览仍然显示,但不再处理识别逻辑。
使用场景:
- 用户切换到其他页面时暂停扫码
- 从相册选择图片时暂停实时扫码
- 避免重复触发扫码回调
使用示例:
QRCaptureController _controller = QRCaptureController();

// 暂停扫码
_controller.pause();
resume() - 恢复扫码
void resume()
功能: 在调用 pause() 后恢复扫码功能,重新启动二维码识别逻辑。
使用场景:
- 用户返回扫码页面时恢复扫码
- 相册选择完成后恢复实时扫码
- 暂停操作完成后继续扫码
使用示例:
// 恢复扫码
_controller.resume();
dispose() - 停止扫码并释放资源
void dispose()
功能: 完全停止扫码功能,释放相机资源。在页面销毁时必须调用,避免内存泄漏。
使用场景:
- 页面销毁时释放相机资源
- 不再需要扫码功能时清理资源
使用示例:
void dispose() {
_controller.dispose();
super.dispose();
}
onCapture() - 设置扫码回调
void onCapture(CaptureCallback capture)
参数说明:
| 参数 | 类型 | 说明 |
|---|---|---|
capture |
CaptureCallback |
扫码结果回调函数,接收识别到的二维码内容字符串 |
功能: 设置扫码结果回调函数。当相机识别到二维码时,会调用该回调函数并传入二维码内容。
回调函数签名:
typedef CaptureCallback = Function(String data);
data: 识别到的二维码内容字符串
使用示例:
_controller.onCapture((data) {
  print('扫码结果: $data');
  setState(() {
    _captureText = data;
  });
});
getQrCodeByImagePath() - 从图片识别二维码(静态方法)
static Future<List<String>> getQrCodeByImagePath(String path)
参数说明:
| 参数 | 类型 | 说明 |
|---|---|---|
path |
String |
图片文件路径 |
返回值: Future<List<String>> - 识别到的二维码内容列表。一张图片可能包含多个二维码。
功能: 从指定路径的图片中识别二维码。支持从相册选择的图片进行二维码识别。
使用示例:
final ImagePicker picker = ImagePicker();
final XFile? image = await picker.pickImage(source: ImageSource.gallery);
if (image != null) {
  var qrCodeResult = await QRCaptureController.getQrCodeByImagePath(image.path);
  setState(() {
    _captureText = qrCodeResult.join('\n');
  });
}
核心属性详解
torchMode - 闪光灯控制
set torchMode(CaptureTorchMode mode)
类型: CaptureTorchMode
功能: 控制相机闪光灯的开关。通过设置该属性可以打开或关闭闪光灯。
使用示例:
// 打开闪光灯
_controller.torchMode = CaptureTorchMode.on;

// 关闭闪光灯
_controller.torchMode = CaptureTorchMode.off;

// 切换闪光灯
bool _isTorchOn = false;
void _toggleTorch() {
  _isTorchOn = !_isTorchOn;
  _controller.torchMode = _isTorchOn ? CaptureTorchMode.on : CaptureTorchMode.off;
}
3.2 QRCaptureView - 相机预览视图
QRCaptureView 是一个 StatelessWidget,用于展示相机预览画面。它通过 Platform View 技术将原生相机视图嵌入到 Flutter Widget 树中,可以在应用中自定义相机显示位置和大小。
构造函数
const QRCaptureView({
  Key? key,
  required this.controller,
})
参数详解
| 参数 | 类型 | 必填 | 默认值 | 说明 |
|---|---|---|---|---|
key |
Key? |
否 | null |
Widget 的键,用于 Flutter 框架的 Widget 复用机制 |
controller |
QRCaptureController |
是 | 无 | 扫码控制器,控制相机的扫码行为 |
使用示例
// 固定大小的相机预览
Container(
  width: 300,
  height: 300,
  child: QRCaptureView(
    controller: _controller,
  ),
)

// 全屏相机预览
Expanded(
  child: QRCaptureView(
    controller: _controller,
  ),
)

// 自定义位置的相机预览
Positioned(
  top: 50,
  left: 50,
  right: 50,
  bottom: 50,
  child: QRCaptureView(
    controller: _controller,
  ),
)
3.3 CaptureTorchMode - 闪光灯模式枚举
CaptureTorchMode 是一个枚举类型,用于控制相机闪光灯的开关状态。
enum CaptureTorchMode {
  /// 打开闪光灯
  on,

  /// 关闭闪光灯
  off
}
枚举值说明
| 值 | 说明 | 使用场景 |
|---|---|---|
on |
打开闪光灯 | 光线不足的环境 |
off |
关闭闪光灯 | 光线充足的环境 |
使用示例
// 打开闪光灯
_controller.torchMode = CaptureTorchMode.on;

// 关闭闪光灯
_controller.torchMode = CaptureTorchMode.off;

// 根据环境自动切换(示例)
void _autoTorch() {
  // 实际应用中可以根据光线传感器数据自动切换
  _controller.torchMode = isDark ? CaptureTorchMode.on : CaptureTorchMode.off;
}
3.4 CaptureCallback - 扫码回调函数类型
CaptureCallback 是一个函数类型定义,用于声明扫码结果的回调函数签名。
typedef CaptureCallback = Function(String data);
参数说明
| 参数 | 类型 | 说明 |
|---|---|---|
data |
String |
识别到的二维码内容字符串 |
使用示例
// 基本用法
_controller.onCapture((data) {
  print('扫码结果: $data');
});

// 带状态更新的用法
_controller.onCapture((data) {
  setState(() {
    _captureText = data;
    _scanHistory.add(data);
  });
});

// 带暂停/恢复的用法
_controller.onCapture((data) {
  _controller.pause(); // 暂停,避免重复触发
  setState(() {
    _captureText = data;
  });
  // 延迟后恢复扫码
  Future.delayed(const Duration(seconds: 2), () {
    _controller.resume();
  });
});
4. 完整应用示例
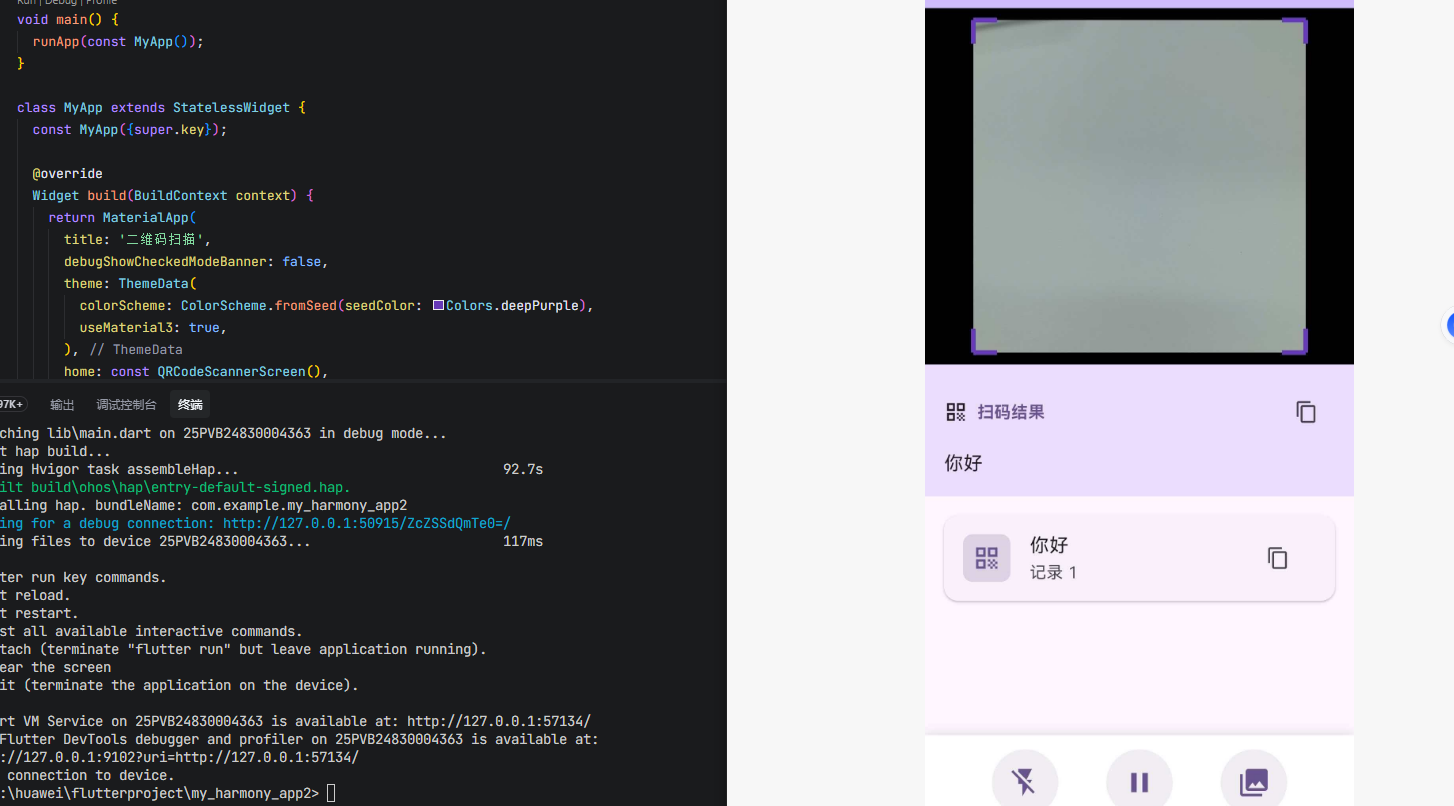
- 实时扫码:使用相机实时扫描二维码
- 相册识别:从相册中选择图片识别二维码
- 闪光灯控制:控制闪光灯的开关
- 暂停/恢复:暂停和恢复扫码功能
- 扫码历史:记录扫码历史并支持复制
import 'package:flutter/material.dart';
import 'package:qrcode_flutter_ohos/qrcode_flutter_ohos.dart';
import 'package:image_picker/image_picker.dart';
void main() {
runApp(const MyApp());
}
class MyApp extends StatelessWidget {
const MyApp({super.key});
Widget build(BuildContext context) {
return MaterialApp(
title: '二维码扫描',
debugShowCheckedModeBanner: false,
theme: ThemeData(
colorScheme: ColorScheme.fromSeed(seedColor: Colors.deepPurple),
useMaterial3: true,
),
home: const QRCodeScannerScreen(),
);
}
}
class QRCodeScannerScreen extends StatefulWidget {
const QRCodeScannerScreen({super.key});
State<QRCodeScannerScreen> createState() => _QRCodeScannerScreenState();
}
class _QRCodeScannerScreenState extends State<QRCodeScannerScreen> {
final QRCaptureController _controller = QRCaptureController();
final ImagePicker _picker = ImagePicker();
String _captureText = '';
bool _isTorchOn = false;
bool _isPaused = false;
final List<String> _scanHistory = [];
void initState() {
super.initState();
_controller.onCapture((data) {
debugPrint('扫码结果: $data');
setState(() {
_captureText = data;
if (!_scanHistory.contains(data)) {
_scanHistory.add(data);
}
});
});
}
void dispose() {
_controller.dispose();
super.dispose();
}
Future<void> _pickImageFromGallery() async {
_controller.pause();
setState(() => _isPaused = true);
try {
final XFile? image = await _picker.pickImage(source: ImageSource.gallery);
if (image != null) {
var qrCodeResult = await QRCaptureController.getQrCodeByImagePath(image.path);
setState(() {
_captureText = qrCodeResult.join('\n');
for (var result in qrCodeResult) {
if (!_scanHistory.contains(result)) {
_scanHistory.add(result);
}
}
});
}
} catch (e) {
debugPrint('相册识别二维码失败: $e');
if (mounted) {
ScaffoldMessenger.of(context).showSnackBar(
const SnackBar(content: Text('相册识别二维码失败')),
);
}
}
_controller.resume();
setState(() => _isPaused = false);
}
void _toggleTorch() {
setState(() {
_isTorchOn = !_isTorchOn;
_controller.torchMode =
_isTorchOn ? CaptureTorchMode.on : CaptureTorchMode.off;
});
}
void _togglePause() {
setState(() {
_isPaused = !_isPaused;
if (_isPaused) {
_controller.pause();
} else {
_controller.resume();
}
});
}
void _copyToClipboard() {
if (_captureText.isNotEmpty) {
ScaffoldMessenger.of(context).showSnackBar(
SnackBar(content: Text('已复制: $_captureText')),
);
}
}
void _clearHistory() {
setState(() {
_scanHistory.clear();
_captureText = '';
});
}
Widget build(BuildContext context) {
return Scaffold(
appBar: AppBar(
title: const Text('二维码扫描'),
backgroundColor: Theme.of(context).colorScheme.inversePrimary,
actions: [
IconButton(
icon: const Icon(Icons.photo_library),
tooltip: '从相册选择',
onPressed: _pickImageFromGallery,
),
IconButton(
icon: const Icon(Icons.delete_sweep),
tooltip: '清空记录',
onPressed: _clearHistory,
),
],
),
body: Column(
children: [
// 相机预览区域
Container(
width: double.infinity,
height: 300,
color: Colors.black,
child: Stack(
alignment: Alignment.center,
children: [
// 相机预览
SizedBox(
width: 280,
height: 280,
child: QRCaptureView(controller: _controller),
),
// 扫描框装饰
CustomPaint(
size: const Size(280, 280),
painter: _ScannerOverlayPainter(),
),
// 暂停提示
if (_isPaused)
Container(
color: Colors.black54,
child: const Center(
child: Text(
'已暂停',
style: TextStyle(
color: Colors.white,
fontSize: 24,
fontWeight: FontWeight.bold,
),
),
),
),
],
),
),
// 扫码结果
if (_captureText.isNotEmpty)
Container(
width: double.infinity,
padding: const EdgeInsets.all(16),
color: Theme.of(context).colorScheme.primaryContainer,
child: Column(
crossAxisAlignment: CrossAxisAlignment.start,
children: [
Row(
children: [
const Icon(Icons.qr_code, size: 20),
const SizedBox(width: 8),
Text(
'扫码结果',
style: TextStyle(
fontWeight: FontWeight.bold,
color: Theme.of(context).colorScheme.primary,
),
),
const Spacer(),
IconButton(
icon: const Icon(Icons.copy, size: 20),
onPressed: _copyToClipboard,
tooltip: '复制',
),
],
),
const SizedBox(height: 8),
SelectableText(
_captureText,
style: const TextStyle(fontSize: 16),
),
],
),
),
// 扫码历史
Expanded(
child: _scanHistory.isEmpty
? const Center(
child: Column(
mainAxisAlignment: MainAxisAlignment.center,
children: [
Icon(Icons.qr_code_scanner, size: 60, color: Colors.grey),
SizedBox(height: 16),
Text(
'将二维码放入框内即可自动扫描',
style: TextStyle(color: Colors.grey, fontSize: 16),
),
],
),
)
: ListView.builder(
padding: const EdgeInsets.all(16),
itemCount: _scanHistory.length,
itemBuilder: (context, index) {
return Card(
margin: const EdgeInsets.only(bottom: 8),
child: ListTile(
leading: Container(
width: 40,
height: 40,
decoration: BoxDecoration(
color: Theme.of(context)
.colorScheme
.primary
.withOpacity(0.2),
borderRadius: BorderRadius.circular(8),
),
child: Icon(
Icons.qr_code,
color: Theme.of(context).colorScheme.primary,
),
),
title: Text(
_scanHistory[index],
maxLines: 2,
overflow: TextOverflow.ellipsis,
),
subtitle: Text('记录 ${index + 1}'),
trailing: IconButton(
icon: const Icon(Icons.copy, size: 20),
onPressed: () {
ScaffoldMessenger.of(context).showSnackBar(
SnackBar(
content:
Text('已复制: ${_scanHistory[index]}')),
);
},
),
),
);
},
),
),
// 底部控制栏
Container(
padding: const EdgeInsets.symmetric(horizontal: 16, vertical: 12),
decoration: BoxDecoration(
color: Colors.white,
boxShadow: [
BoxShadow(
color: Colors.black.withOpacity(0.1),
blurRadius: 8,
offset: const Offset(0, -2),
),
],
),
child: Row(
mainAxisAlignment: MainAxisAlignment.spaceEvenly,
children: [
_buildControlButton(
icon: _isTorchOn ? Icons.flash_on : Icons.flash_off,
label: '闪光灯',
isActive: _isTorchOn,
onPressed: _toggleTorch,
),
_buildControlButton(
icon: _isPaused ? Icons.play_arrow : Icons.pause,
label: _isPaused ? '恢复' : '暂停',
isActive: _isPaused,
onPressed: _togglePause,
),
_buildControlButton(
icon: Icons.photo_library,
label: '相册',
isActive: false,
onPressed: _pickImageFromGallery,
),
],
),
),
],
),
);
}
Widget _buildControlButton({
required IconData icon,
required String label,
required bool isActive,
required VoidCallback onPressed,
}) {
return GestureDetector(
onTap: onPressed,
child: Column(
mainAxisSize: MainAxisSize.min,
children: [
Container(
width: 56,
height: 56,
decoration: BoxDecoration(
color: isActive
? Theme.of(context).colorScheme.primary
: Theme.of(context).colorScheme.primary.withOpacity(0.1),
shape: BoxShape.circle,
),
child: Icon(
icon,
color: isActive
? Colors.white
: Theme.of(context).colorScheme.primary,
size: 28,
),
),
const SizedBox(height: 4),
Text(
label,
style: TextStyle(
fontSize: 12,
color: isActive
? Theme.of(context).colorScheme.primary
: Colors.grey[600],
),
),
],
),
);
}
}
// 扫描框装饰绘制器
class _ScannerOverlayPainter extends CustomPainter {
void paint(Canvas canvas, Size size) {
final cornerLength = 20.0;
final cornerPaint = Paint()
..color = Colors.deepPurple
..strokeWidth = 4
..style = PaintingStyle.stroke;
// 左上角
canvas.drawLine(
Offset(0, cornerLength),
Offset(0, 0),
cornerPaint,
);
canvas.drawLine(
Offset(0, 0),
Offset(cornerLength, 0),
cornerPaint,
);
// 右上角
canvas.drawLine(
Offset(size.width - cornerLength, 0),
Offset(size.width, 0),
cornerPaint,
);
canvas.drawLine(
Offset(size.width, 0),
Offset(size.width, cornerLength),
cornerPaint,
);
// 左下角
canvas.drawLine(
Offset(0, size.height - cornerLength),
Offset(0, size.height),
cornerPaint,
);
canvas.drawLine(
Offset(0, size.height),
Offset(cornerLength, size.height),
cornerPaint,
);
// 右下角
canvas.drawLine(
Offset(size.width - cornerLength, size.height),
Offset(size.width, size.height),
cornerPaint,
);
canvas.drawLine(
Offset(size.width, size.height - cornerLength),
Offset(size.width, size.height),
cornerPaint,
);
}
bool shouldRepaint(covariant CustomPainter oldDelegate) => false;
}
5. 常见问题解答
Q1: 如何限制扫码框的大小和位置?
解决方案: 使用 Container 或 SizedBox 包裹 QRCaptureView:
Container(
  width: 300,
  height: 300,
  child: QRCaptureView(controller: _controller),
)
Q2: 如何从相册中识别二维码?
解决方案: 使用 getQrCodeByImagePath 静态方法:
final ImagePicker picker = ImagePicker();
final XFile? image = await picker.pickImage(source: ImageSource.gallery);
if (image != null) {
  var qrCodeResult = await QRCaptureController.getQrCodeByImagePath(image.path);
  // qrCodeResult 是 List<String>,包含识别到的所有二维码内容
}
Q3: 如何控制闪光灯?
解决方案: 使用 torchMode 属性:
// 打开闪光灯
_controller.torchMode = CaptureTorchMode.on;

// 关闭闪光灯
_controller.torchMode = CaptureTorchMode.off;
Q4: 如何暂停和恢复扫码?
解决方案:
// 暂停扫码
_controller.pause();

// 恢复扫码
_controller.resume();
Q5: 如何释放相机资源?
解决方案: 在 dispose() 中调用:
void dispose() {
_controller.dispose();
super.dispose();
}
Q6: 扫码回调会被多次触发怎么办?
解决方案: 可以在回调中暂停扫码,处理完后再恢复:
_controller.onCapture((data) {
  _controller.pause(); // 暂停,避免重复触发

  // 处理扫码结果
  setState(() {
    _captureText = data;
  });

  // 延迟后恢复扫码
  Future.delayed(const Duration(seconds: 2), () {
    _controller.resume();
  });
});
Q7: qrcode_flutter 在 OpenHarmony 上有哪些已知问题?
目前 qrcode_flutter 库在 OpenHarmony 平台上运行正常,需要注意:
- 相机权限:需要在
module.json5中配置相机权限 - 相册权限:需要在
module.json5中配置媒体读取权限 - 导入路径:OpenHarmony 版本使用
package:qrcode_flutter_ohos/qrcode_flutter_ohos.dart
6. 总结
qrcode_flutter 库为 Flutter 应用提供了完整的二维码处理功能,在 OpenHarmony 平台上已经完成了完整适配。通过本文的介绍,我们学习了:
- QRCaptureController:核心控制器,管理扫码生命周期
- QRCaptureView:相机预览视图,可嵌入任意 Widget 树
- 闪光灯控制:通过
torchMode控制闪光灯开关 - 暂停/恢复:灵活控制扫码状态
- 相册识别:从图片中识别二维码
- 扫码回调:实时获取扫码结果
qrcode_flutter 提供了简单易用的 API,可以快速集成二维码扫描和识别功能到应用中。在实际开发中,建议合理处理权限配置和错误情况,为用户提供流畅的扫码体验。

开源鸿蒙跨平台开发社区汇聚开发者与厂商,共建“一次开发,多端部署”的开源生态,致力于降低跨端开发门槛,推动万物智联创新。
更多推荐


 15
15 0
0- 0


 已为社区贡献55条内容

所有评论(0)