基于React Native 搭建 HarmonyOS-GitCode口袋工具-1
本文记录了使用React Native开发HarmonyOS应用的流程,包括搭建文件结构、创建底部导航栏组件、配置页面路由以及实现GitCode用户信息接口请求。重点介绍了如何创建BottomTab组件、AppRoot导航容器以及Home/Explore/Settings三个页面,并说明了接口请求的实现过程,包括axios安装、用户类型定义和API调用。文章还提供了开发过程中遇到的错误(错误码95
本文参考
开源鸿蒙-基于React搭建GitCode口袋工具-1-CSDN博客
【开源鸿蒙跨平台开发学习笔记】Day03:React Native 开发 HarmonyOS-GitCode口袋工具开发-1-CSDN博客
本文记录操作流程以及遇到的问题
一、前期准备
1.搭建文件结构
1.1 用到的文件和作用
需要用到搭建React鸿蒙的环境时得到的"AwesomePorject"文件。
各个文件的作用可以看这篇文章
开源鸿蒙-基于React搭建GitCode口袋工具-1-CSDN博客
在AwesomePorject文件夹上创建src文件夹,AwesomeProject\src路径下添加以下文件夹
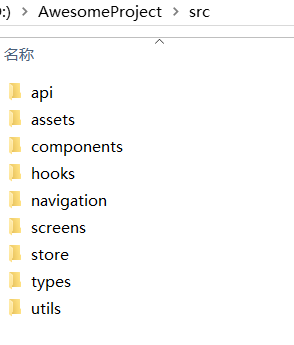
在components文件夹下,新建BottomTab.tsx文件,添加以下内容:
import React from 'react';
import {View, Pressable, Text, StyleSheet} from 'react-native';

export interface TabItem {
  key: string;
  title: string;
}

export interface BottomTabBarProps {
  tabs: TabItem[];
  activeKey: string;
  onTabPress: (key: string) => void;
}

export function BottomTabBar({tabs, activeKey, onTabPress}: BottomTabBarProps) {
  return (
    <View style={styles.tabBar}>
      {tabs.map(tab => {
        const isActive = tab.key === activeKey;
        return (
          <Pressable
            key={tab.key}
            onPress={() => onTabPress(tab.key)}
            style={[styles.tabItem, isActive ? styles.tabItemActive : null]}
          >
            <Text style={[styles.tabText, isActive ? styles.tabTextActive : null]}>
              {tab.title}
            </Text>
          </Pressable>
        );
      })}
    </View>
  );
}

const styles = StyleSheet.create({
  tabBar: {
    flexDirection: 'row',
    borderTopWidth: 1,
    borderTopColor: '#E5E7EB',
    backgroundColor: '#F9FAFB',
  },
  tabItem: {flex: 1, paddingVertical: 12, alignItems: 'center'},
  tabItemActive: {backgroundColor: '#EEF2FF'},
  tabText: {fontSize: 14, color: '#374151'},
  tabTextActive: {color: '#1F2937', fontWeight: '600'},
});
在navigation文件夹下,新建AppRoot.tsx文件,添加以下内容:
import React, {useMemo, useState} from 'react';
import {SafeAreaView, View, StyleSheet} from 'react-native';
import {BottomTabBar, TabItem} from '../components/BottomTab';
import {HomeScreen} from '../screens/HomeScreen';
import {ExploreScreen} from '../screens/ExploreScreen'; // 1. 导入探索页面
import {SettingsScreen} from '../screens/SettingsScreen';

export function AppRoot() {
  const tabs: TabItem[] = [
    {key: 'home', title: '首页'},
    {key: 'explore', title: '探索'},
    {key: 'settings', title: '设置'},
  ];
  const [activeKey, setActiveKey] = useState(tabs[0].key);

  const ActiveComponent = useMemo(() => {
    if (activeKey === 'home') return HomeScreen;
    if (activeKey === 'explore') return ExploreScreen;
    if (activeKey === 'settings') return SettingsScreen;
    return HomeScreen;
  }, [activeKey]);

  return (
    <SafeAreaView style={styles.container}>
      <View style={styles.content}>
        <ActiveComponent />
      </View>
      <BottomTabBar tabs={tabs} activeKey={activeKey} onTabPress={setActiveKey} />
    </SafeAreaView>
  );
}

const styles = StyleSheet.create({
  container: {flex: 1, backgroundColor: '#FFFFFF'},
  content: {flex: 1, alignItems: 'center', justifyContent: 'center'},
});
在screens文件夹下新建ExploreScreen.tsx、HomeScreen.tsx、SettingsScreen.tsx三个文件
分别添加以下内容:
ExploreScreen.tsx
// ../screens/ExploreScreen.js
import React from 'react';
import { View, Text, StyleSheet } from 'react-native';

export function ExploreScreen() {
  return (
    <View style={styles.container}>
      <Text>探索</Text>
    </View>
  );
}

const styles = StyleSheet.create({
  container: {
    flex: 1,
    alignItems: 'center',
    justifyContent: 'center',
  },
});
HomeScreen.tsx
import React from 'react';
import {View, Text, StyleSheet} from 'react-native';

interface HomeScreenProps {}

export function HomeScreen(_: HomeScreenProps) {
  return (
    <View style={styles.container}>
      <Text style={styles.title}>Hello World</Text>
      <Text style={styles.subTitle}>React Native + Harmony</Text>
    </View>
  );
}

const styles = StyleSheet.create({
  container: {alignItems: 'center', justifyContent: 'center'},
  title: {fontSize: 22, fontWeight: '700', color: '#111827'},
  subTitle: {marginTop: 8, fontSize: 16, color: '#374151'},
});
SettingsScreen.tsx
import React from 'react';
import {View, Text, StyleSheet} from 'react-native';

interface SettingsScreenProps {}

export function SettingsScreen(_: SettingsScreenProps) {
  return (
    <View style={styles.container}>
      <Text style={styles.title}>设置</Text>
      <Text style={styles.subTitle}>基础示例页面</Text>
    </View>
  );
}

const styles = StyleSheet.create({
  container: {alignItems: 'center', justifyContent: 'center'},
  title: {fontSize: 20, fontWeight: '600', color: '#111827'},
  subTitle: {marginTop: 8, fontSize: 14, color: '#4B5563'},
});
1.2 Harmony编译开发
在App.tsx配置入口文件。
把这些删了
/**
 * Sample React Native App
 * https://github.com/facebook/react-native
 *
 * @format
 */

import React from 'react';
import type {PropsWithChildren} from 'react';
import {
  SafeAreaView,
  ScrollView,
  StatusBar,
  StyleSheet,
  Text,
  useColorScheme,
  View,
} from 'react-native';

import {
  Colors,
  DebugInstructions,
  Header,
  LearnMoreLinks,
  ReloadInstructions,
} from 'react-native/Libraries/NewAppScreen';

type SectionProps = PropsWithChildren<{
  title: string;
}>;

function Section({children, title}: SectionProps): JSX.Element {
  const isDarkMode = useColorScheme() === 'dark';
  return (
    <View style={styles.sectionContainer}>
      <Text
        style={[
          styles.sectionTitle,
          {
            color: isDarkMode ? Colors.white : Colors.black,
          },
        ]}>
        {title}
      </Text>
      <Text
        style={[
          styles.sectionDescription,
          {
            color: isDarkMode ? Colors.light : Colors.dark,
          },
        ]}>
        {children}
      </Text>
    </View>
  );
}

function App(): JSX.Element {
  const isDarkMode = useColorScheme() === 'dark';

  const backgroundStyle = {
    backgroundColor: isDarkMode ? Colors.darker : Colors.lighter,
  };

  return (
    <SafeAreaView style={backgroundStyle}>
      <StatusBar
        barStyle={isDarkMode ? 'light-content' : 'dark-content'}
        backgroundColor={backgroundStyle.backgroundColor}
      />
      <ScrollView
        contentInsetAdjustmentBehavior="automatic"
        style={backgroundStyle}>
        <Header />
        <View
          style={{
            backgroundColor: isDarkMode ? Colors.black : Colors.white,
          }}>
          <Section title="Step One">
            Edit <Text style={styles.highlight}>App.tsx</Text> to change this
            screen and then come back to see your edits.
          </Section>
          <Section title="See Your Changes">
            <ReloadInstructions />
          </Section>
          <Section title="Debug">
            <DebugInstructions />
          </Section>
          <Section title="Learn More">
            Read the docs to discover what to do next:
          </Section>
          <LearnMoreLinks />
        </View>
      </ScrollView>
    </SafeAreaView>
  );
}

const styles = StyleSheet.create({
  sectionContainer: {
    marginTop: 32,
    paddingHorizontal: 24,
  },
  sectionTitle: {
    fontSize: 24,
    fontWeight: '600',
  },
  sectionDescription: {
    marginTop: 8,
    fontSize: 18,
    fontWeight: '400',
  },
  highlight: {
    fontWeight: '700',
  },
});

export default App;
添加如下内容:
import React from 'react';
import {AppRoot} from './src/navigation/AppRoot';

export default function App() {
  return <AppRoot />;
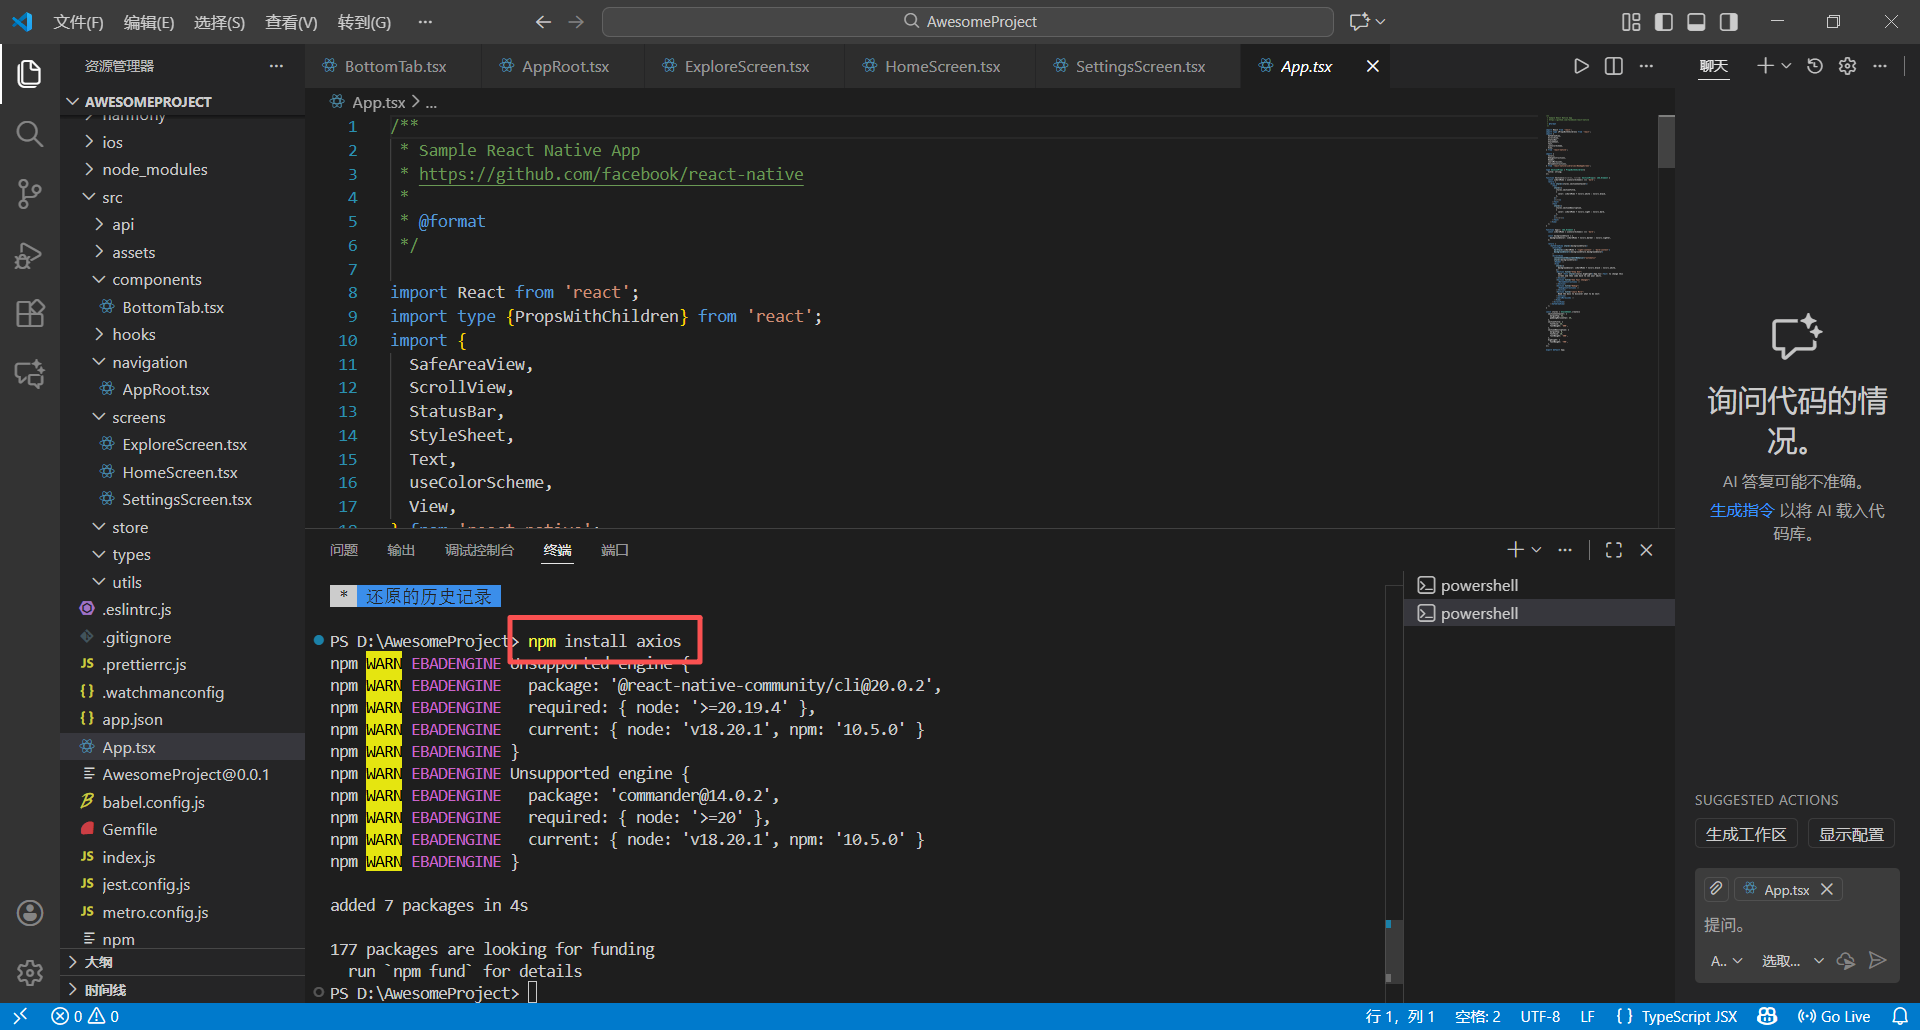
}新建终端后,执行"npm install axios"命令
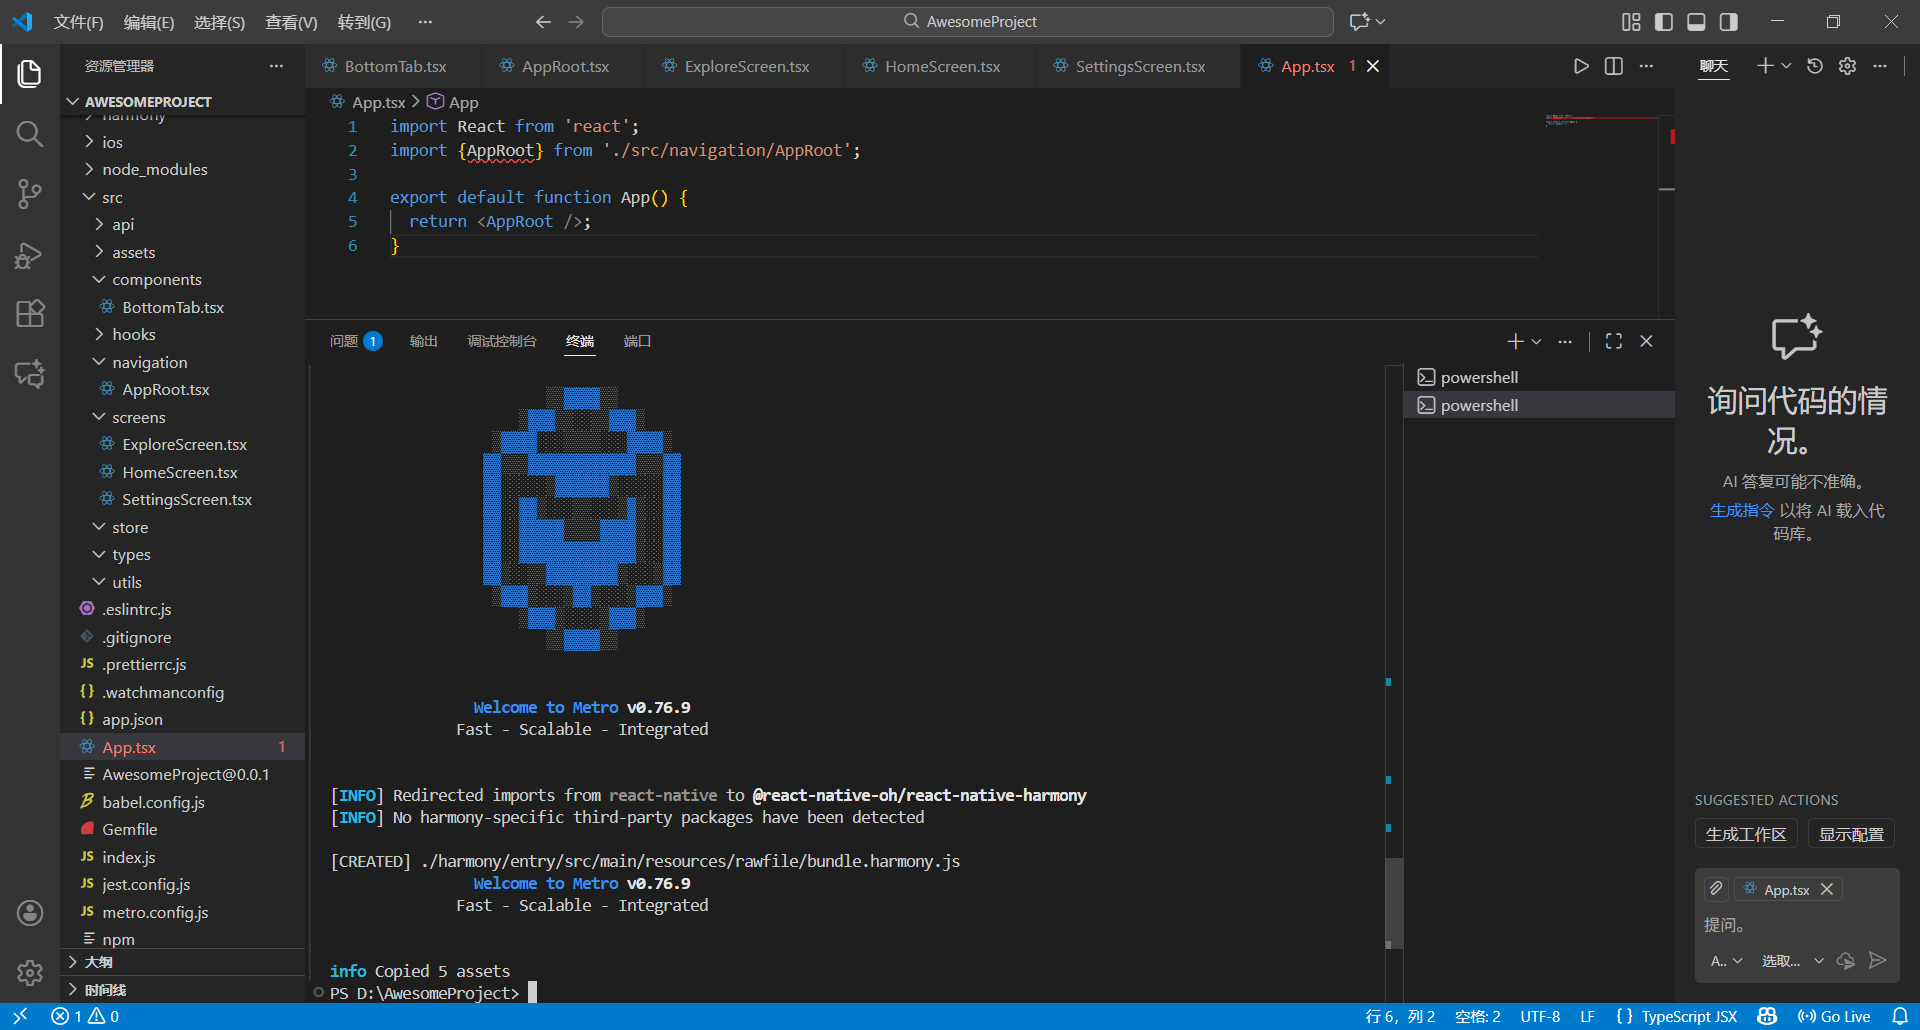
再执行:npm run dev
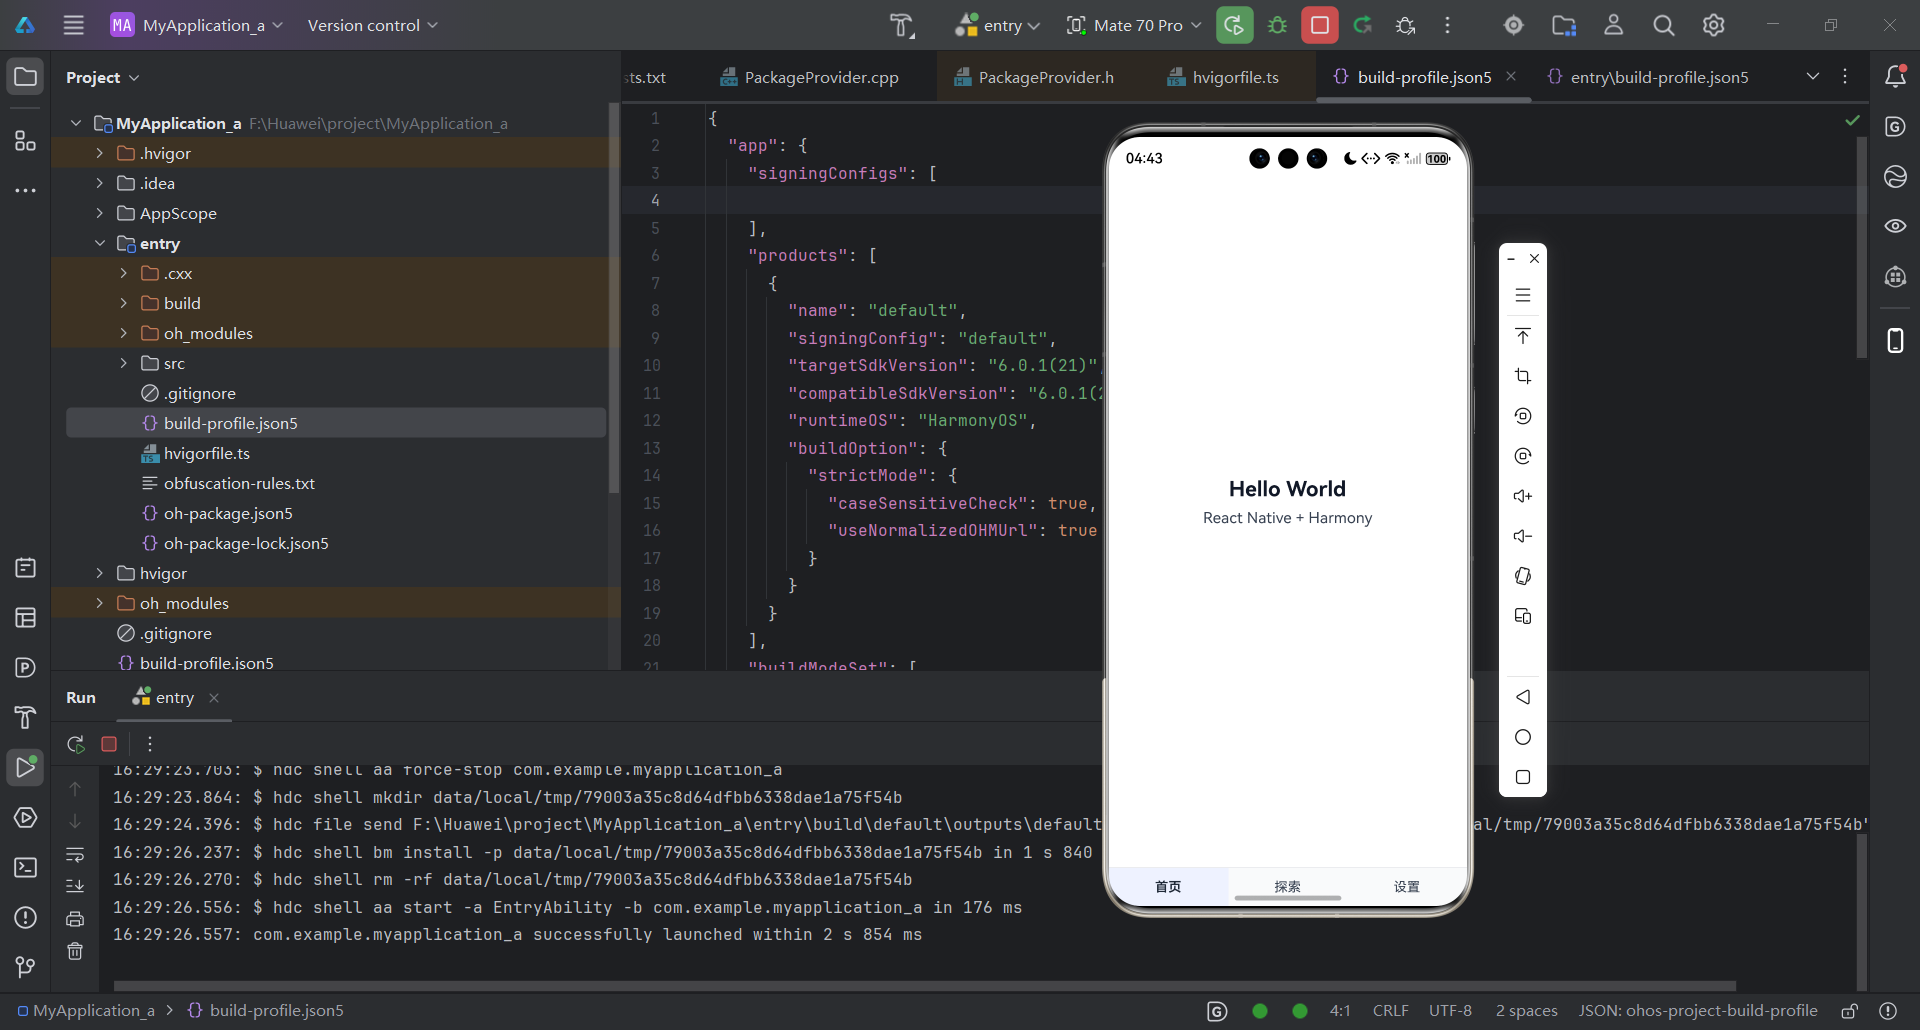
编译代码后我们需要用到harmony\entry\src\main\resources\rawfile\assets文件夹下的"bundle.harmony.js"文件。
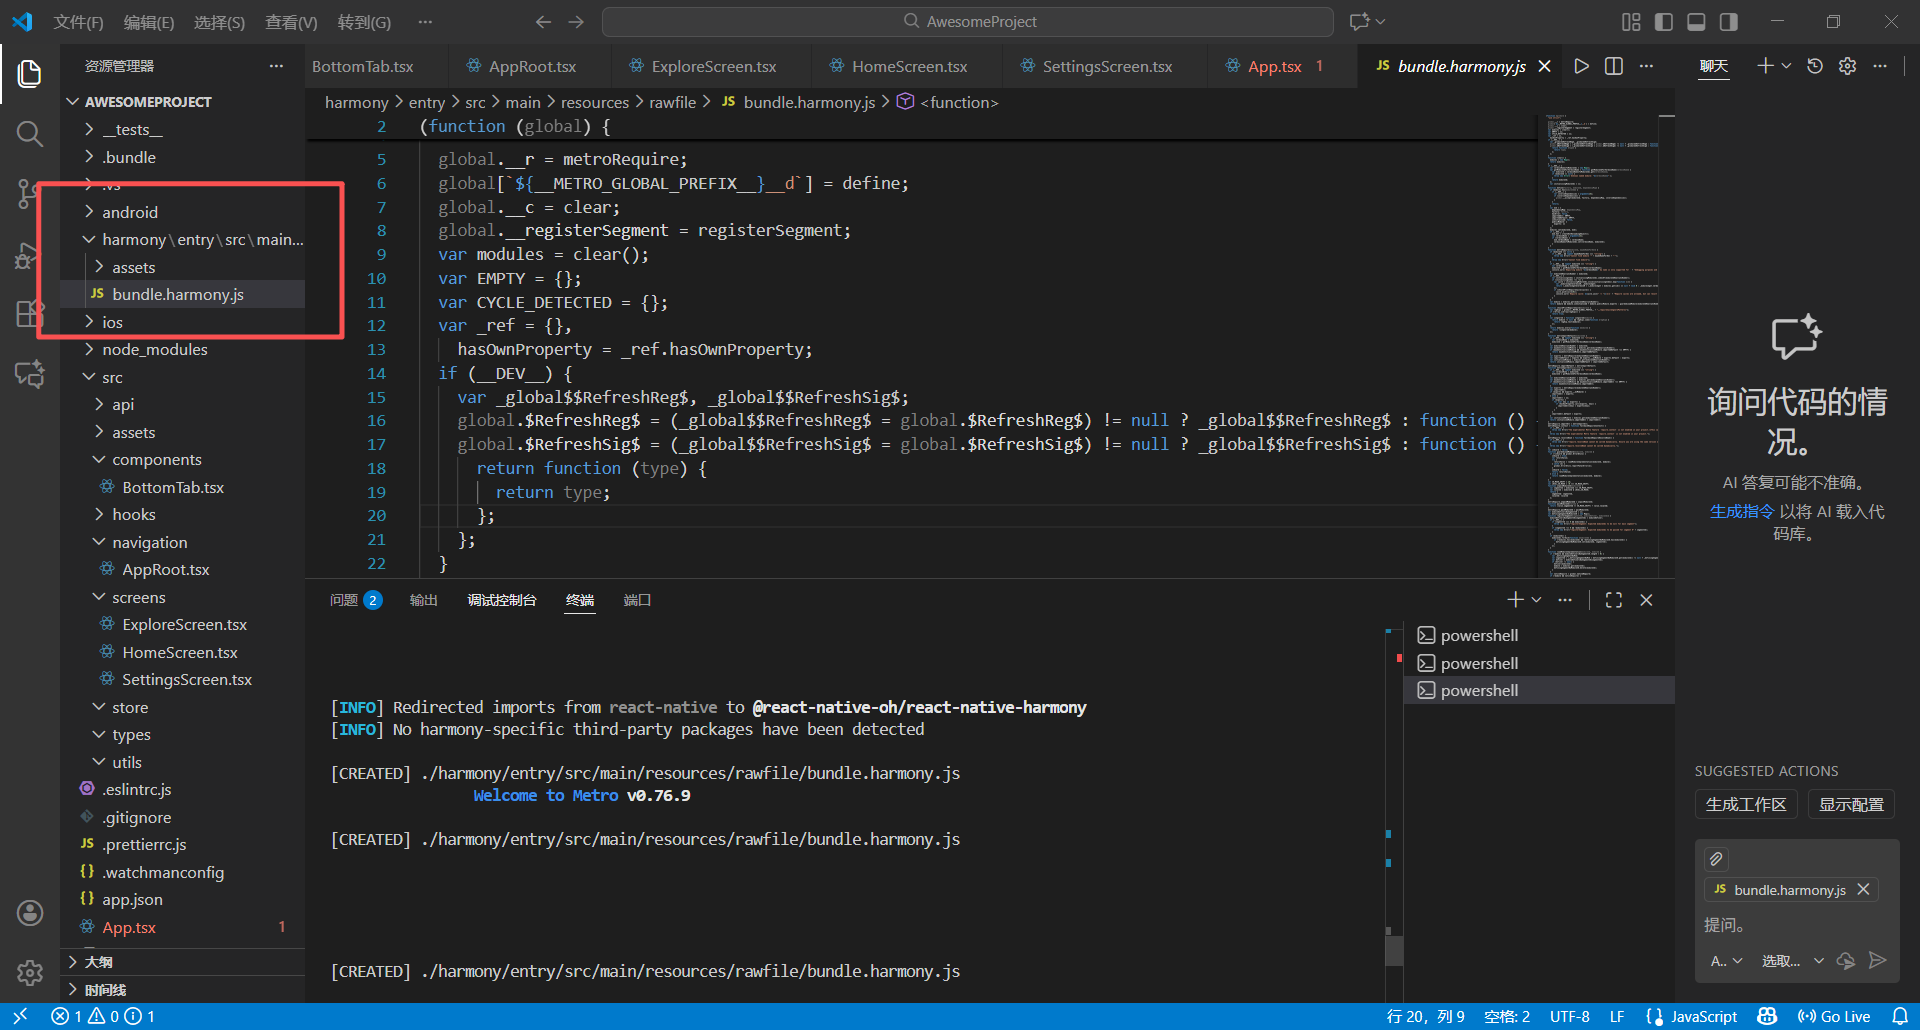
复制"bundle.harmony.js"文件到DevEco Studio的rawfile\assets文件夹下,然后选择"Overwrite"覆盖原来的文件。最后运行查看我们在React编写的代码
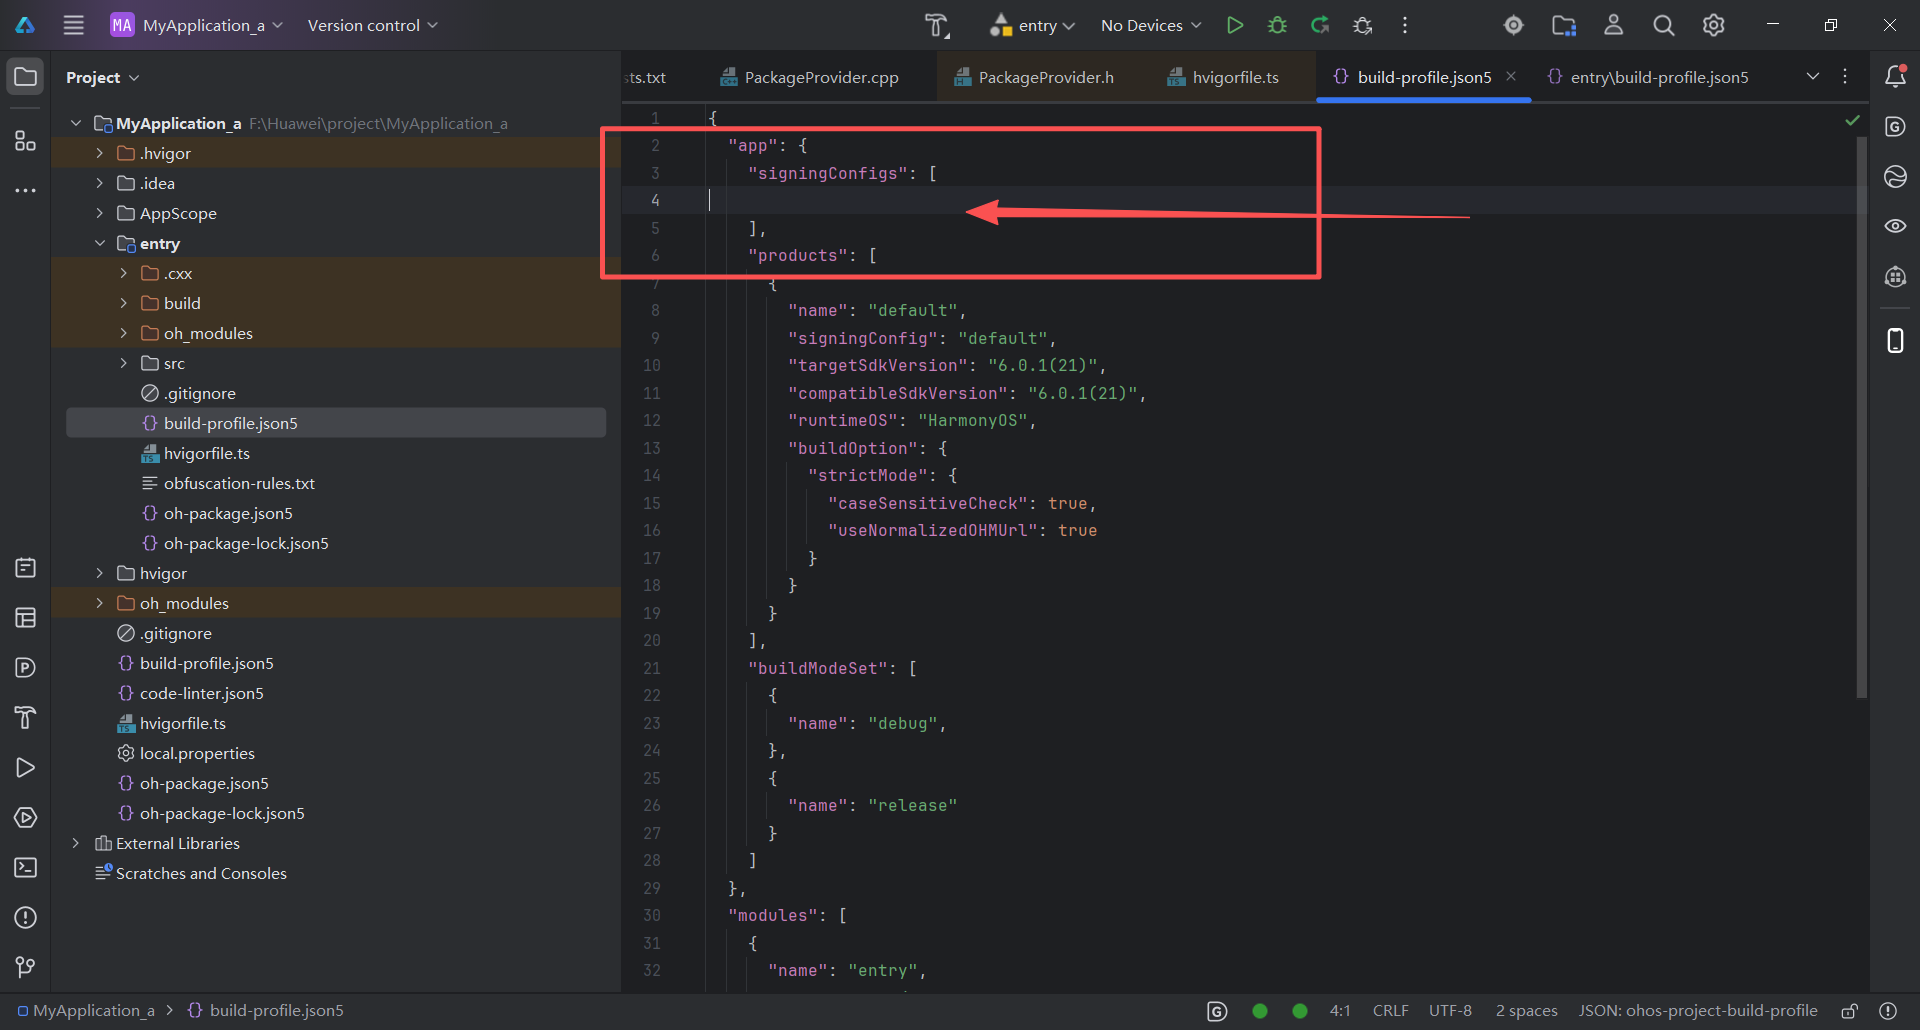
出现报错,错误码 9568332(忘记截图了)
解决方法:删掉我圈住的地方的内容
运行成功
二、请求接口
1. 改写代码
更改src/navigation文件夹下的"AppRoo.tsx"文件:
import React, {useMemo, useState} from 'react';
import {SafeAreaView, View, StyleSheet} from 'react-native';
import {BottomTabBar, TabItem} from '../components/BottomTabBar';
import {HomeScreen} from '../screens/HomeScreen';
import {ExploreScreen} from '../screens/ExploreScreen'; // 1. 导入探索页面
import {SettingsScreen} from '../screens/SettingsScreen';

export function AppRoot() {
  const tabs: TabItem[] = [
    {key: 'home', title: '首页'},
    {key: 'explore', title: '探索'},
    {key: 'settings', title: '设置'},
  ];
  const [activeKey, setActiveKey] = useState(tabs[0].key);

  const ActiveComponent = useMemo(() => {
    if (activeKey === 'home') return HomeScreen;
    if (activeKey === 'explore') return ExploreScreen;
    if (activeKey === 'settings') return SettingsScreen;
    return HomeScreen;
  }, [activeKey]);

  return (
    <SafeAreaView style={styles.container}>
      <View style={styles.content}>
        <ActiveComponent />
      </View>
      <BottomTabBar tabs={tabs} activeKey={activeKey} onTabPress={setActiveKey} />
    </SafeAreaView>
  );
}

const styles = StyleSheet.create({
  container: {flex: 1, backgroundColor: '#FFFFFF'},
  content: {flex: 1, alignItems: 'center', justifyContent: 'center'},
});
更改src/types/文件夹下的"user.tsx"文件,如果没有就新建一个:
export interface UserProfile {
  login: string;
  name?: string;
  type?: string;
  followers?: number;
  following?: number;
  avatar_url?: string;
  html_url?: string;
  bio?: string;
  [key: string]: unknown;
}
更改src/api文件夹下的"user.tsx"文件:
import axios from 'axios';
import {UserProfile} from '../types/user';

const BASE_URL = 'https://api.gitcode.com/api/v5/users';

export async function fetchUserProfile(username: string): Promise<UserProfile> {
  const res = await axios.get<UserProfile>(`${BASE_URL}/${encodeURIComponent(username)}`, {timeout: 10000});
  return res.data;
}
更改src/api文件夹下的"index.tsx"文件:
export * from './user';更改src/screens文件夹下的"ExploreScreen.tsx"文件:
import React, {useEffect, useState} from 'react';
import {View, Text, StyleSheet, Image, ActivityIndicator, ScrollView, TouchableOpacity, Linking} from 'react-native';
import {fetchUserProfile} from '../api';
import {UserProfile} from '../types/user';

interface ExploreScreenProps {
  username?: string;
}

export function ExploreScreen({username = 'weixin_74220422'}: ExploreScreenProps) {
  const [data, setData] = useState<UserProfile | null>(null);
  const [isLoading, setIsLoading] = useState<boolean>(false);
  const [hasError, setHasError] = useState<string>('');

  useEffect(function load() {
    let mounted = true;
    setIsLoading(true);
    setHasError('');
    fetchUserProfile(username)
      .then(d => {
        if (!mounted) return;
        setData(d);
      })
      .catch(e => {
        if (!mounted) return;
        setHasError(String(e?.message || e));
      })
      .finally(() => {
        if (!mounted) return;
        setIsLoading(false);
      });
    return function cleanup() {
      mounted = false;
    };
  }, [username]);

  if (isLoading) {
    return (
      <View style={styles.center}>
        <ActivityIndicator />
        <Text style={styles.loadingText}>加载中</Text>
      </View>
    );
  }

  if (hasError) {
    return (
      <View style={styles.center}>
        <Text style={styles.errorText}>请求失败:{hasError}</Text>
      </View>
    );
  }

  if (!data) {
    return (
      <View style={styles.center}>
        <Text style={styles.errorText}>暂无数据</Text>
      </View>
    );
  }

  return (
    <ScrollView contentContainerStyle={styles.scrollContent} style={styles.scroll}>
      <Image source={{uri: data.avatar_url}} style={styles.avatar} />
      <Text style={styles.title}>{data.name || data.login}</Text>
      <Text style={styles.subtitle}>类型:{data.type}</Text>
      <Text style={styles.subtitle}>粉丝:{data.followers},关注:{data.following}</Text>
      {Boolean(data.bio) && <Text style={styles.bio}>{data.bio}</Text>}
      <TouchableOpacity onPress={() => Linking.openURL(String(data.html_url))} style={styles.linkButton} activeOpacity={0.9}>
        <Text style={styles.linkText}>打开主页</Text>
      </TouchableOpacity>
    </ScrollView>
  );
}

const styles = StyleSheet.create({
  center: {flex: 1, alignItems: 'center', justifyContent: 'center', backgroundColor: '#FFFFFF'},
  loadingText: {marginTop: 8, fontSize: 14, color: '#666'},
  errorText: {fontSize: 14, color: '#d00'},
  scroll: {flex: 1, backgroundColor: '#FFFFFF'},
  scrollContent: {alignItems: 'center', paddingVertical: 24},
  avatar: {width: 120, height: 120, borderRadius: 60, backgroundColor: '#eee'},
  title: {marginTop: 16, fontSize: 24, fontWeight: '700'},
  subtitle: {marginTop: 8, fontSize: 16, color: '#666'},
  bio: {marginTop: 12, fontSize: 14, color: '#333', paddingHorizontal: 24, textAlign: 'center'},
  linkButton: {marginTop: 16, paddingHorizontal: 16, paddingVertical: 10, borderRadius: 6, backgroundColor: '#007aff'},
  linkText: {color: '#fff', fontSize: 14, fontWeight: '600'},
});
2.注意事项
src/screens文件夹下的"ExploreScreen.tsx"文件中,
把接口的id改成自己Gitcode的id(去掉@符号)
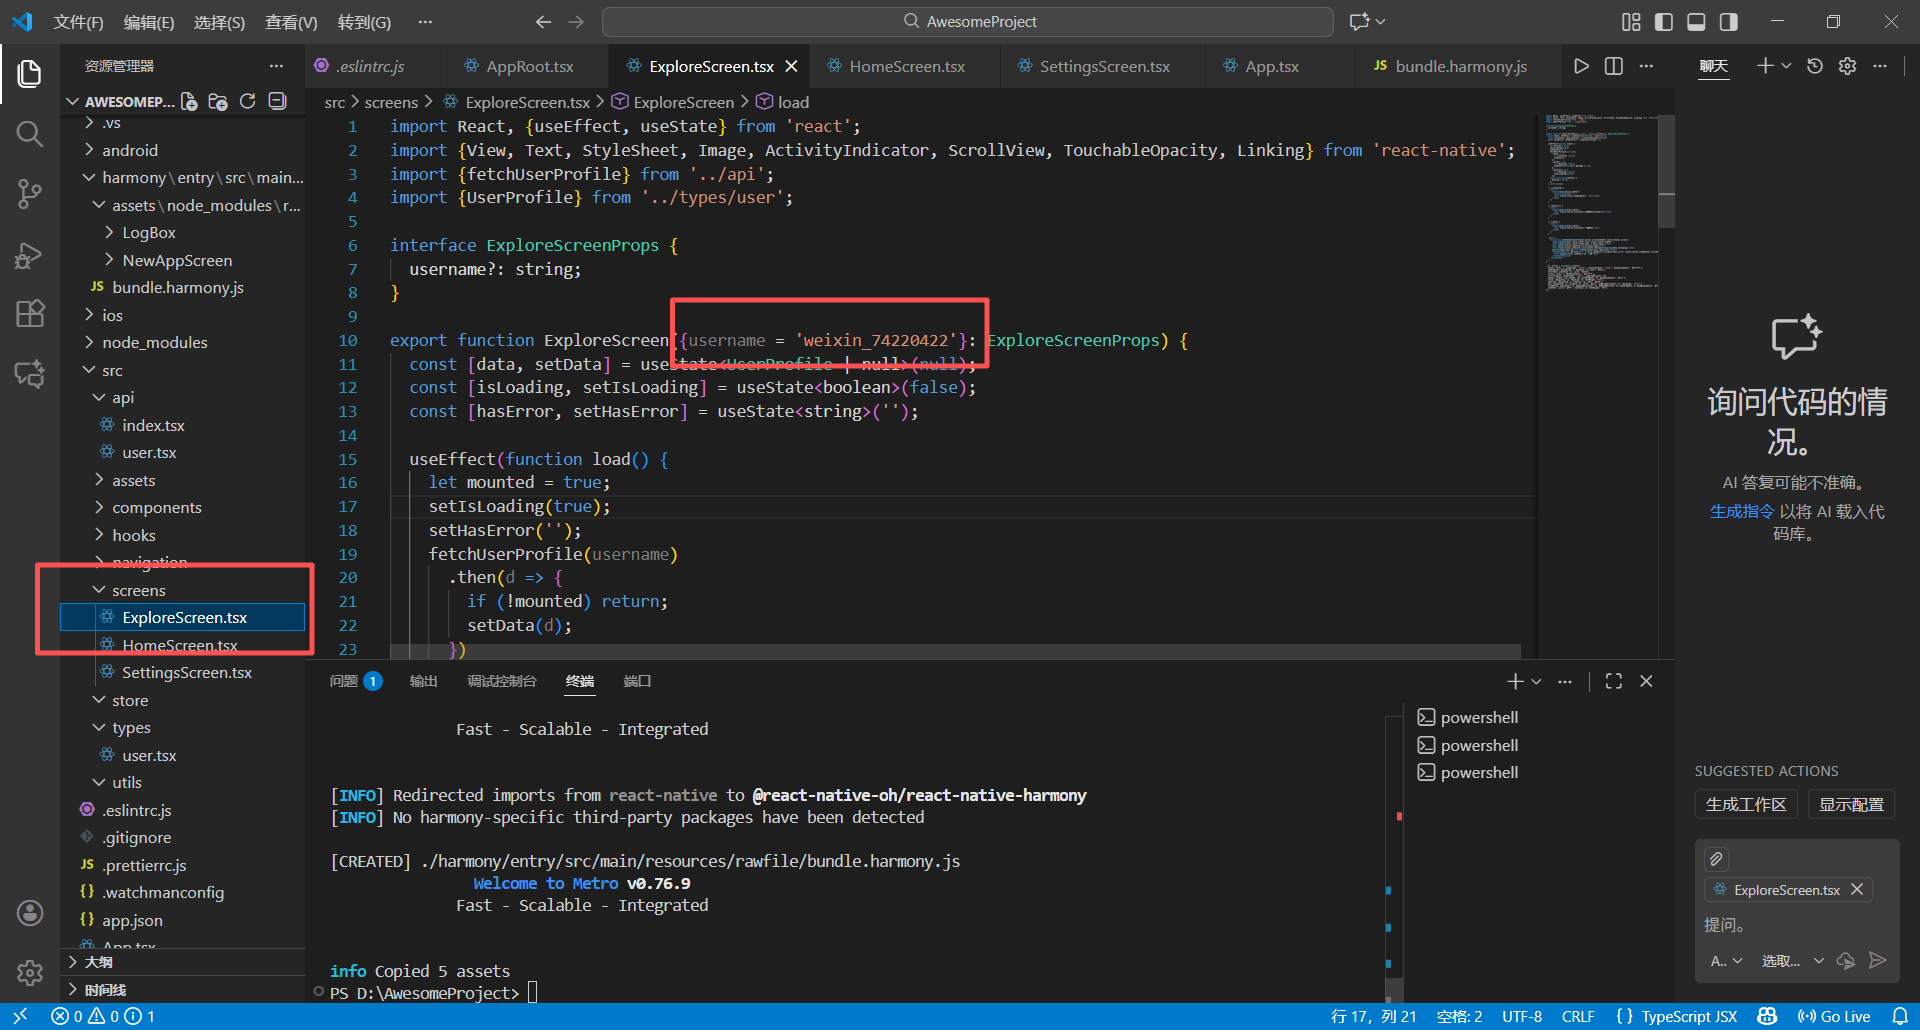
这个网址查看自己的Gitcode的id
3.成功完成
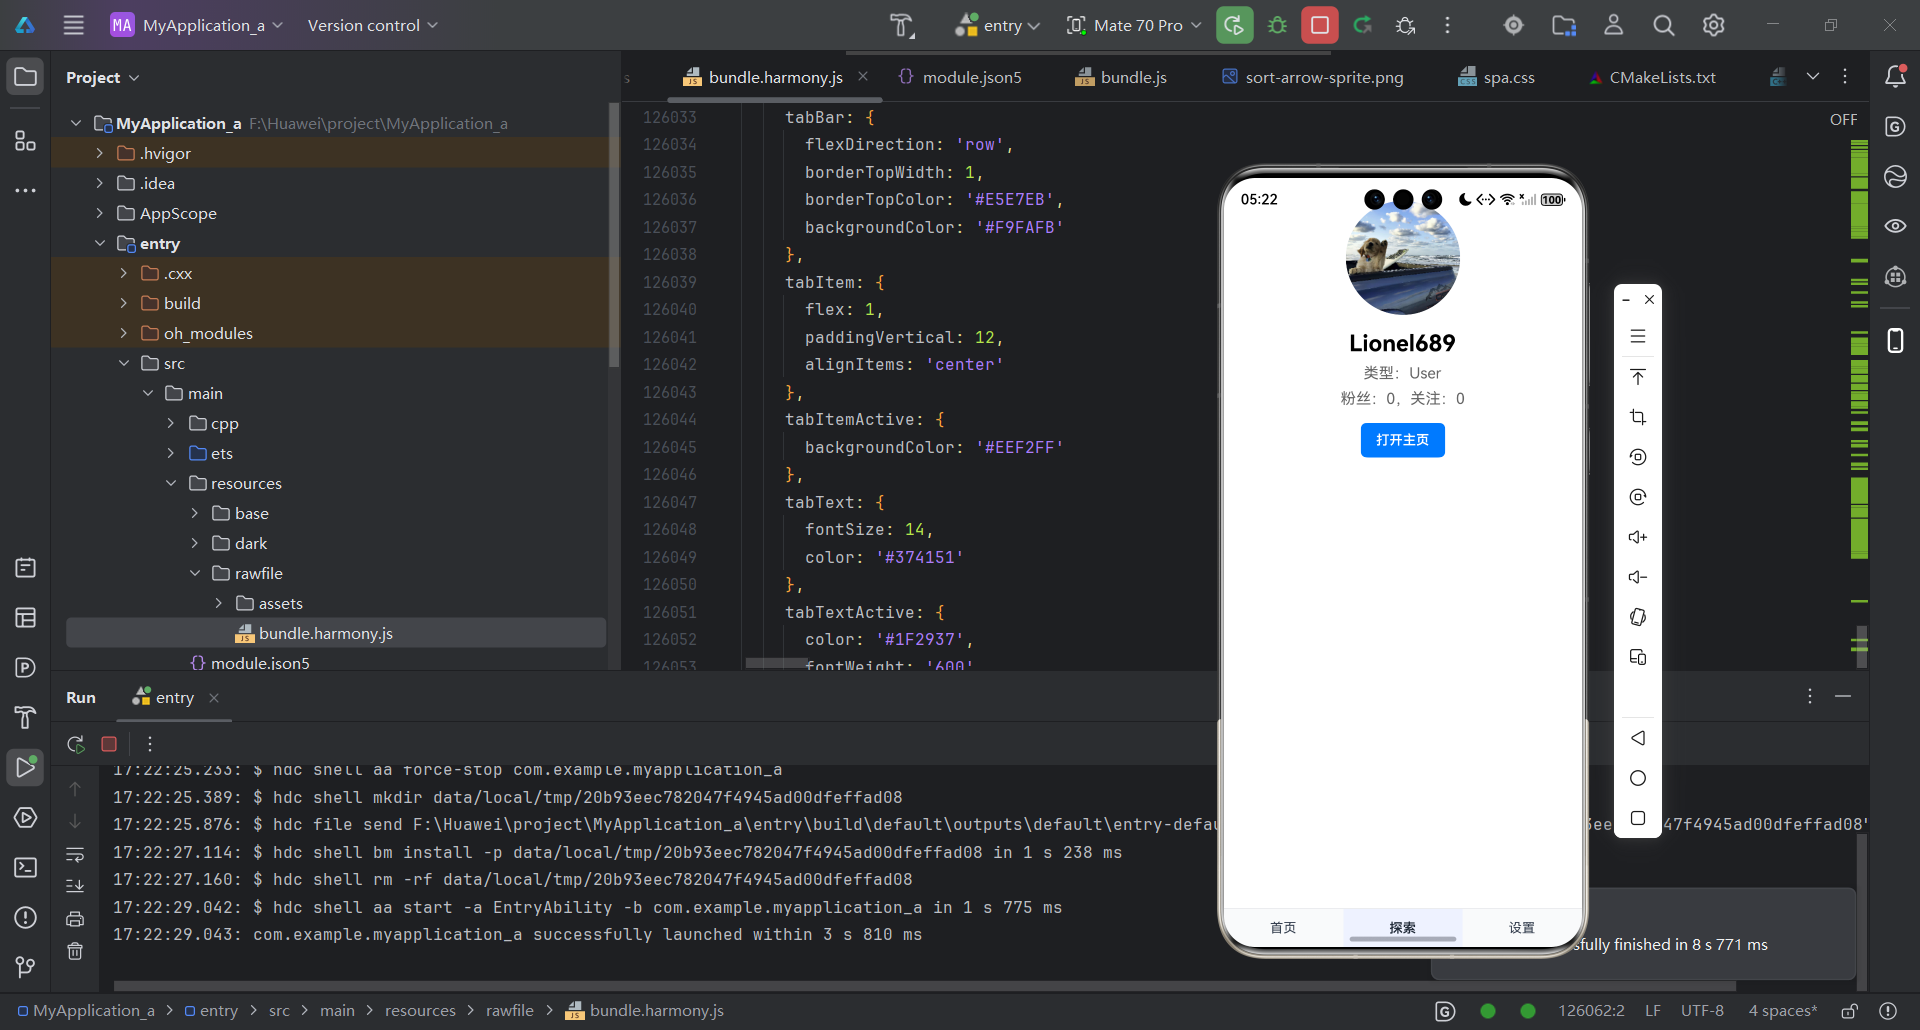

开源鸿蒙跨平台开发社区汇聚开发者与厂商,共建“一次开发,多端部署”的开源生态,致力于降低跨端开发门槛,推动万物智联创新。
更多推荐
 12
12 0
0- 0


 已为社区贡献19条内容

所有评论(0)