小白3天精通跨平台React Native鸿蒙开发:React Navigation 集成,拆分登陆页面创建一个navigation对象
在使用 React Navigation 库时,如果你遇到了“Couldn’t find a navigation object”的错误,这通常意味着你的组件没有正确地接收到导航参数。这个问题经常出现在使用了 React Navigation 的项目中,尤其是在使用堆栈导航(Stack Navigator)或者底部标签导航(Tab Navigator)时。
原因分析
1. 组件没有正确接收导航参数:
在 React Navigation 中,你需要确保你的组件通过 props 接收到了 navigation 和 route 对象。
2. 使用了错误的组件:
如果你试图在一个非导航组件中使用 navigation 对象,比如在一个普通的 React 组件中直接调用 navigation.navigate(),而没有正确地包裹在 NavigationContainer 中,就会遇到这个问题。
@react-navigation/stack是React Navigation库中的一个模块,用于实现堆栈导航(Stack Navigator),支持在React Native应用中管理多个屏幕的导航和切换。
核心功能
- 提供StackNavigator组件,用于定义屏幕堆栈结构。
- 支持自定义导航栏、过渡动画(如SlideFromRightIOS)、手势操作等。
- 可通过screenOptions或options配置单个或全局屏幕属性(如标题、背景色)。
常见配置项
presentation: 控制屏幕切换动画类型(如push、pop)。cardStyle: 设置卡片样式(如透明背景)。detachPreviousScreen: 控制是否从内存中释放非活动屏幕。
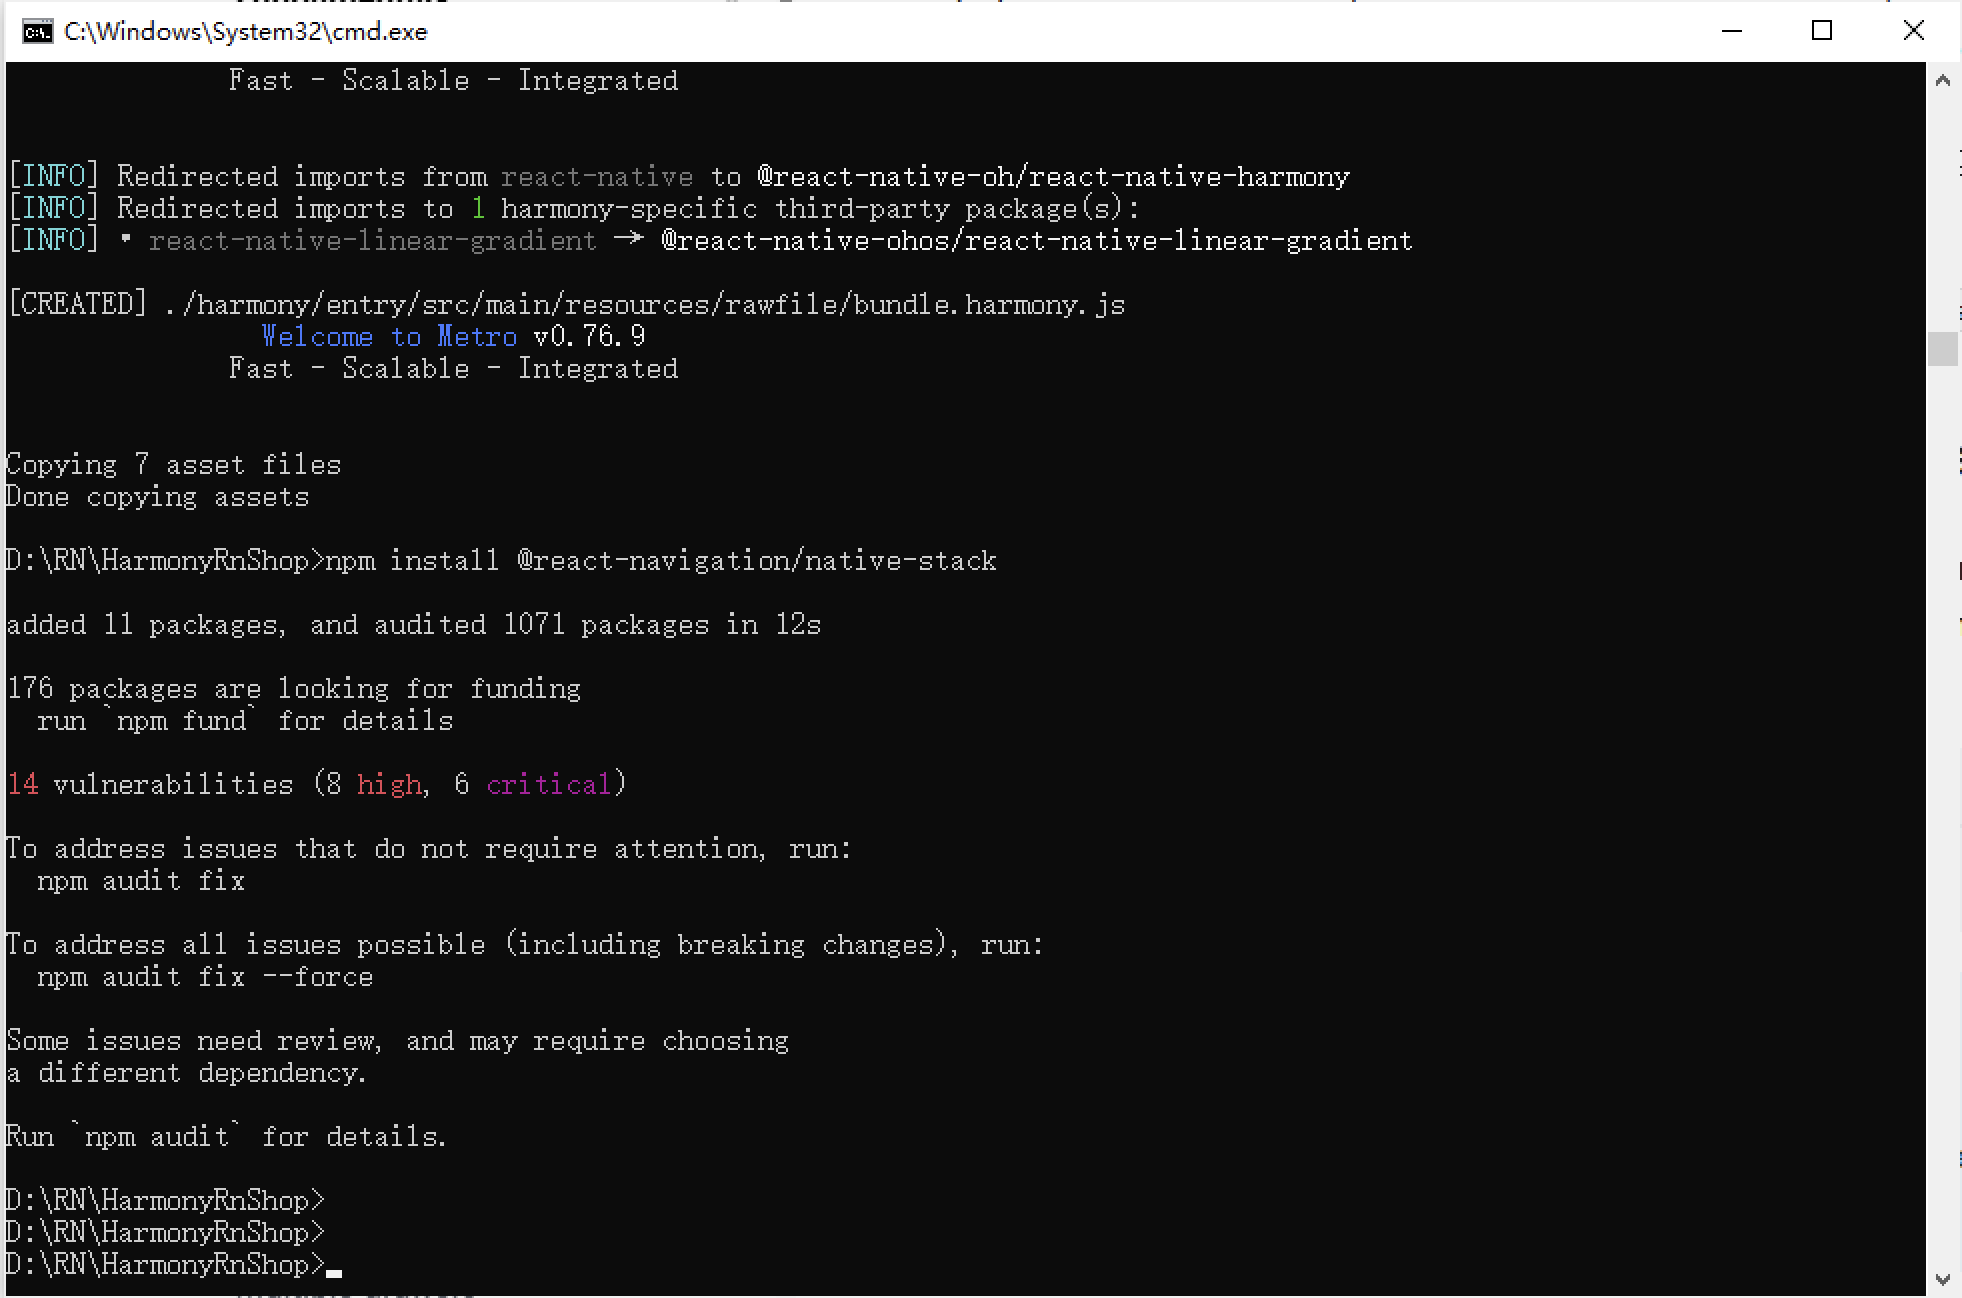
解决方案
1. 确保你的组件正确接收了导航参数
确保你的组件通过 props 接收了 navigation 和 route。例如,如果你使用的是函数组件,你的组件应该这样定义:
import React from 'react';
import { Button, View, Text } from 'react-native';

const MyScreen = ({ navigation }) => {
  return (
    <View>
      <Text>Welcome to My Screen</Text>
      <Button
        title="Go to Details"
        onPress={() => navigation.navigate('Details')} // 确保 'Details' 是你定义的一个路由名
      />
    </View>
  );
};
2. 使用 NavigationContainer 包裹你的应用
确保你的应用的最顶层使用了 NavigationContainer。例如:
import { NavigationContainer } from '@react-navigation/native';
import { createStackNavigator } from '@react-navigation/stack';
import MyScreen from './MyScreen'; // 确保你已经导入了 MyScreen 组件
import DetailsScreen from './DetailsScreen'; // 确保你已经导入了 DetailsScreen 组件

const Stack = createStackNavigator();

function App() {
  return (
    <NavigationContainer>
      <Stack.Navigator initialRouteName="MyScreen">
        <Stack.Screen name="MyScreen" component={MyScreen} />
        <Stack.Screen name="Details" component={DetailsScreen} />
      </Stack.Navigator>
    </NavigationContainer>
  );
}
3. 检查路由名称是否正确匹配
在调用 navigation.navigate() 时,确保你提供的路由名称与你在 Stack.Navigator 中定义的名称完全一致。例如,如果你定义了一个路由为 Details,那么在调用时也必须使用 Details。
4. 确保没有在非导航组件中使用导航功能
如果你在某个没有被 NavigationContainer 包裹的组件中使用了导航功能,那么你需要重新考虑你的组件结构或者确保该组件是通过正确的路由传递到被 NavigationContainer 包裹的组件中。
通过以上步骤,你应该能够解决“Couldn’t find a navigation object”的错误。如果问题仍然存在,请检查你的代码是否有其他逻辑错误或配置问题。
项目实际改造:
import React from 'react';
import { View, Text, Dimensions, StyleSheet, Image, TextInput, TouchableOpacity, Alert } from 'react-native';
import { Modal, ModalContent, ModalPortal } from 'react-native-modals';
import { createStaticNavigation } from '@react-navigation/native';
import { createNativeStackNavigator } from '@react-navigation/native-stack';

//获取屏幕的宽高
const screenWidth =Math.round( Dimensions.get('window').width);
const screenHight =Math.round( Dimensions.get('window').height);
import axios from 'axios';

const AppStyles = StyleSheet.create({
  wrap: {
    width: '100%',
    height: screenHight,
    backgroundColor: '#85BDFF'
  },
  title: {
    width: '100%',
    height: 72,
    fontFamily: 'OPPOSans, OPPOSans',
    fontWeight: 'normal',
    paddingTop: 50,
    fontSize: 36,
    color: '#304057',
    lineHeight: 72,
    textAlign: 'center',
    fontStyle: 'normal'
  },
  banner: {
    paddingTop: 50,
    paddingRight: 32,
    paddingLeft: 32,
  },
  bannerItem: {
    paddingTop: 10,
    display: 'flex',
    flexDirection:'row',
    alignItems: 'center',
    justifyContent: 'center',
    width: '50%',
  },
  loginBox: {
    position: 'relative',
    width: '100%',
    paddingTop: 29,
    paddingLeft: 20,
    paddingRight: 20,
    borderTopRightRadius: 30,
    borderTopLeftRadius: 30,
    backgroundColor: '#F2F8FF',
    flex: 1
  },
  loginBoxCode: {
    marginTop: 20,
    position: 'relative',
    width: '100%',
  },
  loginBoxCodeBtn: {
    position: 'absolute',
    right: 4,
    top: 4,
    width: 110,
    height: 40,
    lineHeight: 40,
    borderRadius: 10,
    backgroundColor: '#1669E3',
    textAlign: 'center',
    fontWeight: 'bold',
    fontSize: 14,
    color: '#FFFFFF',
  },
  loginBtn: {
    position: 'absolute',
    left: 20,
    bottom: 30,
    width: '100%',
    height: 48,
    lineHeight: 48,
    borderRadius: 10,
    backgroundColor: '#1669E3',
    textAlign: 'center',
    fontWeight: 'bold',
    fontSize: 14,
    color: '#FFFFFF',
  }
})
function HomePath() {
  const [phone, onChangePhone] = React.useState('');
  const [code, onChangeCode] = React.useState('');
  const [visible, setVisible] = React.useState(false);
  const submitLogin = () => {
    console.log('submitLogin', phone, code);
    var regex = /^1[3-9]\d{9}$/;
    if (!regex.test(phone)) {
      Alert.alert('请输入正确的手机号码');
      return;
    }
    var regex = /^\d{6}$/;
    if (!regex.test(code)) {
      Alert.alert('请输入正确的验证码');
      return;
    }
    // setVisible(true);
    axios.get('https://xxxxx/id_type?t=1764427207873', {
      headers: {
        'Content-Type': 'application/json',
        'projectid': '3xxxxxx'
      }
    })
    .then(function (response) {
      console.log("get id_type success:", JSON.stringify(response));
      Alert.alert(JSON.stringify(response));
      // navigation.navigate('IndexPath')
    })
    .catch(function (error) {
      console.log(error);
    });
  }

  return (
    <View style={AppStyles.wrap}>
      <Text style={AppStyles.title}>鸿蒙ReactNative系统</Text>
      <View style={AppStyles.banner}>
        <View style={{display:'flex',flexDirection:'row',justifyContent:'space-between'}}>
          <View style={AppStyles.bannerItem}>
            <Image style={{width:27,height:27}} source={require('./images/checked.png')}></Image>
            <Text style={{paddingLeft: 4}}>实时业绩便捷查询</Text>
          </View>
          <View style={AppStyles.bannerItem}>
            <Image style={{width:27,height:27}} source={require('./images/checked.png')}></Image>
            <Text style={{paddingLeft: 4}}>订单状态轻松把控</Text>
          </View>
        </View>
        <View style={{display:'flex',flexDirection:'row',justifyContent:'space-between'}}>
          <View style={AppStyles.bannerItem}>
            <Image style={{width:27,height:27}} source={require('./images/checked.png')}></Image>
            <Text style={{paddingLeft: 4}}>宣传数据全程管理</Text>
          </View>
          <View style={AppStyles.bannerItem}>
            <Image style={{width:27,height:27}} source={require('./images/checked.png')}></Image>
            <Text style={{paddingLeft: 4}}>海量素材一站转发</Text>
          </View>
        </View>
      </View>

      <Image style={{width:289, height: 182, display: 'flex', alignSelf: 'center', margin: 20}} source={require('./images/login-bg.png')}></Image>

      <View style={AppStyles.loginBox}>
        <TextInput style={{width: '100%', height: 48, borderRadius: 10, backgroundColor: '#FFFFFF', paddingLeft: 16, paddingRight: 16, fontSize: 14, color: '#304057'}}
         placeholder="请输入手机号" onChangeText={onChangePhone} value={phone}
         keyboardType="numeric"
         maxLength={11}></TextInput>

        <View style={AppStyles.loginBoxCode}>
          <TextInput style={{width: '100%', height: 48, borderRadius: 10, backgroundColor: '#FFFFFF', paddingLeft: 16, paddingRight: 16, fontSize: 14, color: '#304057'}}
          placeholder="请输入验证码" onChangeText={onChangeCode} value={code}
          keyboardType="numeric"
          maxLength={6}></TextInput>
          <Text style={AppStyles.loginBoxCodeBtn}>获取验证码</Text>
        </View>

        <TouchableOpacity style={AppStyles.loginBtn} onPress={submitLogin}>
          <Text style={{fontSize: 14, color: '#FFFFFF', lineHeight: 48, textAlign: 'center', fontWeight: 'bold'}}>登陆</Text>
        </TouchableOpacity>
      </View>

      <ModalPortal>
        <Modal
          visible={visible}
          onTouchOutside={() => {
            setVisible(false)
          }}
          onSwipeOut={() => setVisible(false)}
        >
          <ModalContent>
            <Text>登录成功!欢迎使用我们的应用。</Text>
            <Text>手机号:{phone}</Text>
            <TouchableOpacity
              style={{marginTop: 20, padding: 10, backgroundColor: '#1669E3', borderRadius: 5}}
              onPress={() => setVisible(false)}
            >
              <Text style={{color: '#FFFFFF', textAlign: 'center'}}>确定</Text>
            </TouchableOpacity>
          </ModalContent>
        </Modal>
      </ModalPortal>
    </View>
  );
}

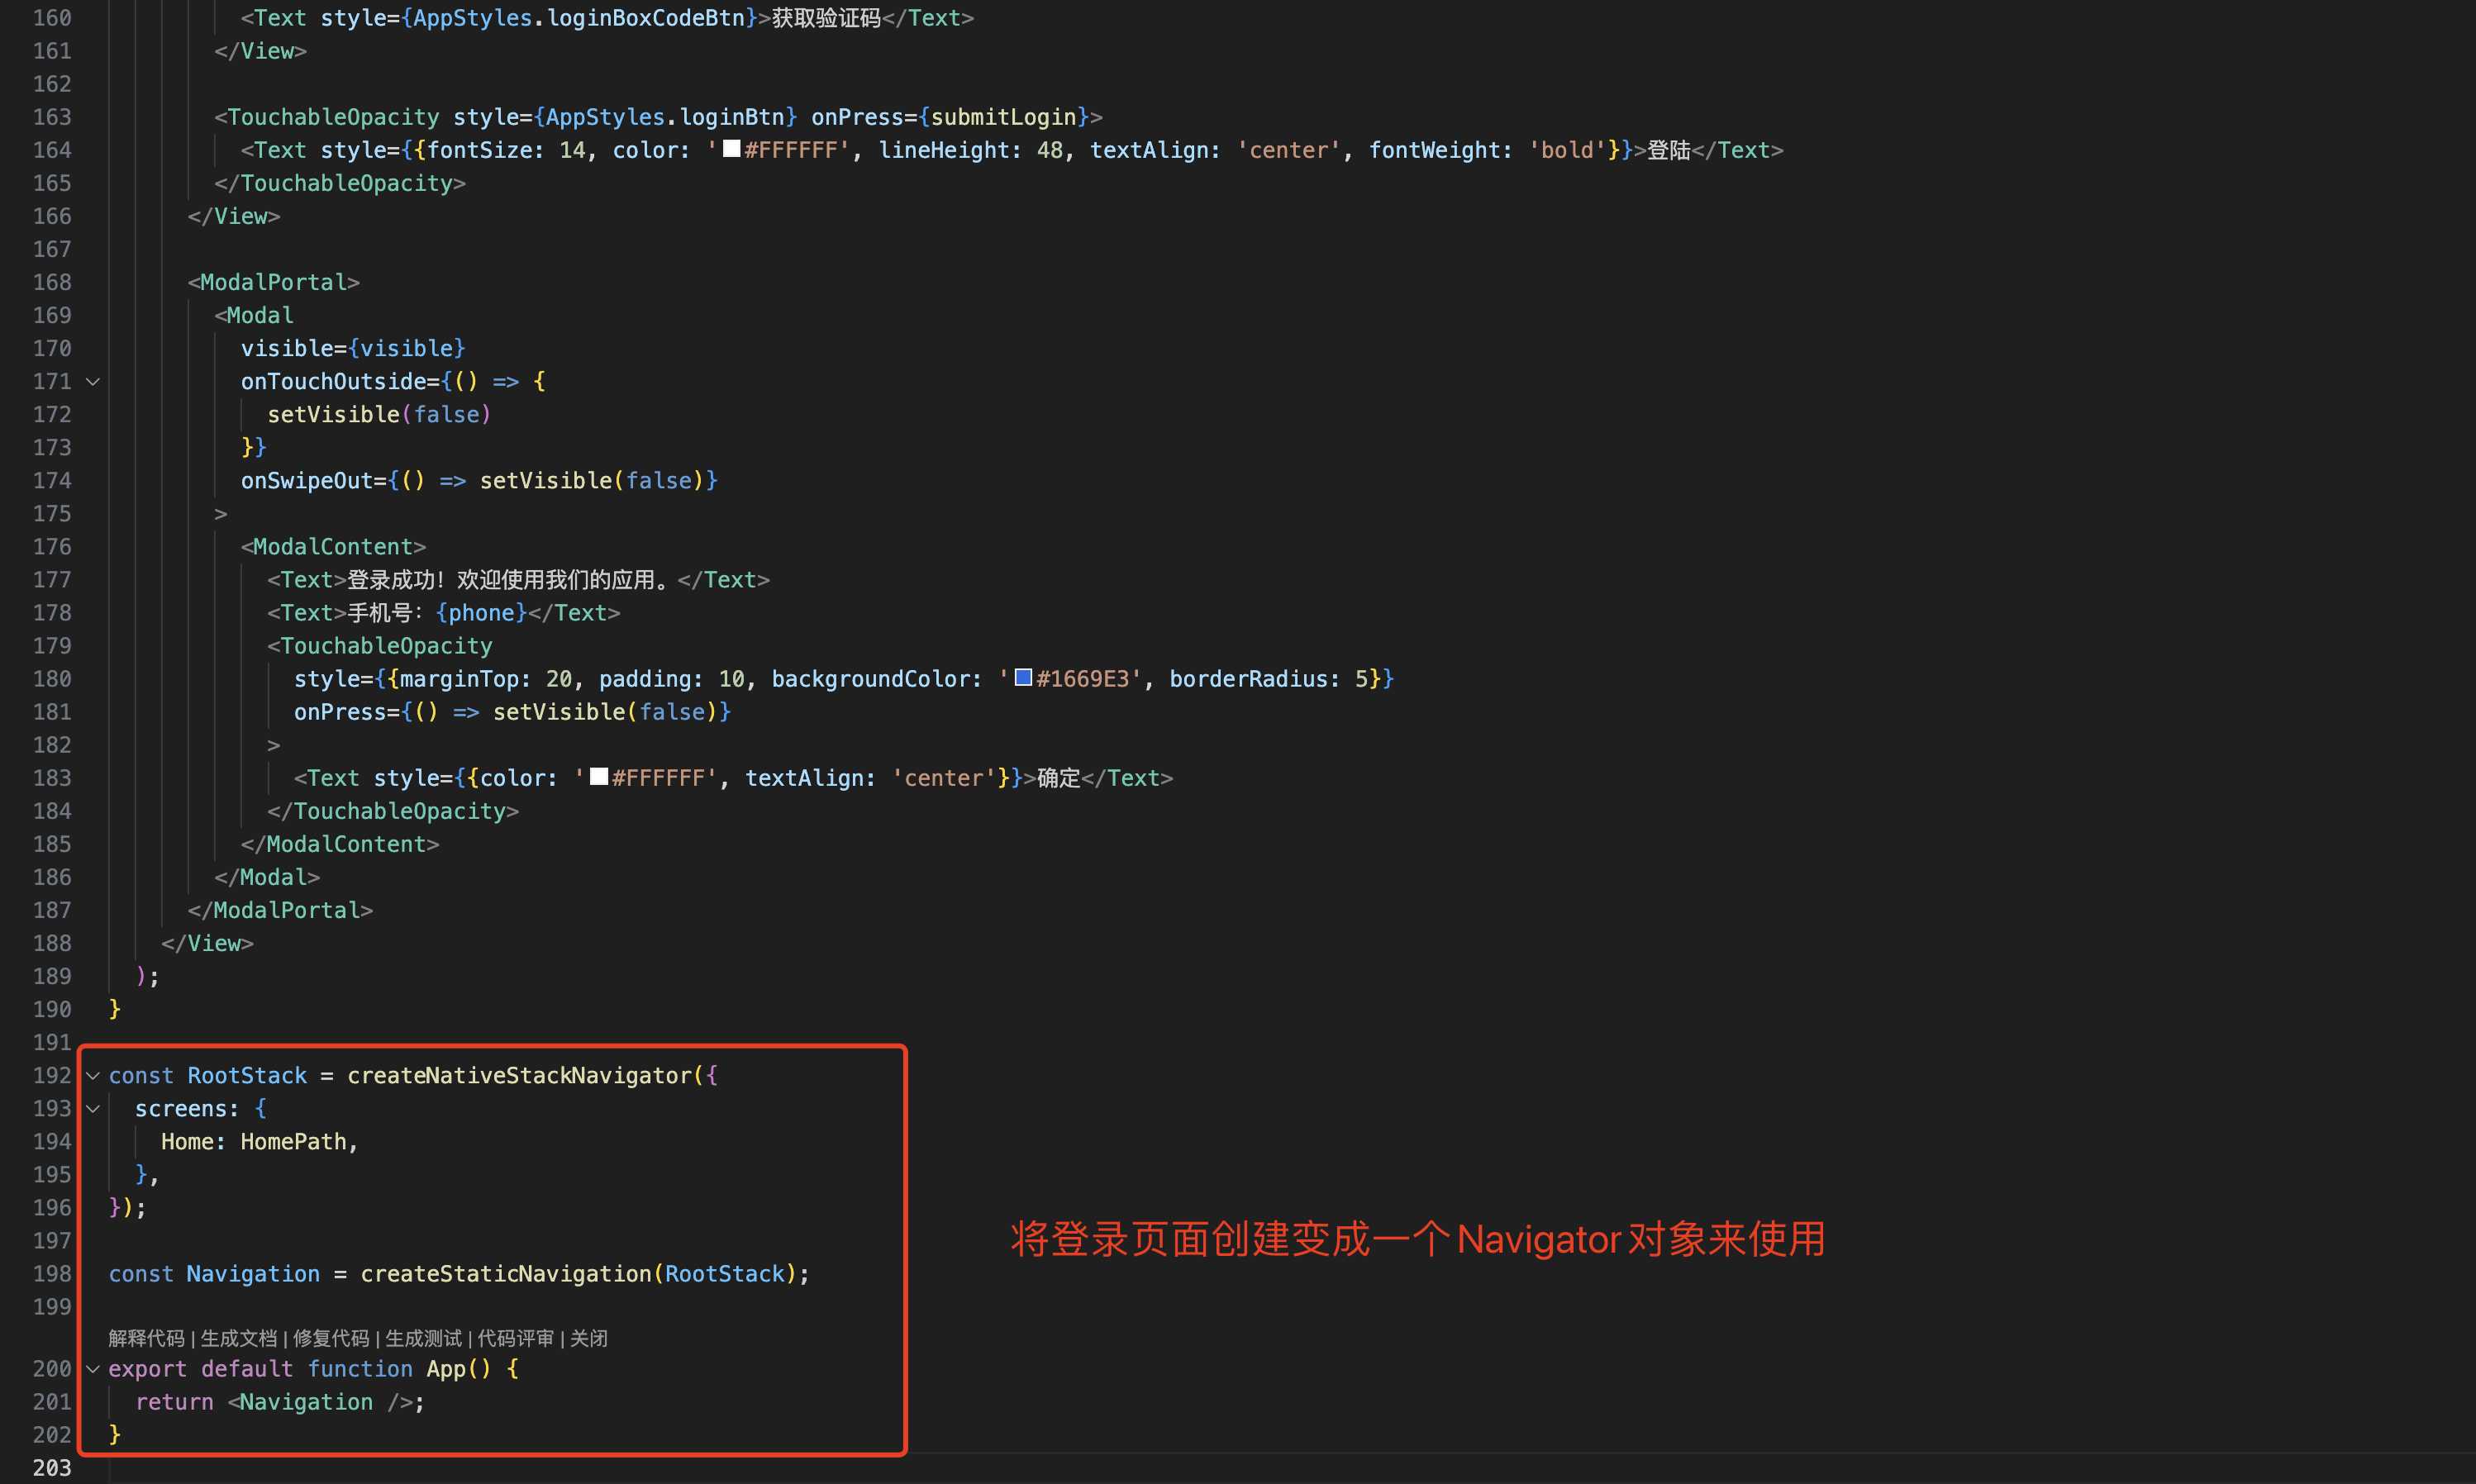
const RootStack = createNativeStackNavigator({
  screens: {
    Home: HomePath,
  },
});

const Navigation = createStaticNavigation(RootStack);

export default function App() {
  return <Navigation />;
}
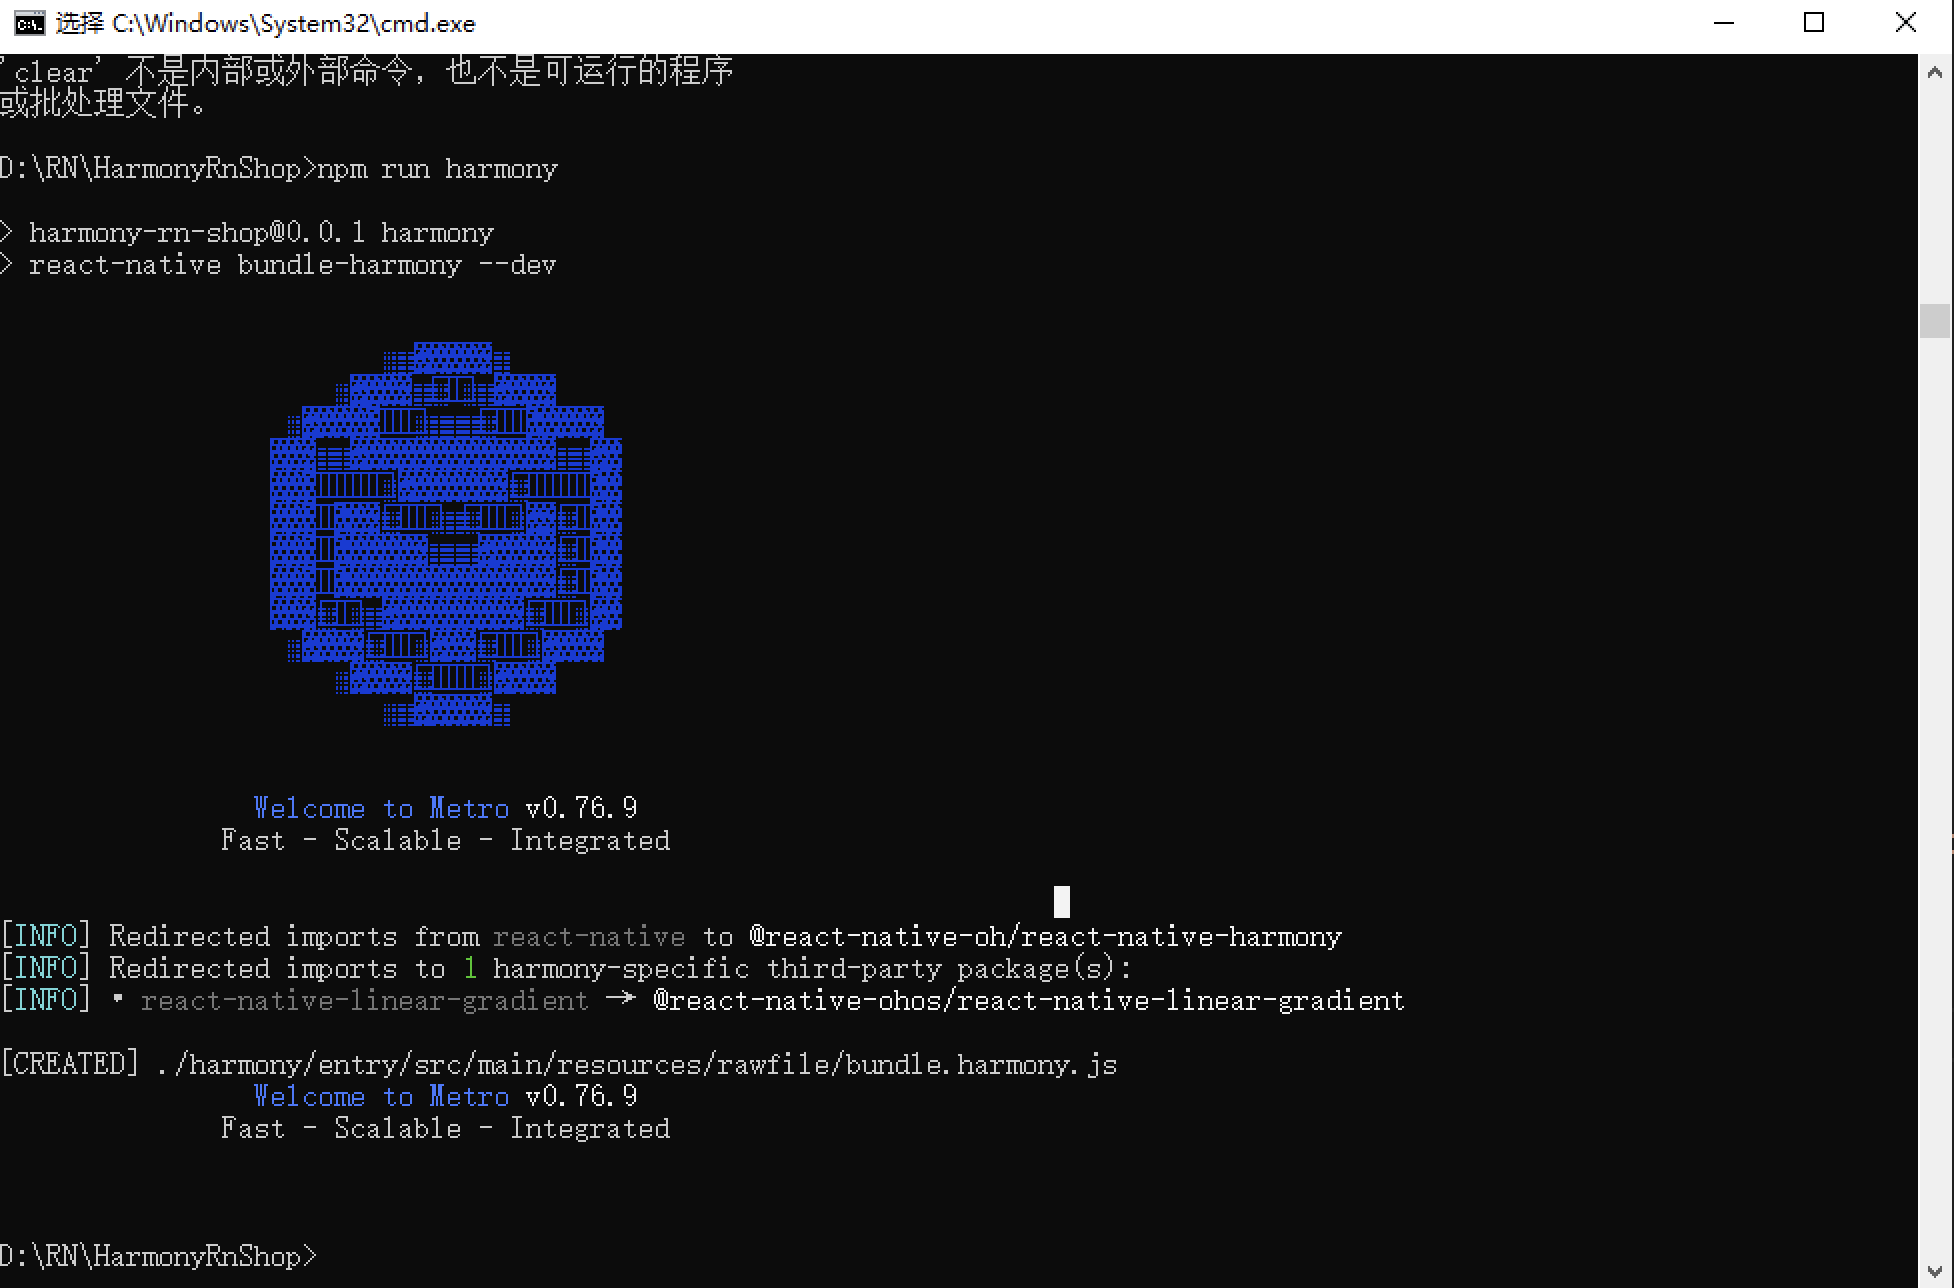
接下来通过打包命令npn run harmony将reactNative的代码打包成为bundle,这样可以进行在开源鸿蒙OpenHarmony中进行使用。
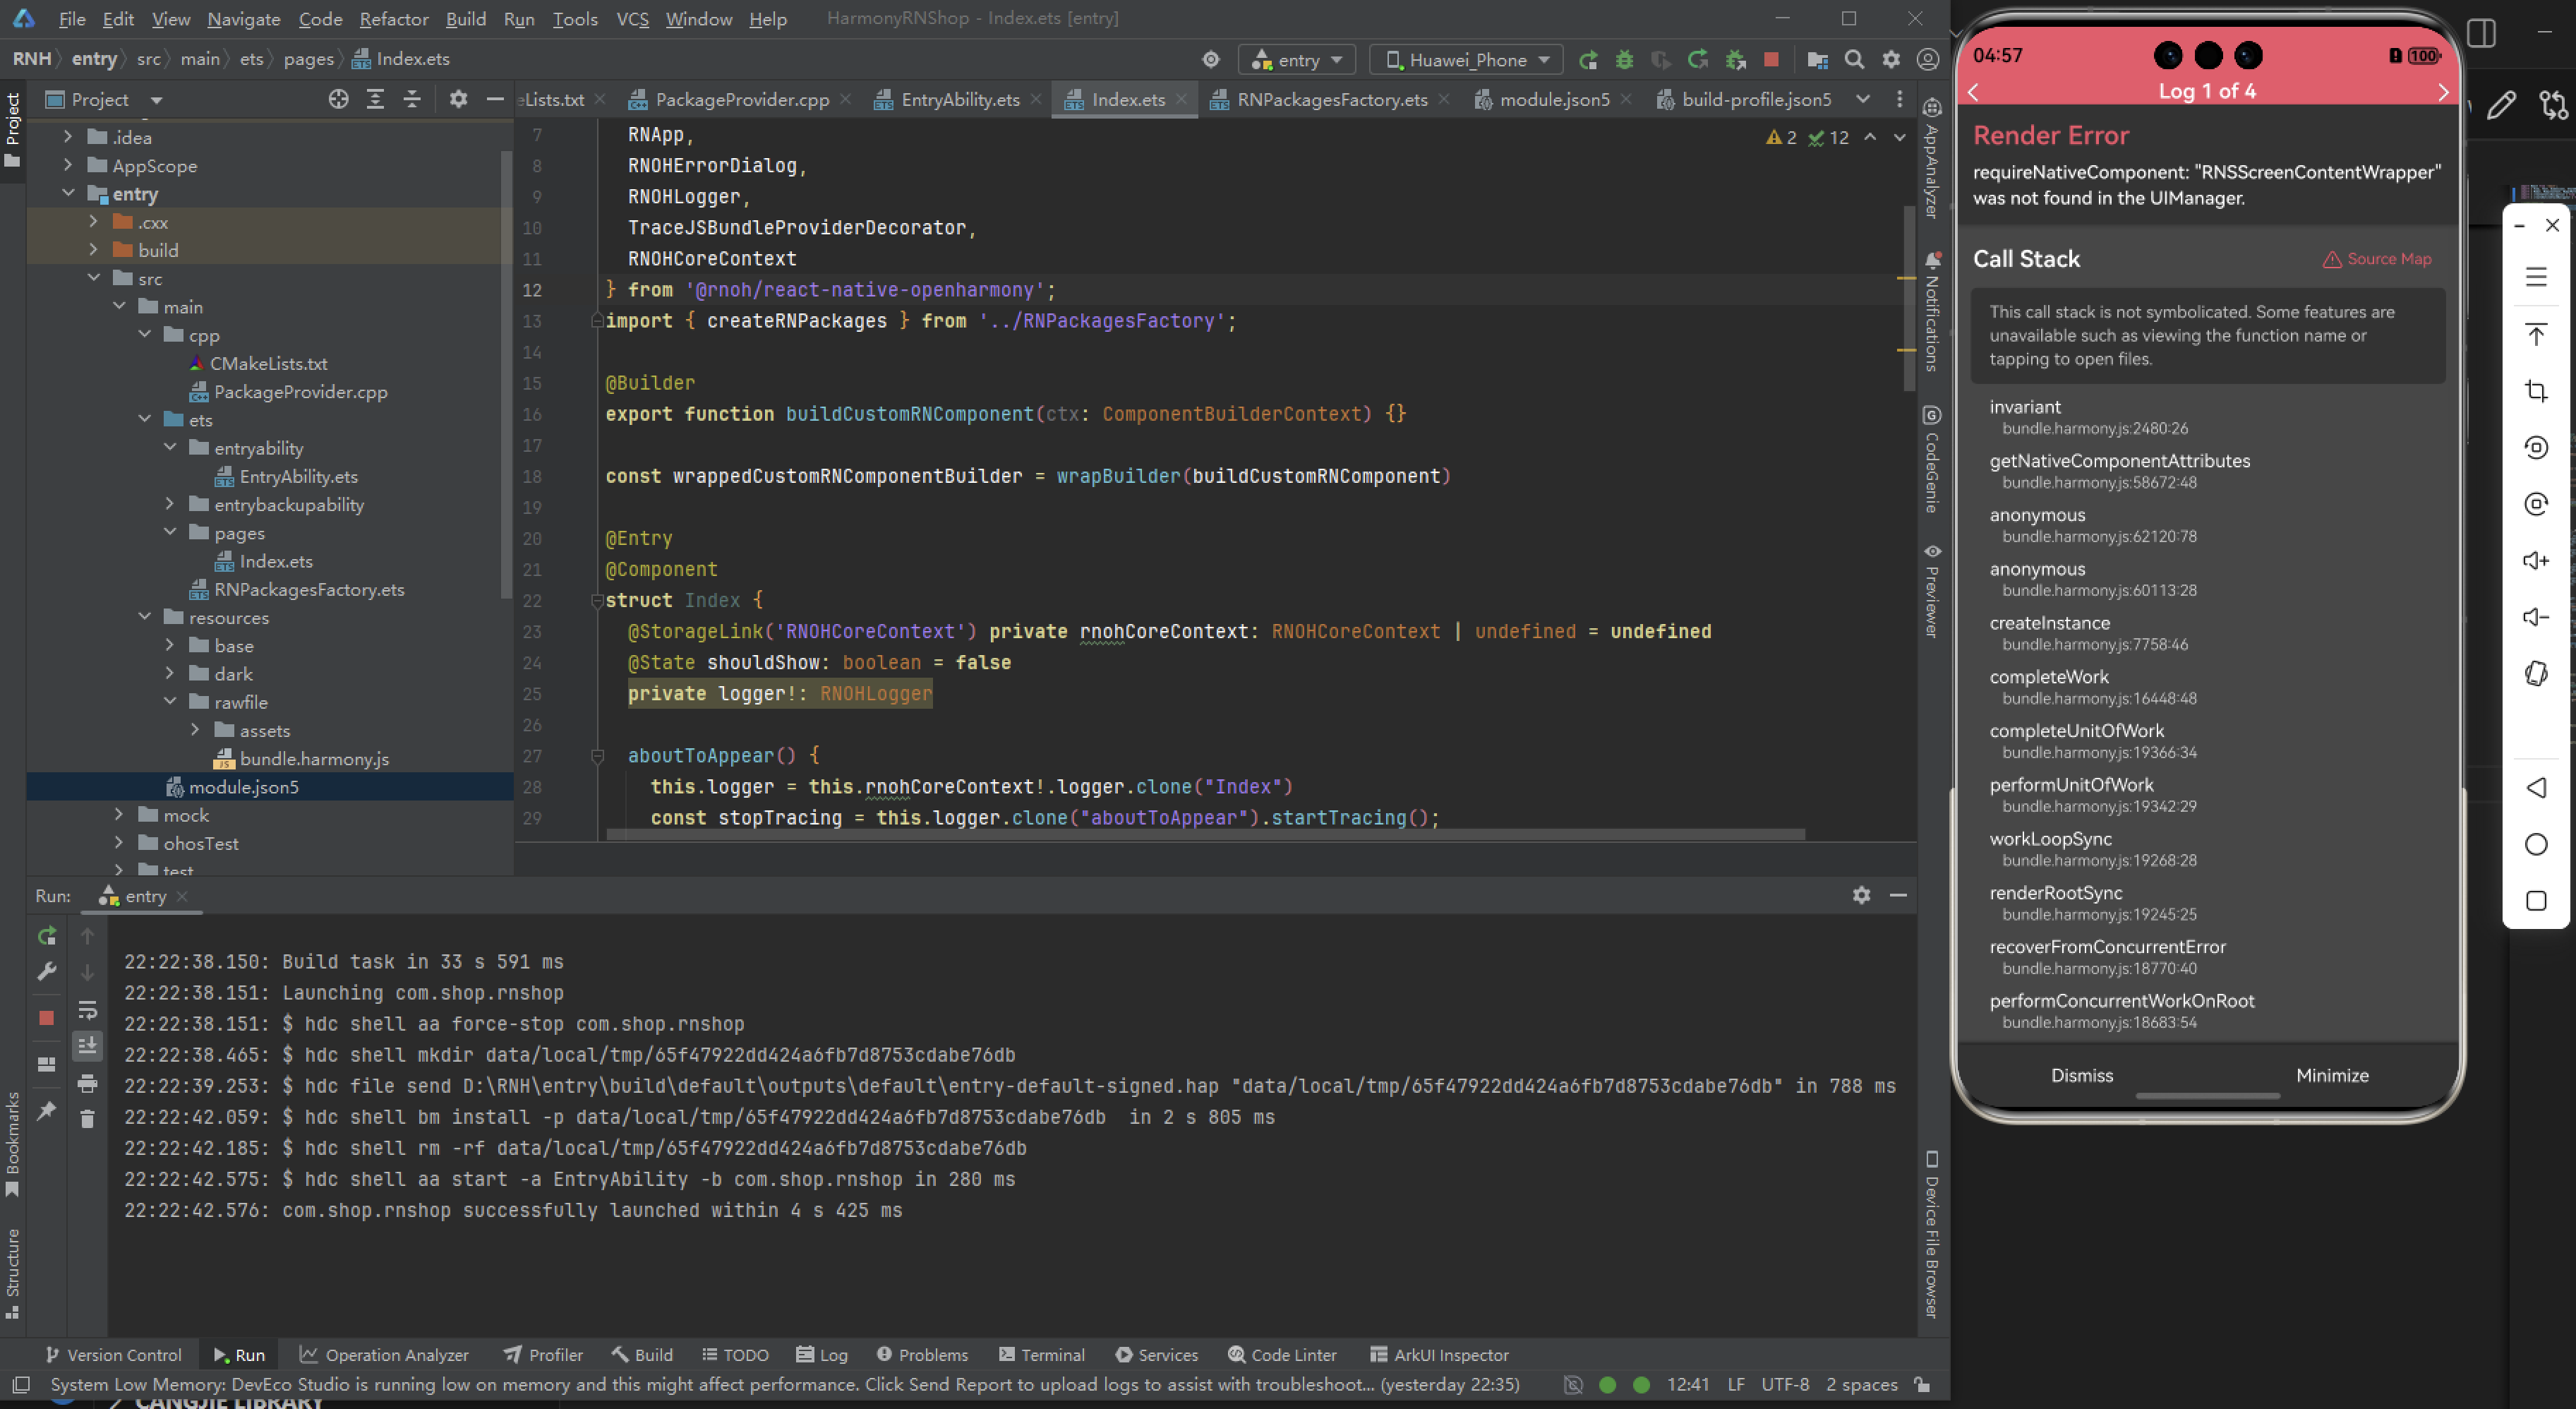
接下来将bundle文件复制到鸿蒙的项目工程中进行引入,然后,正常打包后,可以看到以下的运行效果:
发现还是报错了,报以下错误
欢迎大家加入开源鸿蒙跨平台开发者社区,一起共建开源鸿蒙跨平台生态。

开源鸿蒙跨平台开发社区汇聚开发者与厂商,共建“一次开发,多端部署”的开源生态,致力于降低跨端开发门槛,推动万物智联创新。
更多推荐


 20
20 0
0- 0


 已为社区贡献59条内容

所有评论(0)