Flutter for OpenHarmony 实战:Riverpod 2.0 响应式架构与大规模状态治理
本文介绍了在鸿蒙NEXT应用中使用Flutter的Riverpod 2.0进行状态管理的实战指南。文章从工程配置开始,详细讲解了三种核心Provider的使用场景:StateProvider用于简单状态管理,FutureProvider处理异步操作,NotifierProvider封装复杂业务逻辑。通过计数器、系统配置获取和搜索历史管理等示例,展示了Riverpod的响应式架构优势。最后以一个任务
Flutter for OpenHarmony 实战:Riverpod 2.0 响应式架构与大规模状态治理

前言
在 HarmonyOS NEXT 的专业级开发中,状态管理不仅仅是为了更新 UI,更是为了在跨模块(HSP/HAR)调用、异步 Native 能力调度、以及低内存设备适配等复杂场景下,依然保持代码的健壮性。
Riverpod 2.0 凭借其“不依赖 BuildContext”的特性,成为了鸿蒙端构建大型响应式架构的首选方案。本文将通过四个由浅入深的实战页面,带你彻底掌握 Riverpod。
一、 工程准备:安装与配置
在鸿蒙 NEXT 上使用 Riverpod,我们推荐直接使用官方稳定版 flutter_riverpod。它不依赖原生二进制,因此在鸿蒙上具有极佳的兼容性。
1.1 快速安装
flutter pub add flutter_riverpod
1.2 pubspec.yaml 核心配置
为了确保状态能够在整个鸿蒙应用中共享,你的依赖配置应当如下:
dependencies:
  flutter:
    sdk: flutter
  flutter_riverpod: ^2.5.1 # 💡 状态管理控制中枢
1.3 注入中枢:ProviderScope
在鸿蒙应用的入口处(main.dart),必须包裹 ProviderScope,否则所有的 Provider 将无法正常工作:
void main() {
  runApp(
    const ProviderScope(
      child: MyApp(),
    ),
  );
}
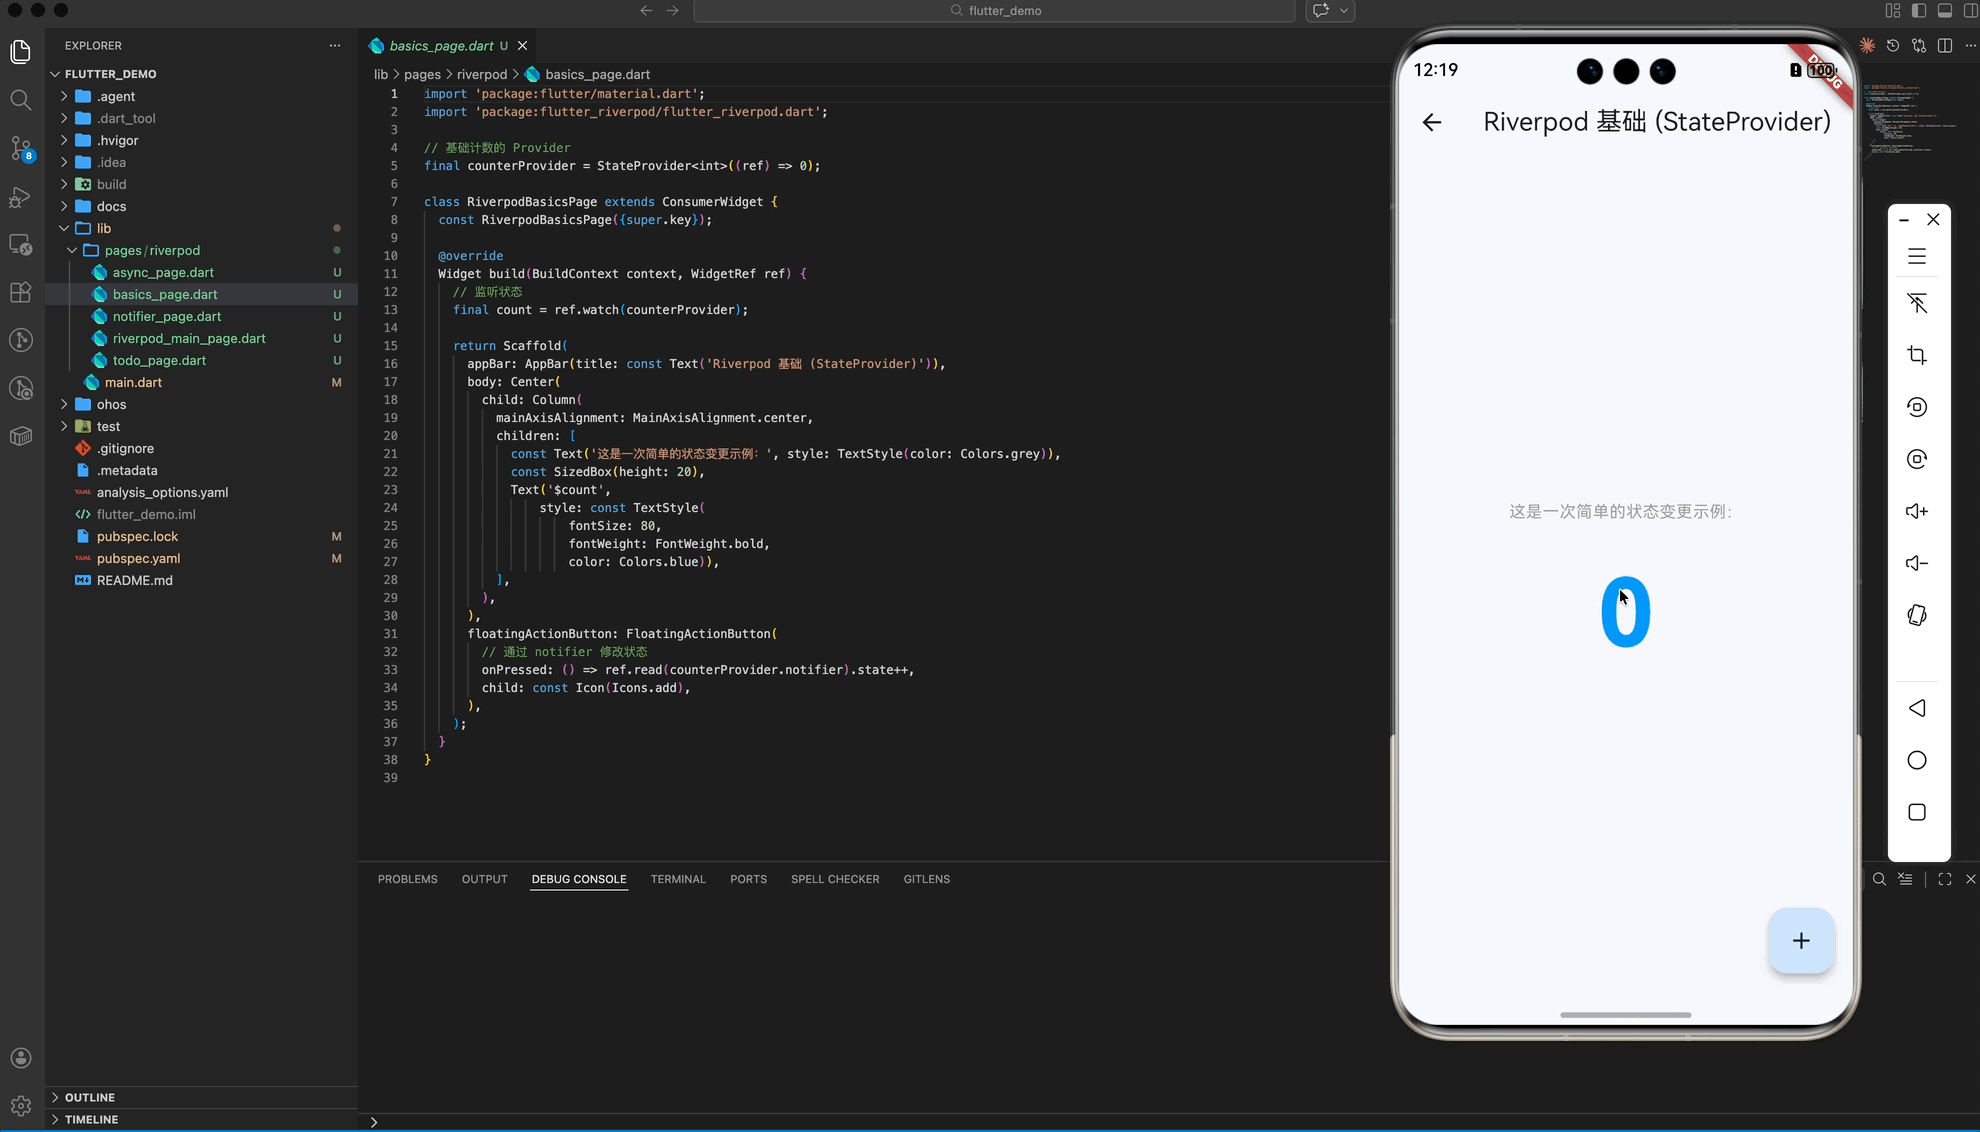
二、 响应式基石:StateProvider (基础篇)
当你只需要管理一个简单的变量(如开关状态、计数、单选索引)时,StateProvider 是最简洁的选择。
核心代码 (basics_page.dart)
// 1. 定义全局 Provider,不依赖上下文
final counterProvider = StateProvider<int>((ref) => 0);
class RiverpodBasicsPage extends ConsumerWidget {
Widget build(BuildContext context, WidgetRef ref) {
// 2. 监听状态:状态变,UI 变
final count = ref.watch(counterProvider);
return FloatingActionButton(
// 3. 修改状态:通过 .notifier 获取修改器
onPressed: () => ref.read(counterProvider.notifier).state++,
child: Icon(Icons.add),
);
}
}
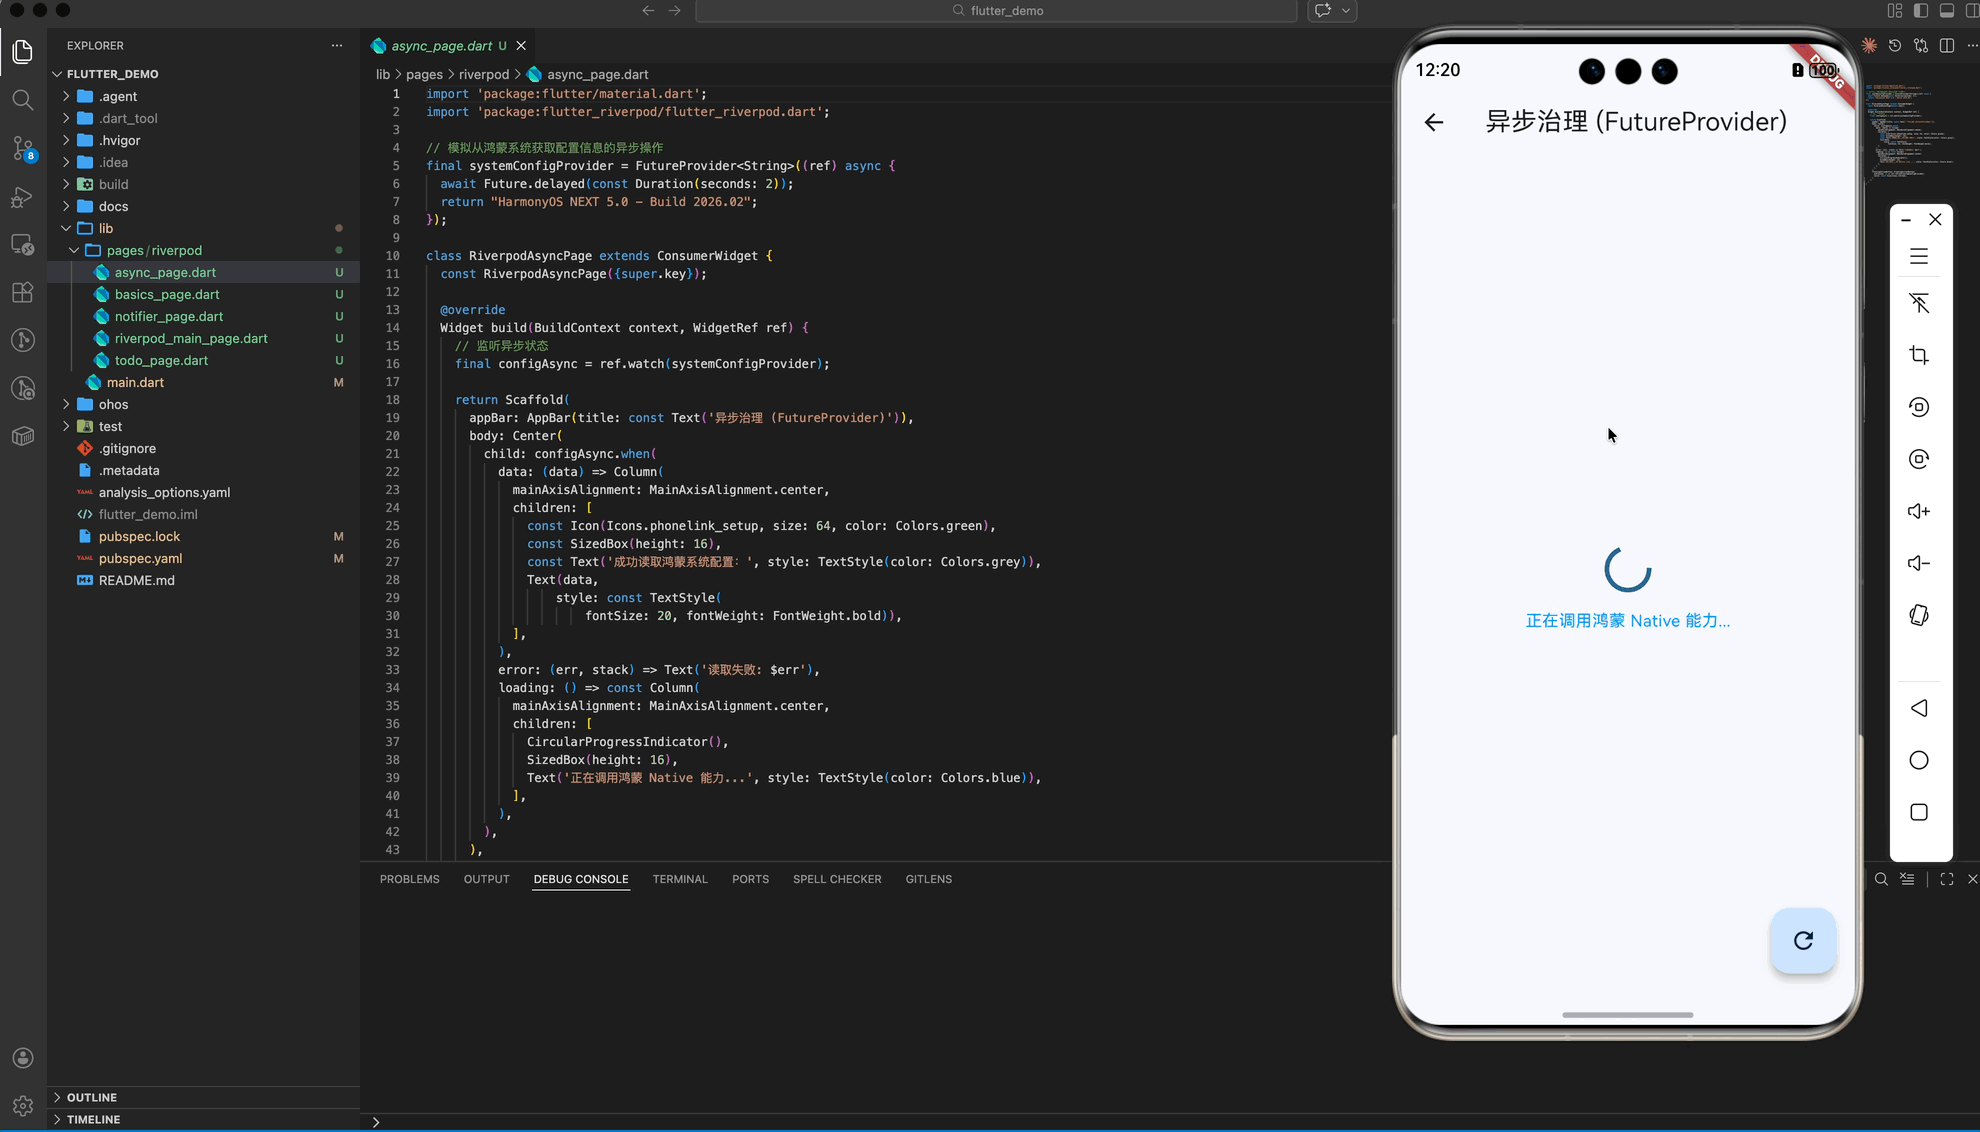
三、 异步状态治理:FutureProvider (进阶篇)
鸿蒙应用中到处都是异步操作(网络请求、读取沙箱文件、调用系统 Sensor)。FutureProvider 能将这些异步任务完美封装为 AsyncValue 状态机。
核心代码 (async_page.dart)
// 模拟从鸿蒙系统获取配置信息的异步操作
final systemConfigProvider = FutureProvider<String>((ref) async {
await Future.delayed(Duration(seconds: 2));
return "HarmonyOS NEXT 5.0 - Build 2026.02";
});
// UI 层只需处理三种模式:data, error, loading
Widget build(BuildContext context, WidgetRef ref) {
final configAsync = ref.watch(systemConfigProvider);
return configAsync.when(
data: (data) => Text('系统配置: $data'),
error: (err, stack) => Text('读取失败'),
loading: () => CircularProgressIndicator(),
);
}
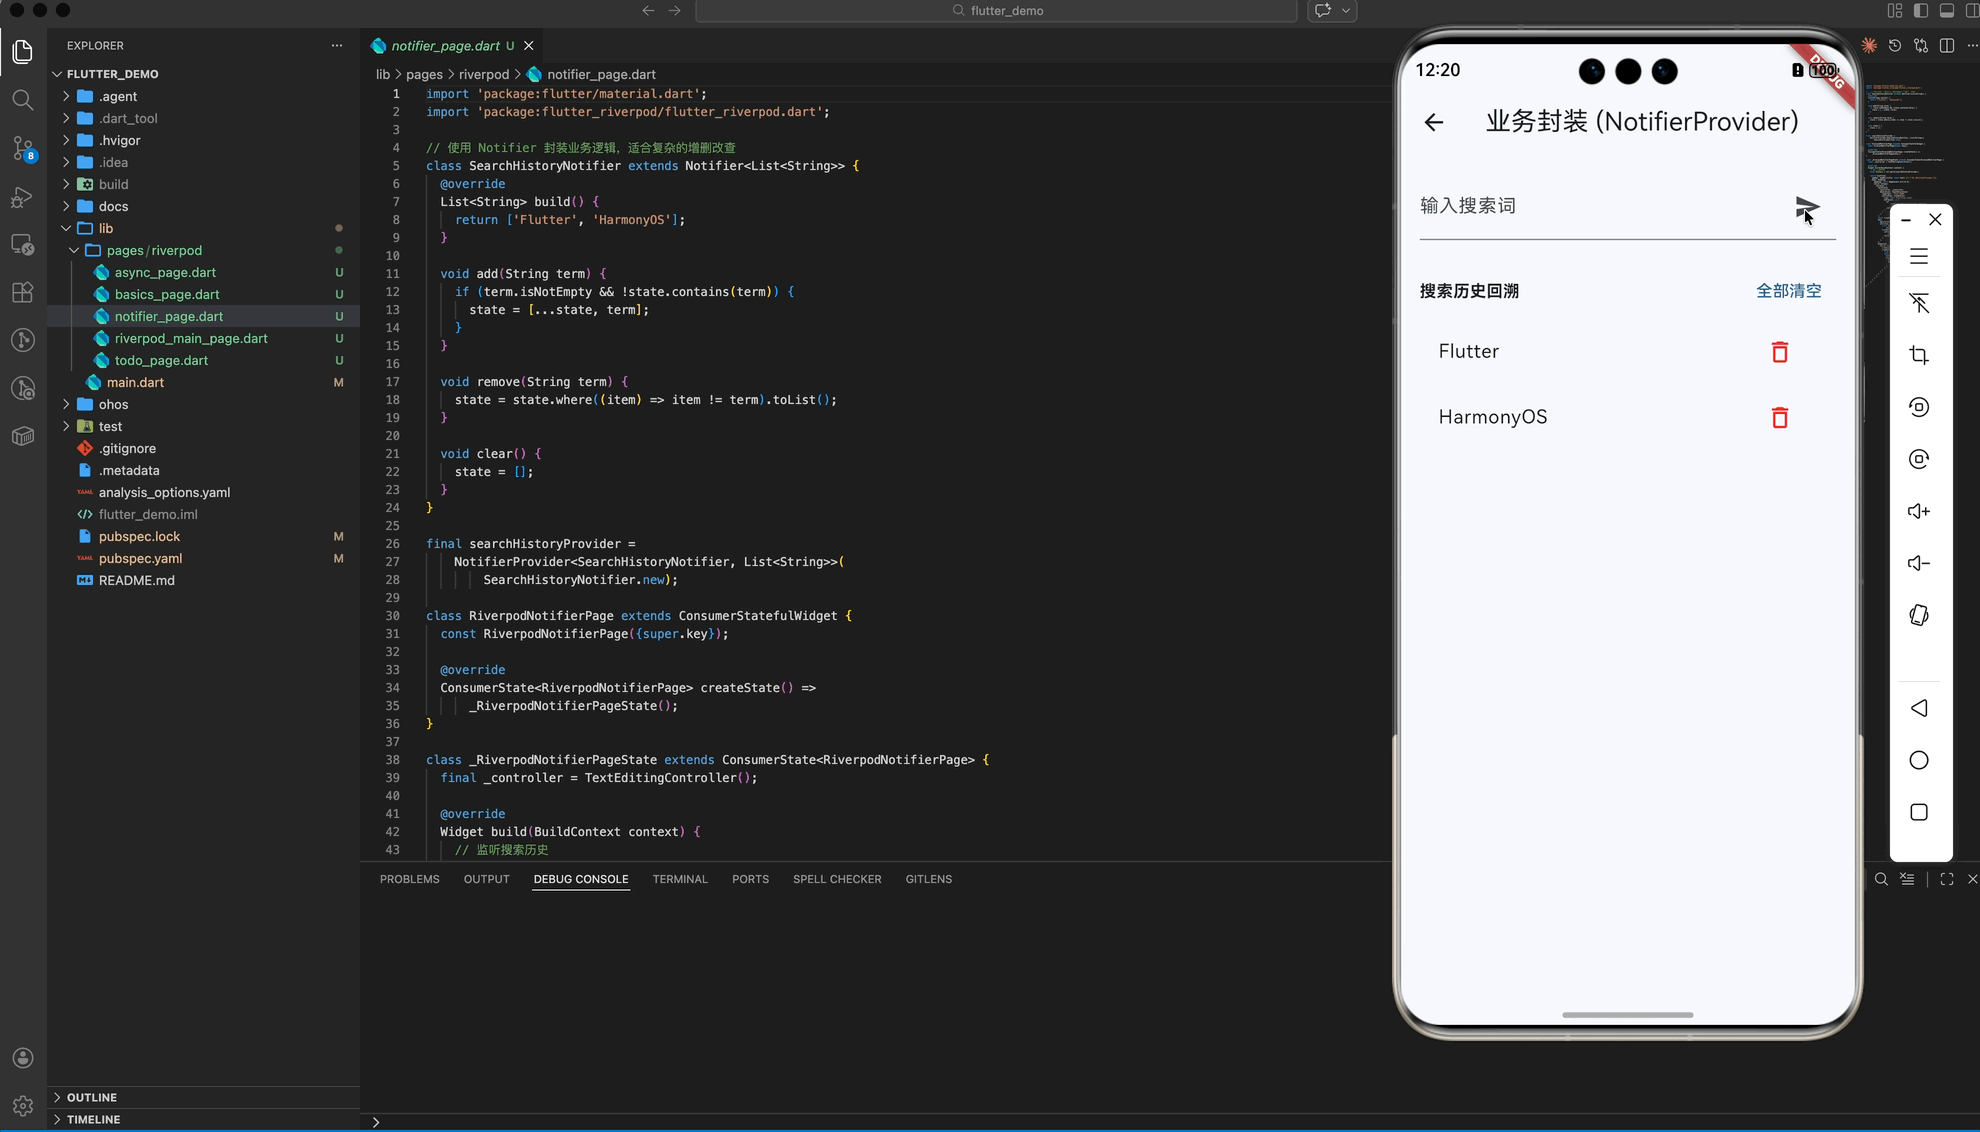
四、 业务逻辑封装:NotifierProvider (专业篇)
在大规模项目中,你不希望 UI 层直接操作状态。通过自定义 Notifier,你可以将复杂的业务逻辑(如搜索词去重、权限校验逻辑)封装起来,实现真正的控制翻转。
核心代码 (notifier_page.dart)
class SearchHistoryNotifier extends Notifier<List<String>> {
List<String> build() => ['Flutter', 'HarmonyOS'];
void add(String term) {
if (term.isNotEmpty && !state.contains(term)) {
state = [...state, term]; // 状态不可变,触发刷新
}
}
}
final searchHistoryProvider = NotifierProvider<SearchHistoryNotifier, List<String>>(SearchHistoryNotifier.new);
五、 综合实战:任务管家 (架构篇)
在最后的“任务管家”案例中,我们演示了 Riverpod 的终极威力:派生状态 (Derived State)。即一个 Provider 的结果依赖于另外两个 Provider。
业务场景:
todoListProvider: 管理原始任务数据。todoFilterProvider: 管理过滤器状态 (全部/已完成/待办)。filteredTodosProvider: 核心! 它观察前两个 Provider,自动计算出当前应展示的内容。
架构优势:
UI 层只需要 watch filteredTodosProvider,无论用户是点击了“任务完成”还是切换了“过滤器”,UI 都会由于响应链的传导而自动刷新,无需编写繁杂的同步逻辑。
import 'package:flutter/material.dart';
import 'package:flutter_riverpod/flutter_riverpod.dart';
// 数据模型
class Todo {
final String id;
final String title;
final bool completed;
Todo({required this.id, required this.title, this.completed = false});
Todo copyWith({String? id, String? title, bool? completed}) {
return Todo(
id: id ?? this.id,
title: title ?? this.title,
completed: completed ?? this.completed,
);
}
}
// 模拟任务列表数据
class TodoListNotifier extends Notifier<List<Todo>> {
List<Todo> build() => [
Todo(id: '1', title: '学习鸿蒙开发', completed: true),
Todo(id: '2', title: '掌握 Riverpod 2.0'),
Todo(id: '3', title: '部署项目到华为手机'),
];
void add(String title) {
state = [
...state,
Todo(id: DateTime.now().toString(), title: title),
];
}
void toggle(String id) {
state = [
for (final todo in state)
if (todo.id == id) todo.copyWith(completed: !todo.completed) else todo,
];
}
void delete(String id) {
state = state.where((todo) => todo.id != id).toList();
}
}
final todoListProvider =
NotifierProvider<TodoListNotifier, List<Todo>>(TodoListNotifier.new);
// 过滤状态 Provider
enum TodoFilter { all, active, completed }
final todoFilterProvider = StateProvider<TodoFilter>((ref) => TodoFilter.all);
// 计算属性 Provider:基于过滤器处理后的列表
final filteredTodosProvider = Provider<List<Todo>>((ref) {
final todos = ref.watch(todoListProvider);
final filter = ref.watch(todoFilterProvider);
switch (filter) {
case TodoFilter.all:
return todos;
case TodoFilter.completed:
return todos.where((todo) => todo.completed).toList();
case TodoFilter.active:
return todos.where((todo) => !todo.completed).toList();
}
});
class RiverpodTodoPage extends ConsumerWidget {
const RiverpodTodoPage({super.key});
Widget build(BuildContext context, WidgetRef ref) {
final todos = ref.watch(filteredTodosProvider);
final filter = ref.watch(todoFilterProvider);
return Scaffold(
appBar: AppBar(title: const Text('综合实战:任务管家')),
body: Column(
children: [
_buildFilterBar(ref, filter),
Expanded(
child: ListView.separated(
itemCount: todos.length,
separatorBuilder: (_, __) => const Divider(height: 1),
itemBuilder: (context, index) {
final todo = todos[index];
return ListTile(
leading: Checkbox(
value: todo.completed,
onChanged: (_) =>
ref.read(todoListProvider.notifier).toggle(todo.id),
),
title: Text(
todo.title,
style: TextStyle(
decoration:
todo.completed ? TextDecoration.lineThrough : null,
color: todo.completed ? Colors.grey : Colors.black,
),
),
trailing: IconButton(
icon: const Icon(Icons.delete_sweep, color: Colors.orange),
onPressed: () =>
ref.read(todoListProvider.notifier).delete(todo.id),
),
);
},
),
),
],
),
floatingActionButton: FloatingActionButton(
onPressed: () => _showAddDialog(context, ref),
child: const Icon(Icons.add_task),
),
);
}
Widget _buildFilterBar(WidgetRef ref, TodoFilter currentFilter) {
return Container(
padding: const EdgeInsets.symmetric(vertical: 8),
color: Colors.grey.withOpacity(0.1),
child: Row(
mainAxisAlignment: MainAxisAlignment.spaceEvenly,
children: TodoFilter.values.map((filter) {
final isSelected = filter == currentFilter;
return ChoiceChip(
label: Text(_filterLabel(filter)),
selected: isSelected,
onSelected: (_) =>
ref.read(todoFilterProvider.notifier).state = filter,
);
}).toList(),
),
);
}
String _filterLabel(TodoFilter filter) {
return switch (filter) {
TodoFilter.all => '全部',
TodoFilter.active => '待办',
TodoFilter.completed => '已完成',
};
}
void _showAddDialog(BuildContext context, WidgetRef ref) {
final controller = TextEditingController();
showDialog(
context: context,
builder: (context) => AlertDialog(
title: const Text('添加新回复'),
content: TextField(
controller: controller,
autofocus: true,
decoration: const InputDecoration(hintText: '写点什么...')),
actions: [
TextButton(
onPressed: () => Navigator.pop(context), child: const Text('取消')),
ElevatedButton(
onPressed: () {
if (controller.text.isNotEmpty) {
ref.read(todoListProvider.notifier).add(controller.text);
}
Navigator.pop(context);
},
child: const Text('保存'),
),
],
),
);
}
}

五、 鸿蒙环境下的避坑指南 (FAQ)
4.1 为什么要用 ref.watch 而不是 ref.read?
在 build 方法中,务必使用 ref.watch。如果你用了 ref.read,虽然能获取到当前值,但当数据后续发生变化时,你的 Widget 不会重绘,这在鸿蒙的动态布局中容易产生“假死”效果。
4.2 内存治理:.autoDispose
在鸿蒙低内存设备适配中,建议给那些临时使用的 Provider 加上 .autoDispose 修饰符:
final temporaryData = FutureProvider.autoDispose((ref) => ...);
这样当用户退出页面时,Riverpod 会立刻释放其占用的内存资源。
六、 总结
Riverpod 重定义了鸿蒙 Flutter 架构的工程质量。它让状态管理变得如同声明式 UI 一样流畅。通过将业务逻辑与 UI 层彻底解耦,你的鸿蒙应用将具备极强的可维护性和测试性。
🌐 欢迎加入开源鸿蒙跨平台社区:开源鸿蒙跨平台开发者社区

开源鸿蒙跨平台开发社区汇聚开发者与厂商,共建“一次开发,多端部署”的开源生态,致力于降低跨端开发门槛,推动万物智联创新。
更多推荐


 19
19 0
0- 0


 已为社区贡献23条内容

所有评论(0)