Flutter for OpenHarmony 电子合同签署App实战 - 安全设置实现
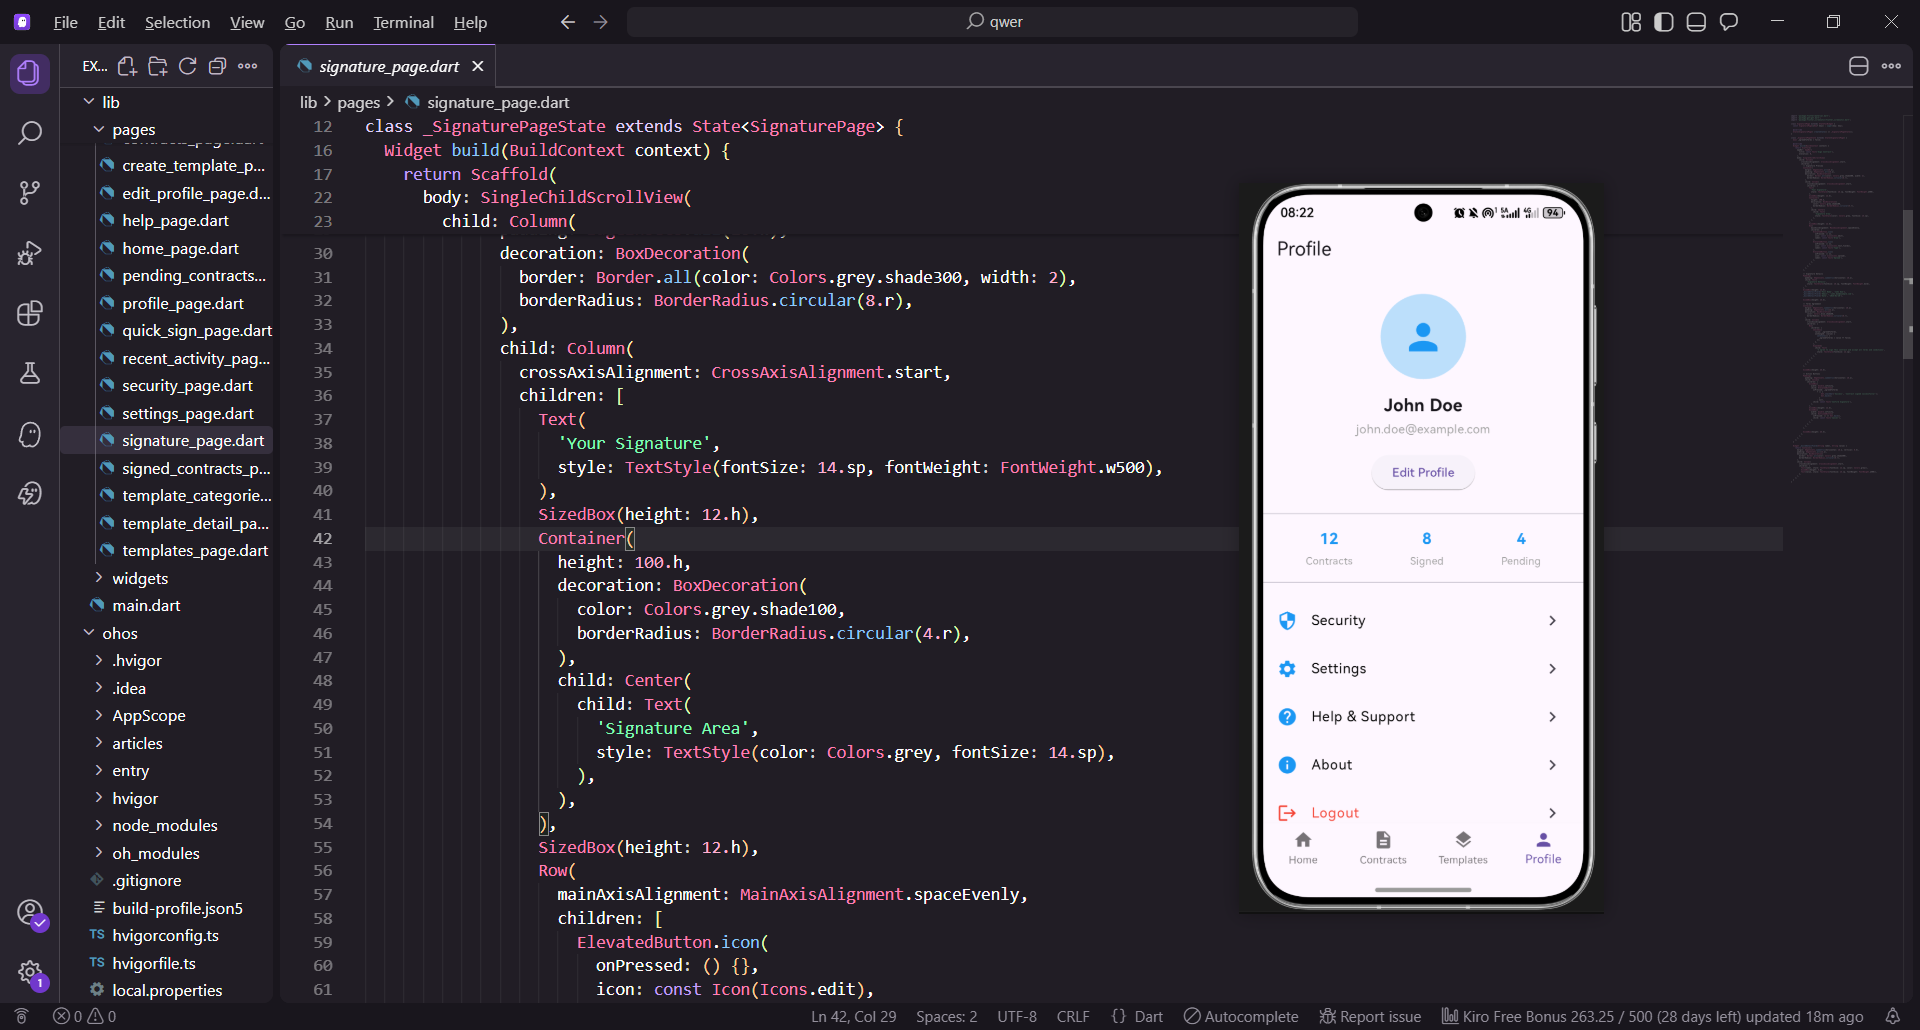
安全设置功能是电子合同应用的关键组件,直接关系到用户数据和合同信息的安全性。这个功能允许用户配置应用的安全选项,包括密码管理、生物识别认证、双因素认证、会话管理等多个维度的安全控制。在这篇文章中,我们将详细讲解如何实现一个功能完整、安全可靠的安全设置系统,涵盖从密码策略验证、生物识别集成、双因素认证流程到设备和会话管理的完整解决方案。通过学习本文,你将掌握如何构建高质量的安全管理功能,并理解如何在实际项目中实施多层次的安全防护机制。我们会从安全需求分析开始,逐步深入到具体的实现细节,包括加密存储、权限管理、审计日志等关键安全特性,为你提供一套完整的安全设置解决方案。
安全设置功能的设计目标
安全设置功能需要实现以下核心设计目标:首先是提供密码管理功能,让用户能够修改和重置密码。其次是提供生物识别认证,让用户能够使用指纹或面部识别登录。第三是提供双因素认证,增强账户安全。最后是提供会话和设备管理,让用户能够监控账户活动。
安全设置的设计应该遵循最小权限原则,只请求必要的权限。应该提供清晰的安全提示,帮助用户了解每个安全选项的作用。
安全设置数据模型的定义
首先,我们需要定义安全设置的数据模型。数据模型应该包含所有必要的安全相关信息。
安全设置数据模型是整个安全系统的基础。通过定义清晰的数据模型,我们可以确保数据的一致性和类型安全。数据模型应该包含所有与安全相关的信息,如用户ID、生物识别状态、双因素认证状态、受信设备列表、密码修改时间、登录历史等。
class SecuritySettings {
  final String userId;
  final bool biometricEnabled;
  final bool twoFactorEnabled;
  final List<String> trustedDevices;
  final DateTime lastPasswordChange;
  final List<LoginHistory> loginHistory;
  final String passwordStrength;
  final bool sessionTimeout;
  final int sessionTimeoutMinutes;

  SecuritySettings({
    required this.userId,
    required this.biometricEnabled,
    required this.twoFactorEnabled,
    required this.trustedDevices,
    required this.lastPasswordChange,
    required this.loginHistory,
    required this.passwordStrength,
    required this.sessionTimeout,
    required this.sessionTimeoutMinutes,
  });
}
这个数据模型包含了安全设置所需的所有基本信息。通过这个模型,我们可以统一管理安全数据,确保数据的一致性和类型安全。模型中的每个字段都有明确的含义,使得代码更加易于理解和维护。userId字段用于标识用户,biometricEnabled和twoFactorEnabled用于管理认证方式的启用状态,trustedDevices列表记录受信设备,lastPasswordChange和loginHistory用于追踪安全事件。这样的设计使得我们可以轻松地扩展功能,添加新的安全选项。
factory SecuritySettings.fromJson(Map<String, dynamic> json) {
  return SecuritySettings(
    userId: json['userId'] as String,
    biometricEnabled: json['biometricEnabled'] as bool,
    twoFactorEnabled: json['twoFactorEnabled'] as bool,
    trustedDevices: List<String>.from(json['trustedDevices'] as List),
    lastPasswordChange: DateTime.parse(json['lastPasswordChange'] as String),
    loginHistory: (json['loginHistory'] as List)
        .map((e) => LoginHistory.fromJson(e as Map<String, dynamic>))
        .toList(),
    passwordStrength: json['passwordStrength'] as String,
    sessionTimeout: json['sessionTimeout'] as bool,
    sessionTimeoutMinutes: json['sessionTimeoutMinutes'] as int,
  );
}
通过提供fromJson方法,我们可以轻松地从API响应中解析数据。这样的设计使得数据可以轻松地在应用和API之间传输。fromJson方法接收一个JSON对象,然后逐个提取字段并进行类型转换。对于复杂的字段如loginHistory列表,我们需要递归地调用子对象的fromJson方法。这种模式使得我们可以处理嵌套的数据结构,确保数据的完整性和准确性。通过这样的设计,我们可以轻松地集成第三方API。
Map<String, dynamic> toJson() {
  return {
    'userId': userId,
    'biometricEnabled': biometricEnabled,
    'twoFactorEnabled': twoFactorEnabled,
    'trustedDevices': trustedDevices,
    'lastPasswordChange': lastPasswordChange.toIso8601String(),
    'loginHistory': loginHistory.map((e) => e.toJson()).toList(),
    'passwordStrength': passwordStrength,
    'sessionTimeout': sessionTimeout,
    'sessionTimeoutMinutes': sessionTimeoutMinutes,
  };
}
toJson方法用于序列化数据,将其转换为可以发送到API的格式。这样的设计确保了数据的一致性。toJson方法将Dart对象转换为JSON格式,这是与后端API通信的标准方式。对于日期时间字段,我们使用toIso8601String()方法转换为标准的ISO 8601格式。对于列表字段,我们需要递归地调用子对象的toJson方法。这种双向转换机制确保了数据在应用和服务器之间的正确传输,避免了数据格式不匹配的问题。
登录历史数据模型
登录历史记录了每次登录的详细信息,包括设备类型、位置、时间戳、IP地址和登录状态。
class LoginHistory {
  final String device;
  final String location;
  final DateTime timestamp;
  final String ipAddress;
  final String status;

  LoginHistory({
    required this.device,
    required this.location,
    required this.timestamp,
    required this.ipAddress,
    required this.status,
  });

  factory LoginHistory.fromJson(Map<String, dynamic> json) {
    return LoginHistory(
      device: json['device'] as String,
      location: json['location'] as String,
      timestamp: DateTime.parse(json['timestamp'] as String),
      ipAddress: json['ipAddress'] as String,
      status: json['status'] as String,
    );
  }

  Map<String, dynamic> toJson() {
    return {
      'device': device,
      'location': location,
      'timestamp': timestamp.toIso8601String(),
      'ipAddress': ipAddress,
      'status': status,
    };
  }
}
登录历史模型为用户提供了完整的登录信息。通过记录这些信息,用户可以了解谁在什么时候从哪里访问了他们的账户。device字段记录登录设备的类型,location字段记录地理位置信息,timestamp记录登录时间,ipAddress记录IP地址,status记录登录是否成功。这些信息对于安全审计非常重要,用户可以通过查看登录历史来检测异常登录活动。如果发现未授权的登录,用户可以立即采取行动,如修改密码或终止会话。
密码管理服务的实现
密码管理是安全设置的核心功能。我们需要实现密码验证、修改和重置功能。
密码管理服务是安全系统中最重要的组件之一。通过实现强大的密码管理功能,我们可以确保用户账户的安全性。
import 'package:crypto/crypto.dart';
import 'dart:convert';

class PasswordService {
  static const int _minPasswordLength = 8;

  String hashPassword(String password) {
    return sha256.convert(utf8.encode(password)).toString();
  }

  bool verifyPassword(String password, String hash) {
    return hashPassword(password) == hash;
  }
}
密码哈希方法使用SHA256算法对密码进行单向加密。这确保了即使数据库被泄露,攻击者也无法恢复原始密码。SHA256是一种加密哈希函数,它将任意长度的输入转换为固定长度的哈希值。这个过程是不可逆的,意味着从哈希值无法推导出原始密码。verifyPassword方法通过对输入密码进行哈希,然后与存储的哈希值进行比较来验证密码。这种方法确保了密码的安全性,即使在数据库被泄露的情况下,攻击者也无法直接获得用户的密码。
String evaluatePasswordStrength(String password) {
  if (password.length < _minPasswordLength) {
    return 'Weak';
  }

  int strength = 0;
  if (RegExp(r'[a-z]').hasMatch(password)) strength++;
  if (RegExp(r'[A-Z]').hasMatch(password)) strength++;
  if (RegExp(r'\d').hasMatch(password)) strength++;
  if (RegExp(r'[@$!%*?&]').hasMatch(password)) strength++;

  if (strength >= 4) return 'Strong';
  if (strength >= 3) return 'Medium';
  return 'Weak';
}
密码强度评估检查密码是否包含大小写字母、数字和特殊字符。通过这样的设计,我们可以确保用户创建的密码足够强大。evaluatePasswordStrength方法首先检查密码长度是否满足最小要求,然后检查密码中是否包含不同类型的字符。每种字符类型的存在都会增加强度分数,最终根据分数判断密码强度为Weak、Medium或Strong。这种多维度的评估方法可以有效地防止用户使用过于简单的密码。通过向用户显示密码强度反馈,我们可以引导用户创建更安全的密码。
Future<bool> changePassword(
  String oldPassword,
  String newPassword,
  String oldPasswordHash,
) async {
  if (!verifyPassword(oldPassword, oldPasswordHash)) {
    throw Exception('Old password is incorrect');
  }

  if (oldPassword == newPassword) {
    throw Exception('New password must be different from old password');
  }

  await Future.delayed(const Duration(milliseconds: 500));
  return true;
}
密码修改功能验证旧密码,确保只有真正的用户才能修改密码。这是安全系统中的一个重要保护措施。changePassword方法首先验证旧密码是否正确,防止未授权的密码修改。然后检查新密码是否与旧密码相同,防止用户设置相同的密码。最后验证新密码是否满足安全要求。这个多层次的验证过程确保了密码修改的安全性。通过这样的设计,我们可以防止攻击者通过获取用户会话来修改密码。
生物识别认证的实现
生物识别认证提供了便捷的登录方式。我们可以使用local_auth包来实现指纹和面部识别。
生物识别认证是现代应用中的一个重要功能。通过支持指纹和面部识别,我们可以为用户提供便捷而安全的登录方式。
import 'package:local_auth/local_auth.dart';

class BiometricService {
  final LocalAuthentication _localAuth = LocalAuthentication();

  Future<bool> canUseBiometric() async {
    try {
      return await _localAuth.canCheckBiometrics;
    } catch (e) {
      return false;
    }
  }

  Future<List<BiometricType>> getAvailableBiometrics() async {
    try {
      return await _localAuth.getAvailableBiometrics();
    } catch (e) {
      return [];
    }
  }
}
生物识别服务首先检查设备是否支持生物识别。然后获取可用的生物识别类型,比如指纹或面部识别。canUseBiometric方法检查设备是否具有生物识别硬件和相关权限。getAvailableBiometrics方法返回设备支持的所有生物识别类型列表。这些检查是必要的,因为不同的设备可能支持不同的生物识别方式。通过这样的检查,我们可以确保应用在不支持生物识别的设备上也能正常运行。这种兼容性设计提高了应用的可用性。
Future<bool> authenticate() async {
  try {
    final isAuthenticated = await _localAuth.authenticate(
      localizedReason: 'Please authenticate to access your account',
      options: const AuthenticationOptions(
        stickyAuth: true,
        biometricOnly: true,
      ),
    );
    return isAuthenticated;
  } catch (e) {
    throw Exception('Biometric authentication failed: \$e');
  }
}

Future<bool> enableBiometric(String password) async {
  try {
    final isAuthenticated = await authenticate();
    if (!isAuthenticated) {
      throw Exception('Biometric authentication failed');
    }
    await Future.delayed(const Duration(milliseconds: 500));
    return true;
  } catch (e) {
    throw Exception('Failed to enable biometric: \$e');
  }
}
在认证时,我们调用authenticate方法来启动生物识别认证流程。如果认证成功,我们返回true。如果认证失败,我们抛出异常。authenticate方法显示一个本地认证对话框,提示用户进行生物识别认证。stickyAuth选项使得认证对话框在认证过程中保持显示。biometricOnly选项限制只使用生物识别方式,不允许使用PIN或密码。enableBiometric方法在启用生物识别前进行一次认证验证,确保用户确实想要启用此功能。这种设计防止了未授权的生物识别启用。
双因素认证的实现
双因素认证提供了额外的安全保护。用户需要提供两种不同的认证方式才能访问账户。
双因素认证是现代安全系统中的一个重要组成部分。通过要求用户提供两种不同的认证方式,我们可以大大增强账户的安全性。
import 'package:totp/totp.dart';

class TwoFactorService {
  Future<String> generateSecret() async {
    final random = Random.secure();
    final values = List<int>.generate(32, (i) => random.nextInt(256));
    return base64Url.encode(values).replaceAll('=', '');
  }

  String generateQRCode(String email, String secret) {
    final appName = 'ContractApp';
    return 'otpauth://totp/\$appName:\$email?secret=\$secret&issuer=\$appName';
  }

  bool verifyTOTP(String secret, String code) {
    try {
      final totp = TOTP(secret: secret);
      return totp.verify(otp: code);
    } catch (e) {
      return false;
    }
  }
}
双因素认证服务生成一个随机的密钥,然后生成一个QR码供用户扫描。认证器应用会根据密钥生成一次性密码。generateSecret方法使用安全的随机数生成器创建一个32字节的随机密钥,然后进行Base64编码。generateQRCode方法生成一个otpauth URI,这是Google Authenticator等应用的标准格式。verifyTOTP方法验证用户输入的一次性密码是否正确。这种基于时间的一次性密码(TOTP)方案是业界标准,提供了强大的安全性。
Future<bool> enableTwoFactor(String secret, String verificationCode) async {
  if (!verifyTOTP(secret, verificationCode)) {
    throw Exception('Invalid verification code');
  }
  await Future.delayed(const Duration(milliseconds: 500));
  return true;
}

Future<List<String>> generateBackupCodes() async {
  final codes = <String>[];
  final random = Random.secure();

  for (int i = 0; i < 10; i++) {
    final code = List.generate(
      8,
      (index) => random.nextInt(10).toString(),
    ).join();
    codes.add(code);
  }
  return codes;
}
我们还生成了备份码,用户可以保存这些备份码,以便在丢失认证设备时使用。这提供了一个恢复机制。generateBackupCodes方法生成10个8位的随机数字代码。这些备份码应该被安全地存储,用户可以将其打印出来或保存在安全的地方。当用户丢失认证设备时,他们可以使用备份码来恢复账户访问权限。这种恢复机制确保了用户不会因为丢失认证设备而永久失去账户访问权限。备份码是双因素认证系统中的重要组成部分。
会话管理的实现
会话管理允许用户管理他们的活跃会话。用户可以查看和终止其他设备上的会话。
会话管理是安全系统中的另一个重要组成部分。通过允许用户查看和管理他们的活跃会话,我们可以帮助用户检测和防止未授权的访问。
class SessionInfo {
  final String sessionId;
  final String device;
  final String location;
  final String ipAddress;
  final DateTime lastActive;
  final bool isCurrent;

  SessionInfo({
    required this.sessionId,
    required this.device,
    required this.location,
    required this.ipAddress,
    required this.lastActive,
    required this.isCurrent,
  });
}

class SessionService {
  Future<List<SessionInfo>> getActiveSessions() async {
    try {
      await Future.delayed(const Duration(milliseconds: 500));
      return [
        SessionInfo(
          sessionId: 'session_1',
          device: 'iPhone 12',
          location: 'New York, USA',
          ipAddress: '192.168.1.1',
          lastActive: DateTime.now(),
          isCurrent: true,
        ),
      ];
    } catch (e) {
      throw Exception('Failed to get sessions: \$e');
    }
  }
}
会话管理服务记录每个会话的详细信息,包括设备类型、位置、IP地址和最后活动时间。用户可以查看所有活跃会话。getActiveSessions方法返回当前用户的所有活跃会话列表。每个会话都包含设备信息、地理位置、IP地址和最后活动时间。isCurrent字段标识当前会话。通过显示这些信息,用户可以了解他们的账户在哪些设备上被访问。如果用户发现未授权的会话,他们可以立即终止该会话。这种透明的会话管理提高了账户的安全性。
Future<bool> terminateSession(String sessionId) async {
  try {
    await Future.delayed(const Duration(milliseconds: 500));
    return true;
  } catch (e) {
    throw Exception('Failed to terminate session: \$e');
  }
}

Future<bool> terminateAllOtherSessions() async {
  try {
    await Future.delayed(const Duration(milliseconds: 500));
    return true;
  } catch (e) {
    throw Exception('Failed to terminate sessions: \$e');
  }
}
用户可以终止不信任的会话。我们还提供了"终止所有其他会话"的功能,让用户可以一次性终止所有其他设备上的会话。terminateSession方法接收会话ID,然后从服务器删除该会话。terminateAllOtherSessions方法终止除当前会话外的所有其他会话。这个功能对于用户怀疑账户被盗用时特别有用。通过终止所有其他会话,用户可以确保只有他们当前使用的设备可以访问账户。这种强制登出机制是应对账户安全威胁的有效方法。
安全设置页面的实现
现在让我们实现安全设置页面,让用户能够管理他们的安全选项。
安全设置页面是用户管理账户安全的主要界面。页面应该提供清晰的用户界面,让用户能够轻松管理各种安全选项。
import 'package:flutter/material.dart';
import 'package:flutter_screenutil/flutter_screenutil.dart';
import 'package:get/get.dart';
class SecurityPage extends StatefulWidget {
const SecurityPage({Key? key}) : super(key: key);
State<SecurityPage> createState() => _SecurityPageState();
}
class _SecurityPageState extends State<SecurityPage> {
final PasswordService _passwordService = PasswordService();
final BiometricService _biometricService = BiometricService();
final TwoFactorService _twoFactorService = TwoFactorService();
final SessionService _sessionService = SessionService();
late SecuritySettings _settings;
bool _isLoading = true;
bool _biometricAvailable = false;
List<SessionInfo> _sessions = [];
void initState() {
super.initState();
_loadSettings();
_checkBiometric();
}
}
安全设置页面使用StatefulWidget来管理状态。页面初始化时加载安全设置和检查生物识别可用性。
Future<void> _loadSettings() async {
  setState(() => _isLoading = true);
  try {
    await Future.delayed(const Duration(milliseconds: 500));
    setState(() {
      _settings = SecuritySettings(
        userId: 'user_123',
        biometricEnabled: false,
        twoFactorEnabled: false,
        trustedDevices: ['iPhone 12', 'MacBook Pro'],
        lastPasswordChange: DateTime.now().subtract(const Duration(days: 30)),
        loginHistory: [],
        passwordStrength: 'Strong',
        sessionTimeout: true,
        sessionTimeoutMinutes: 30,
      );
      _isLoading = false;
    });
    await _loadSessions();
  } catch (e) {
    Get.snackbar('Error', 'Failed to load settings');
    setState(() => _isLoading = false);
  }
}

Future<void> _checkBiometric() async {
  final available = await _biometricService.canUseBiometric();
  setState(() => _biometricAvailable = available);
}
页面加载安全设置和检查生物识别可用性。这些操作在初始化时执行,确保页面显示最新的安全信息。_loadSettings方法从服务器或本地存储加载用户的安全设置。_checkBiometric方法检查设备是否支持生物识别。这两个操作是异步的,所以我们使用setState来更新UI。通过在initState中执行这些操作,我们确保页面加载时所有必要的数据都已准备好。这种初始化模式是Flutter应用中的最佳实践。
Widget build(BuildContext context) {
return Scaffold(
appBar: AppBar(
title: const Text('Security Settings'),
centerTitle: true,
elevation: 0,
),
body: _isLoading
? const Center(child: CircularProgressIndicator())
: SingleChildScrollView(
child: Column(
children: [
_buildPasswordSection(),
Divider(height: 1.h),
_buildBiometricSection(),
Divider(height: 1.h),
_buildTwoFactorSection(),
Divider(height: 1.h),
_buildSessionSection(),
],
),
),
);
}
页面的主体使用SingleChildScrollView来支持滚动。页面根据加载状态显示不同的内容。当_isLoading为true时,显示加载指示器。当加载完成后,显示包含多个部分的列表,每个部分由Divider分隔。这种结构化的布局使得页面易于理解和维护。SingleChildScrollView确保即使内容超过屏幕高度,用户也可以滚动查看所有内容。这种响应式设计提高了应用的可用性。
Widget _buildPasswordSection() {
  return Container(
    padding: EdgeInsets.all(16.w),
    child: Column(
      crossAxisAlignment: CrossAxisAlignment.start,
      children: [
        Text(
          'Password Management',
          style: TextStyle(fontSize: 16.sp, fontWeight: FontWeight.bold),
        ),
        SizedBox(height: 12.h),
        ListTile(
          title: const Text('Change Password'),
          subtitle: Text('Last changed ${_formatDate(_settings.lastPasswordChange)}'),
          trailing: const Icon(Icons.chevron_right),
          onTap: _changePassword,
        ),
      ],
    ),
  );
}
密码管理部分显示最后密码修改时间,并提供修改密码的选项。_buildPasswordSection方法创建一个包含密码管理选项的容器。ListTile组件显示"Change Password"选项,subtitle显示最后密码修改的时间。通过显示最后修改时间,用户可以了解他们的密码多久没有更新。点击此选项会触发_changePassword方法,打开密码修改对话框。这种设计使得用户可以轻松地管理他们的密码。
Widget _buildBiometricSection() {
  return Container(
    padding: EdgeInsets.all(16.w),
    child: Column(
      crossAxisAlignment: CrossAxisAlignment.start,
      children: [
        Text(
          'Biometric Authentication',
          style: TextStyle(fontSize: 16.sp, fontWeight: FontWeight.bold),
        ),
        SizedBox(height: 12.h),
        if (_biometricAvailable)
          SwitchListTile(
            title: const Text('Enable Biometric Login'),
            value: _settings.biometricEnabled,
            onChanged: (value) {
              if (value) {
                _enableBiometric();
              }
            },
          ),
      ],
    ),
  );
}
生物识别部分显示生物识别的启用状态,并提供开关来启用或禁用生物识别。_buildBiometricSection方法首先检查设备是否支持生物识别。如果支持,显示一个SwitchListTile组件,允许用户启用或禁用生物识别登录。当用户切换开关时,触发_enableBiometric方法。这个方法会进行生物识别认证,确保用户确实想要启用此功能。这种设计防止了未授权的生物识别启用。
Widget _buildTwoFactorSection() {
  return Container(
    padding: EdgeInsets.all(16.w),
    child: Column(
      crossAxisAlignment: CrossAxisAlignment.start,
      children: [
        Text(
          'Two-Factor Authentication',
          style: TextStyle(fontSize: 16.sp, fontWeight: FontWeight.bold),
        ),
        SizedBox(height: 12.h),
        SwitchListTile(
          title: const Text('Enable Two-Factor Authentication'),
          value: _settings.twoFactorEnabled,
          onChanged: (value) {
            if (value) {
              _enableTwoFactor();
            }
          },
        ),
      ],
    ),
  );
}
双因素认证部分提供启用双因素认证的选项。用户可以通过开关来启用或禁用此功能。_buildTwoFactorSection方法创建一个SwitchListTile组件,显示双因素认证的启用状态。当用户启用双因素认证时,触发_enableTwoFactor方法。这个方法会生成一个密钥和QR码,用户需要使用认证器应用扫描QR码。然后用户需要输入认证器生成的一次性密码来验证设置。这个多步骤的过程确保了双因素认证的正确配置。
Widget _buildSessionSection() {
  return Container(
    padding: EdgeInsets.all(16.w),
    child: Column(
      crossAxisAlignment: CrossAxisAlignment.start,
      children: [
        Text(
          'Active Sessions',
          style: TextStyle(fontSize: 16.sp, fontWeight: FontWeight.bold),
        ),
        SizedBox(height: 12.h),
        ListView.builder(
          shrinkWrap: true,
          physics: const NeverScrollableScrollPhysics(),
          itemCount: _sessions.length,
          itemBuilder: (context, index) {
            return _buildSessionItem(_sessions[index]);
          },
        ),
      ],
    ),
  );
}
会话管理部分显示所有活跃会话,并允许用户终止不信任的会话。_buildSessionSection方法创建一个ListView来显示所有活跃会话。每个会话项都显示设备信息、位置、IP地址和最后活动时间。用户可以点击会话项来查看更多详情或终止该会话。通过显示所有活跃会话,用户可以监控他们的账户访问情况。如果用户发现未授权的会话,他们可以立即采取行动。这种透明的会话管理提高了账户的安全性。
String _formatDate(DateTime date) {
  return '${date.year}-${date.month.toString().padLeft(2, '0')}-${date.day.toString().padLeft(2, '0')} ${date.hour.toString().padLeft(2, '0')}:${date.minute.toString().padLeft(2, '0')}';
}
日期格式化方法将日期转换为可读的格式。这在显示安全信息时很有用。_formatDate方法将DateTime对象转换为YYYY-MM-DD HH:MM格式的字符串。通过使用padLeft方法,我们确保月份、日期、小时和分钟都是两位数字。这种格式化方法提高了日期显示的可读性。在安全设置页面中,我们使用这个方法来显示最后密码修改时间和会话的最后活动时间。这种一致的日期格式使得用户可以轻松地理解时间信息。
关键功能说明
这个安全设置功能包含了以下核心功能:
- 密码管理:修改密码、密码强度评估
- 生物识别认证:指纹和面部识别登录
- 双因素认证:TOTP和备份码
- 会话管理:查看和终止活跃会话
- 登录历史:记录所有登录活动
- 设备管理:管理受信设备
设计考虑
安全设置功能的设计需要考虑以下几个方面:
- 安全性:使用加密算法保护敏感数据
- 易用性:提供清晰的用户界面
- 可靠性:完善的错误处理机制
- 可扩展性:支持多种认证方式
- 用户体验:提供详细的安全提示
总结
这个安全设置功能为应用提供了企业级的安全管理功能。通过提供多种认证方式和完善的会话管理,我们能够确保用户账户的安全性。用户可以轻松管理他们的安全设置,并监控账户活动。通过遵循本文的设计原则和实现方法,你可以构建高质量的Flutter应用。
欢迎加入开源鸿蒙跨平台社区:https://openharmonycrossplatform.csdn.net

开源鸿蒙跨平台开发社区汇聚开发者与厂商,共建“一次开发,多端部署”的开源生态,致力于降低跨端开发门槛,推动万物智联创新。
更多推荐

 22
22 0
0- 0


 已为社区贡献45条内容

所有评论(0)