用 UniApp 复刻 AtomGit 仓库页
目录
模块二:初始化加载 (The "Promise.all" Trick)
架构设计图
在动手写代码前,我们先看一眼我们要做的页面结构。根据需求,页面严格分为上下两大核心区域:
+-------------------------------------------------------+
|  【头部区域:Top Area】 (固定或随滚动)                  |
|                                                       |
|   [项目名称 / 仓库名]   [公开/私有 徽章]                 |
|   [项目简介:这是一个很棒的UniApp项目...]                 |
|                                                       |
|   Stats: 🌟 Star 100  |  🔱 Fork 20  |  👁 Watch 50   |
+-------------------------------------------------------+
|  【内容区域:Bottom Area】 (滚动列表)                   |
|                                                       |
|   📂 src/                  更新于 2小时前               |
|   📂 components/           更新于 3天前                 |
|   📄 main.js               更新于 1周前                 |
|   📄 README.md             更新于 1年前                 |
|   ...                                                 |
+-------------------------------------------------------+
第一步:API 准备(数据源)
AtomGit(基于 GitLab 架构) 提供了非常完善的 REST API。我们需要用到两个核心接口。
假设我们要访问的仓库是:dcloud/uni-app (仅作示例,实际请替换为你自己的或开源仓库)。
-
获取仓库详情 (Repo Info)
-
URL:
https://gitcode.com/api/v5/repos/{owner}/{repo} -
作用: 拿到头像、描述、Star数、默认分支等。
-
-
获取文件树 (Repository Tree)
-
URL:
https://gitcode.com/api/v5/repos/{owner}/{repo}/contents/{path} -
参数:
ref(分支名,如 master/main) -
作用: 拿到文件列表、类型(是文件还是文件夹)。
-
⚠️ 注意: 实际开发中建议申请 AtomGit的
Access Token放在 Header 里,否则会有 API 调用频率限制。
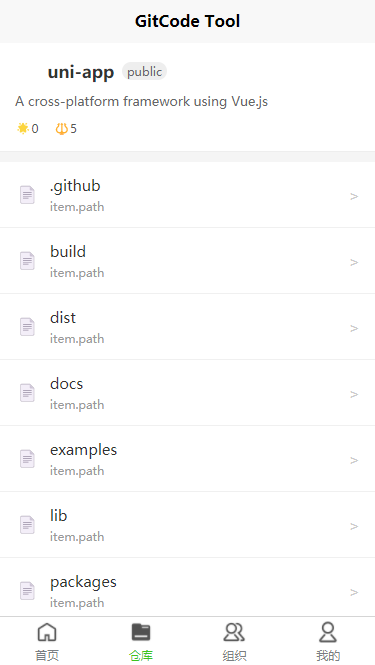
第二步:编写页面布局 (Template)
在 pages 目录下新建 repo-detail.vue。
我们使用 Flex 布局来实现清晰的上下结构。
<template>
<view class="container">
<view class="header-section">
<view class="repo-title-row">
<image class="avatar" :src="repoInfo.owner.avatar_url || '/static/default-avatar.png'" mode="aspectFill"></image>
<text class="repo-name">{{ repoInfo.name }}</text>
<view class="badge">{{ repoInfo.visibility || 'public' }}</view>
</view>
<text class="repo-desc">{{ repoInfo.description || '暂无描述' }}</text>
<view class="repo-stats">
<view class="stat-item">
<text class="iconfont">🌟</text>
<text>{{ repoInfo.star_count || 0 }}</text>
</view>
<view class="stat-item">
<text class="iconfont">🔱</text>
<text>{{ repoInfo.forks_count || 0 }}</text>
</view>
</view>
</view>
<view class="file-section">
<view class="breadcrumb" v-if="currentPath">
<text @click="goBack">⬅ 返回上一级: /{{ currentPath }}</text>
</view>
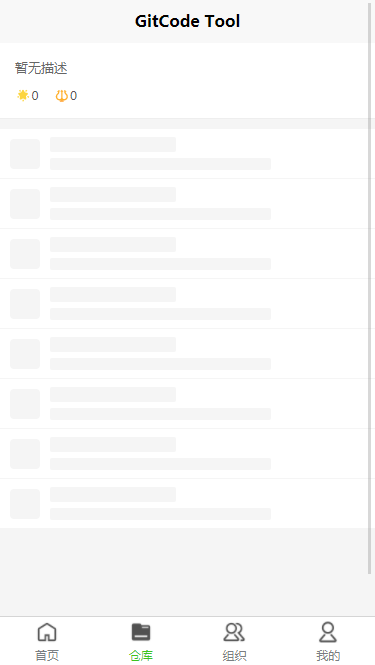
<view v-if="loading" class="loading-tips">加载中...</view>
<view v-else class="file-list">
<view
class="file-item"
v-for="(item, index) in fileList"
:key="index"
@click="handleFileClick(item)"
>
<view class="file-icon">
{{ item.type === 'tree' ? '📂' : '📄' }}
</view>
<view class="file-info">
<text class="file-name">{{ item.name }}</text>
<text class="file-update">item.path</text>
</view>
<view class="arrow">></view>
</view>
</view>
</view>
</view>
</template>
第三步:核心逻辑实现 (Script)
这里是性能优化的关键。我们需要处理路径跳转(进入文件夹)和网络请求。
模块一:数据状态设计 (Data Modeling)
在 data() 里定义的变量,其实就是这个页面的“内存条”。理解了它们,你就理解了页面是如何“记住”当前状态的。
data() {
  return {
    // --- 1. 路由参数 ---
    owner: '',       // 谁的仓库?(如 dcloud)
    repoName: '',    // 哪个项目?(如 uni-app)

    // --- 2. 导航状态 (核心中的核心) ---
    currentPath: '', // 记录当前我们“钻”到哪一层目录了
                     // 空字符串 = 根目录
                     // "src" = 第一层
                     // "src/core" = 第二层

    // --- 3. 视图数据 ---
    repoInfo: {},    // 头部大对象:存头像、Star数、描述
    fileList: [],    // 列表数组:存当前目录下的所有文件

    // --- 4. 交互状态 ---
    loading: true    // 控制“加载中...”提示的显示与隐藏
  };
}
博主划重点: 这里的
currentPath是最关键的变量。整个文件浏览器的“前进”和“后退”,本质上就是对这个字符串进行拼接或截断,然后重新请求 API。
模块二:初始化加载 (The "Promise.all" Trick)
在 onLoad 和 initData 中,我们用了一个性能优化技巧。
场景描述:
我们需要展示两部分信息:
-
仓库的头像和简介(Header 区域)。
-
仓库根目录的文件列表(List 区域)。
普通写法 (串行 - 慢):
先请求 Header -> 等它回来 -> 再请求文件列表 -> 渲染。这会导致用户看到头像了,下面还是空白。
高手写法 (并行 - 快):
我们使用了 Promise.all。
async initData() {
  this.loading = true; // 开启全局 Loading
  try {
    // Promise.all 接收一个数组,里面的请求会同时发出!
    // 只有当两个请求都成功了,await 才会继续往下走。
    await Promise.all([
      this.fetchRepoInfo(), // 线程1:去拿头部信息
      this.fetchFiles()     // 线程2:去拿文件列表
    ]);
  } catch (e) {
    // 只要有一个失败,就报错
    uni.showToast({ title: '加载失败' });
  } finally {
    // 不管成功失败,最后都要把 Loading 关掉
    this.loading = false;
  }
}
逻辑解读: 这样做的好处是,页面的加载时间取决于最慢的那个请求,而不是两个请求时间的总和。用户体验会有质的飞跃。
模块三:路径导航机制 (Navigation Logic)
这是文件浏览器的灵魂。用户点击文件夹进入下一级,点击面包屑返回上一级。
1. 前进逻辑 (Drill Down)
当用户点击 src 文件夹时:
handleFileClick(item) {
  if (item.type === 'tree') { // tree 在 Git 术语中代表文件夹

    // 逻辑:旧路径 + "/" + 新文件夹名
    // 如果当前是空(根目录),直接赋值;否则拼接斜杠
    let newPath = this.currentPath
                  ? `${this.currentPath}/${item.name}`
                  : item.name;

    // 1. 更新状态
    this.currentPath = newPath;
    // 2. 拿着新路径去请求 API
    this.fetchFiles(newPath);
  }
}
2. 后退逻辑 (Go Back)
当用户点击“返回上一级”时,我们需要把路径字符串的最后一节砍掉。
goBack() {
  if (!this.currentPath) return; // 已经是根目录就别退了

  // 举例:currentPath 是 "src/core/service"

  // 1. 劈开:变成数组 ['src', 'core', 'service']
  const parts = this.currentPath.split('/');

  // 2. 弹射:把最后一个 'service' 扔掉 -> ['src', 'core']
  parts.pop();

  // 3. 缝合:重新拼成字符串 -> "src/core"
  this.currentPath = parts.join('/');

  // 4. 重新请求新路径的数据
  this.fetchFiles(this.currentPath);
}
模块四:文件排序哲学 (Sorting)
API 返回的数据通常是乱序的(或者按字母序)。但作为程序员,我们习惯文件夹在上面,文件在下面。
所以在 fetchFiles 成功拿到数据后,我们做了一次手动干预:
// res.data 是 API 返回的原始数组
let files = res.data;

files.sort((a, b) => {
  // 情况A:类型相同(都是文件夹,或都是文件)
  if (a.type === b.type) {
    // 按首字母 A-Z 排序
    return a.name.localeCompare(b.name);
  }

  // 情况B:类型不同
  // 如果 a 是文件夹(tree),它应该排前面 (-1)
  // 否则 a 是文件(blob),它应该排后面 (1)
  return a.type === 'tree' ? -1 : 1;
});
逻辑解读: 这段
sort代码保证了无论 API 怎么返回数据,你的页面永远是井井有条的:文件夹整齐地列在顶部,文件列在底部,符合所有 IDE 的使用习惯。
全链路数据流图:
为了让你彻底看清整个过程,我画了一个文字版的数据流向图
[用户行为]           [代码逻辑]                      [界面变化]
   👇                  👇                             👇
1. 页面加载 ----> onLoad() -> initData()
                 触发 Promise.all
                 ├── 请求 RepoInfo API --------> 头部显示头像、Star
                 └── 请求 Root Files API ------> 底部显示 README.md, src/

2. 点击 "src" --> handleFileClick()
                 1. 拼接路径: "" -> "src"
                 2. currentPath = "src" -------> 面包屑变成 "返回 /src"
                 3. fetchFiles("src") ---------> 列表刷新,显示 src 下的内容

3. 点击 "返回" --> goBack()
                 1. 切割路径: "src" -> ""
                 2. currentPath = "" ----------> 面包屑消失
                 3. fetchFiles("") ------------> 列表刷新,回到根目录
完整代码展示:
<script>
export default {
  data() {
    return {
      owner: '',       // 仓库拥有者
      repoName: '',    // 仓库名
      defaultBranch: 'master', // 默认分支
      currentPath: '', // 当前浏览的路径,空字符串代表根目录

      loading: true,
      repoInfo: {},    // 头部信息数据
      fileList: []     // 文件列表数据
    };
  },
  onLoad(options) {
    // 假设从上一页传参过来:?owner=dcloud&repo=uni-app
    this.owner = options.owner || 'dcloud';
    this.repoName = options.repo || 'uni-app';

    this.initData();
  },
  methods: {
    async initData() {
      this.loading = true;
      try {
        // 并行请求:同时获取详情和根目录文件,提高首屏速度
        await Promise.all([this.fetchRepoInfo(), this.fetchFiles()]);
      } catch (e) {
        uni.showToast({ title: '加载失败', icon: 'none' });
      } finally {
        this.loading = false;
      }
    },

    // 1. 获取仓库详情
    fetchRepoInfo() {
      return new Promise((resolve, reject) => {
        uni.request({
          url: `https://gitcode.com/api/v5/repos/${this.owner}/${this.repoName}`,
          success: (res) => {
            this.repoInfo = res.data;
            this.defaultBranch = res.data.default_branch || 'master';
            resolve(res);
          },
          fail: reject
        });
      });
    },

    // 2. 获取文件列表 (支持进入文件夹)
    fetchFiles(path = '') {
      this.loading = true;
      // 处理路径编码,防止中文路径报错
      const encodedPath = encodeURIComponent(path);
      // 注意:GitCode API 如果请求根目录,路径参数可能不同,这里以 contents 接口为例
      // 如果 path 为空,通常不需要传路径参数或传空
      let url = `https://gitcode.com/api/v5/repos/${this.owner}/${this.repoName}/contents/${encodedPath}`;

      return new Promise((resolve, reject) => {
        uni.request({
          url: url,
          data: {
            ref: this.defaultBranch // 指定分支
          },
          success: (res) => {
            // 对文件进行排序:文件夹排在前面,文件排在后面
            let files = res.data;
            if (Array.isArray(files)) {
              files.sort((a, b) => {
                if (a.type === b.type) return a.name.localeCompare(b.name);
                return a.type === 'tree' ? -1 : 1;
              });
              this.fileList = files;
            }
            resolve(res);
          },
          fail: reject,
          complete: () => {
            this.loading = false;
          }
        });
      });
    },

    // 3. 点击文件/文件夹处理
    handleFileClick(item) {
      if (item.type === 'tree') {
        // --- 文件夹:进入下一级 ---
        // 拼接新路径
        let newPath = this.currentPath ? `${this.currentPath}/${item.name}` : item.name;
        this.currentPath = newPath;
        this.fetchFiles(newPath);
      } else {
        // --- 文件:跳转到代码阅读页 ---
        uni.navigateTo({
          // 传递必要参数到代码阅读页
          url: `/pages/code-view/code-view?url=${encodeURIComponent(item.download_url)}&name=${item.name}`
        });
      }
    },

    // 4. 返回上一级
    goBack() {
      if (!this.currentPath) return;

      const parts = this.currentPath.split('/');
      parts.pop(); // 移除最后一级
      this.currentPath = parts.join('/');

      this.fetchFiles(this.currentPath);
    }
  }
};
</script>
第四步:样式美化 (CSS)
简单加点 CSS,让页面看起来不像“毛坯房”。
<style scoped>
.container { background-color: #f5f5f5; min-height: 100vh; }

/* 头部样式 */
.header-section {
  background-color: #fff;
  padding: 30rpx;
  margin-bottom: 20rpx;
  border-bottom: 1rpx solid #eee;
}
.repo-title-row { display: flex; align-items: center; margin-bottom: 15rpx; }
.avatar { width: 50rpx; height: 50rpx; border-radius: 50%; margin-right: 15rpx; }
.repo-name { font-weight: bold; font-size: 34rpx; color: #333; }
.badge { font-size: 20rpx; background: #eee; padding: 2rpx 10rpx; border-radius: 20rpx; margin-left: 15rpx; color: #666; }
.repo-desc { font-size: 26rpx; color: #666; line-height: 1.5; display: block; margin-bottom: 20rpx; }
.repo-stats { display: flex; }
.stat-item { margin-right: 30rpx; font-size: 24rpx; color: #555; }

/* 列表样式 */
.file-section { background-color: #fff; }
.breadcrumb { padding: 20rpx; background: #eef; color: #007aff; font-size: 28rpx; border-bottom: 1px solid #eee; }
.file-item {
  display: flex; align-items: center;
  padding: 25rpx 30rpx;
  border-bottom: 1rpx solid #f0f0f0;
}
.file-item:active { background-color: #fafafa; }
.file-icon { font-size: 36rpx; margin-right: 20rpx; }
.file-info { flex: 1; }
.file-name { font-size: 30rpx; color: #333; }
.file-update { font-size: 22rpx; color: #999; display: block; margin-top: 6rpx; }
.arrow { color: #ccc; }
</style>
Q&A 与 拓展问题
Q1: H5 端调试时遇到跨域(CORS)问题怎么办?
A: 这是浏览器的安全策略。
-
开发时: 在
manifest.json-> 源码视图 ->h5->devServer->proxy中配置代理,将https://gitcode.com映射为/api。 -
真机/App 端: 不会有跨域问题,uni-app 的 request 是原生网络请求。
Q2: 文件列表太多卡顿怎么办?
A: 如果一个目录下有几千个文件:
-
不要一次性渲染!使用 uni-app 的
<scroll-view>组件并没有虚拟列表功能。 -
建议引入 z-paging 或手写一个简单的虚拟列表(只渲染屏幕内可见的 DOM),这在“原生渲染”中是提升性能的终极杀器。
Q3: 如何渲染 README.md 和代码高亮?
A:
-
Markdown: 推荐使用
mp-html或towxml组件。它们能把 Markdown 文本转成小程序的 nodes 节点。 -
代码高亮: 当你点击文件进入详情页时,获取到的通常是 Base64 内容,解码后,使用
highlight.js(注意包体积) 或者轻量级的prism.js。
Q4: 私有仓库怎么访问?
A: 你需要在 uni.request 的 header 中添加 Token:
header: {
  'Authorization': 'Bearer YOUR_PRIVATE_TOKEN'
}
你可以做一个“设置页”,让用户输入自己的 GitCode Token 并保存在 uni.setStorage 中。
总结
通过这篇文章,我们实现了一个结构清晰(Header + List)、逻辑自洽(支持点击文件夹下钻)、性能优良(原生渲染)的代码仓详情页。
技术要点回顾:
-
Flex 布局 构建清晰的 UI。
-
uni.request 对接 RESTful API。
-
递归思维 处理文件夹层级逻辑(虽然这里用的是路径重置,逻辑类似)。
-
Promise.all 优化首屏并发请求。
欢迎加入开源鸿蒙跨平台社区:https://openharmonycrossplatform.csdn.net

开源鸿蒙跨平台开发社区汇聚开发者与厂商,共建“一次开发,多端部署”的开源生态,致力于降低跨端开发门槛,推动万物智联创新。
更多推荐
 15
15 0
0- 0


 已为社区贡献8条内容

所有评论(0)