

ionic项目配置包名
So far I haven’t been able to find an up-to-date guide on how to set up a basic Phaser 3 project using Ionic that would also allow me to build it as a mobile application using Cordova.
到目前为止,我还没有找到有关如何使用Ionic设置基本Phaser 3项目的最新指南,该指南也允许我使用Cordova将其构建为移动应用程序。
This post summarizes several existing guides found on the Internet.
这篇文章总结了Internet上现有的几种指南。
安装离子 (Install Ionic)
First we will install Ionic as a global Node.js module:
首先,我们将安装Ionic作为全局Node.js模块:
> npm install -g ionicOnce Ionic is installed, we can create a blank project. When asked about which JavaScript framework to use in our new app, we will choose Angular.
安装Ionic之后,我们可以创建一个空白项目。 当被问及在新应用程序中使用哪种JavaScript框架时,我们将选择Angular。
> ionic start my-project blankPick a framework! 😁Please select the JavaScript framework to use for your new app. To bypass this prompt next time, supply a value for the
--type option.? Framework: (Use arrow keys)
❯ Angular | https://angular.io
  React   | https://reactjs.org
We can now serve the blank project with the following command:
现在,我们可以使用以下命令为空白项目提供服务:
> ionic serveA window will automatically open in your browser pointing to http://localhost:8100.
将在浏览器中自动打开一个指向http://localhost:8100的窗口。
安装Phaser 3 (Install Phaser 3)
Some guides suggest copying the minified Phaser 3 source code into your assets folder. Instead, we will install it as a regular npm module as follows:
一些指南建议将缩小的Phaser 3源代码复制到资产文件夹中。 相反,我们将其作为常规npm模块安装,如下所示:
> npm install phaserIf now we try to reload the page served by Ionic, the following error will appear:
如果现在我们尝试重新加载Ionic服务的页面,则会出现以下错误:
[ng] ERROR in node_modules/phaser/types/phaser.d.ts:7744:54 - error TS2304: Cannot find name 'ActiveXObject'.This issue can easily be solved by making the following changes in our tsconfig.json file:
通过在tsconfig.json文件中进行以下更改,可以轻松解决此问题:
We will add
"scripthost"to the"lib"array.我们将
"scripthost"添加到"lib"数组。We willl set
"allowSyntheticDefaultImports"totrue.我们将
"allowSyntheticDefaultImports"设置为true。
The resulting tsconfig.json file might look something like this:
生成的tsconfig.json文件可能类似于以下内容:
{
  "compileOnSave": false,
  "compilerOptions": {
    "baseUrl": "./",
    "outDir": "./dist/out-tsc",
    "sourceMap": true,
    "declaration": false,
    "module": "esnext",
    "moduleResolution": "node",
    "emitDecoratorMetadata": true,
    "experimentalDecorators": true,
    "importHelpers": true,
    "target": "es2015",
    "typeRoots": [
      "node_modules/@types"
    ],
    "lib": [
      "es2018",
      "dom",
      "scripthost"
    ],
    "allowSyntheticDefaultImports": true
  },
  "angularCompilerOptions": {
    "fullTemplateTypeCheck": true,
    "strictInjectionParameters": true
  }
}
Alas, after reloading, you will see another error!
las,重新加载后,您将看到另一个错误!
ReferenceError: global is not definedYou can solve this by adding the following snippet inside the <head> tag of our index.html:
您可以通过在index.html的<head>标记内添加以下代码段来解决此问题:
<script>
    if (global === undefined) {
        var global = window;
    }
</script>
Those two changes are enough to load the blank project page with no errors whatsoever. Yay!
这两个更改足以加载空白项目页面,而不会出现任何错误。 好极了!
一个简单的相位器组件 (A simple Phaser component)
We will now modify the home Angular component to initialize a simple, empty Phaser 3 game.
现在,我们将修改原始的Angular组件,以初始化一个简单的空Phaser 3游戏。
We can start by removing the default content of the home.page.html and just leaving it like this:
我们可以从删除home.page.html的默认内容开始,然后像这样保留它:
<ion-content>
  <div id="game"></div>
</ion-content>
The div with id game will be the container of our game.
具有id game的div将成为我们游戏的容器。
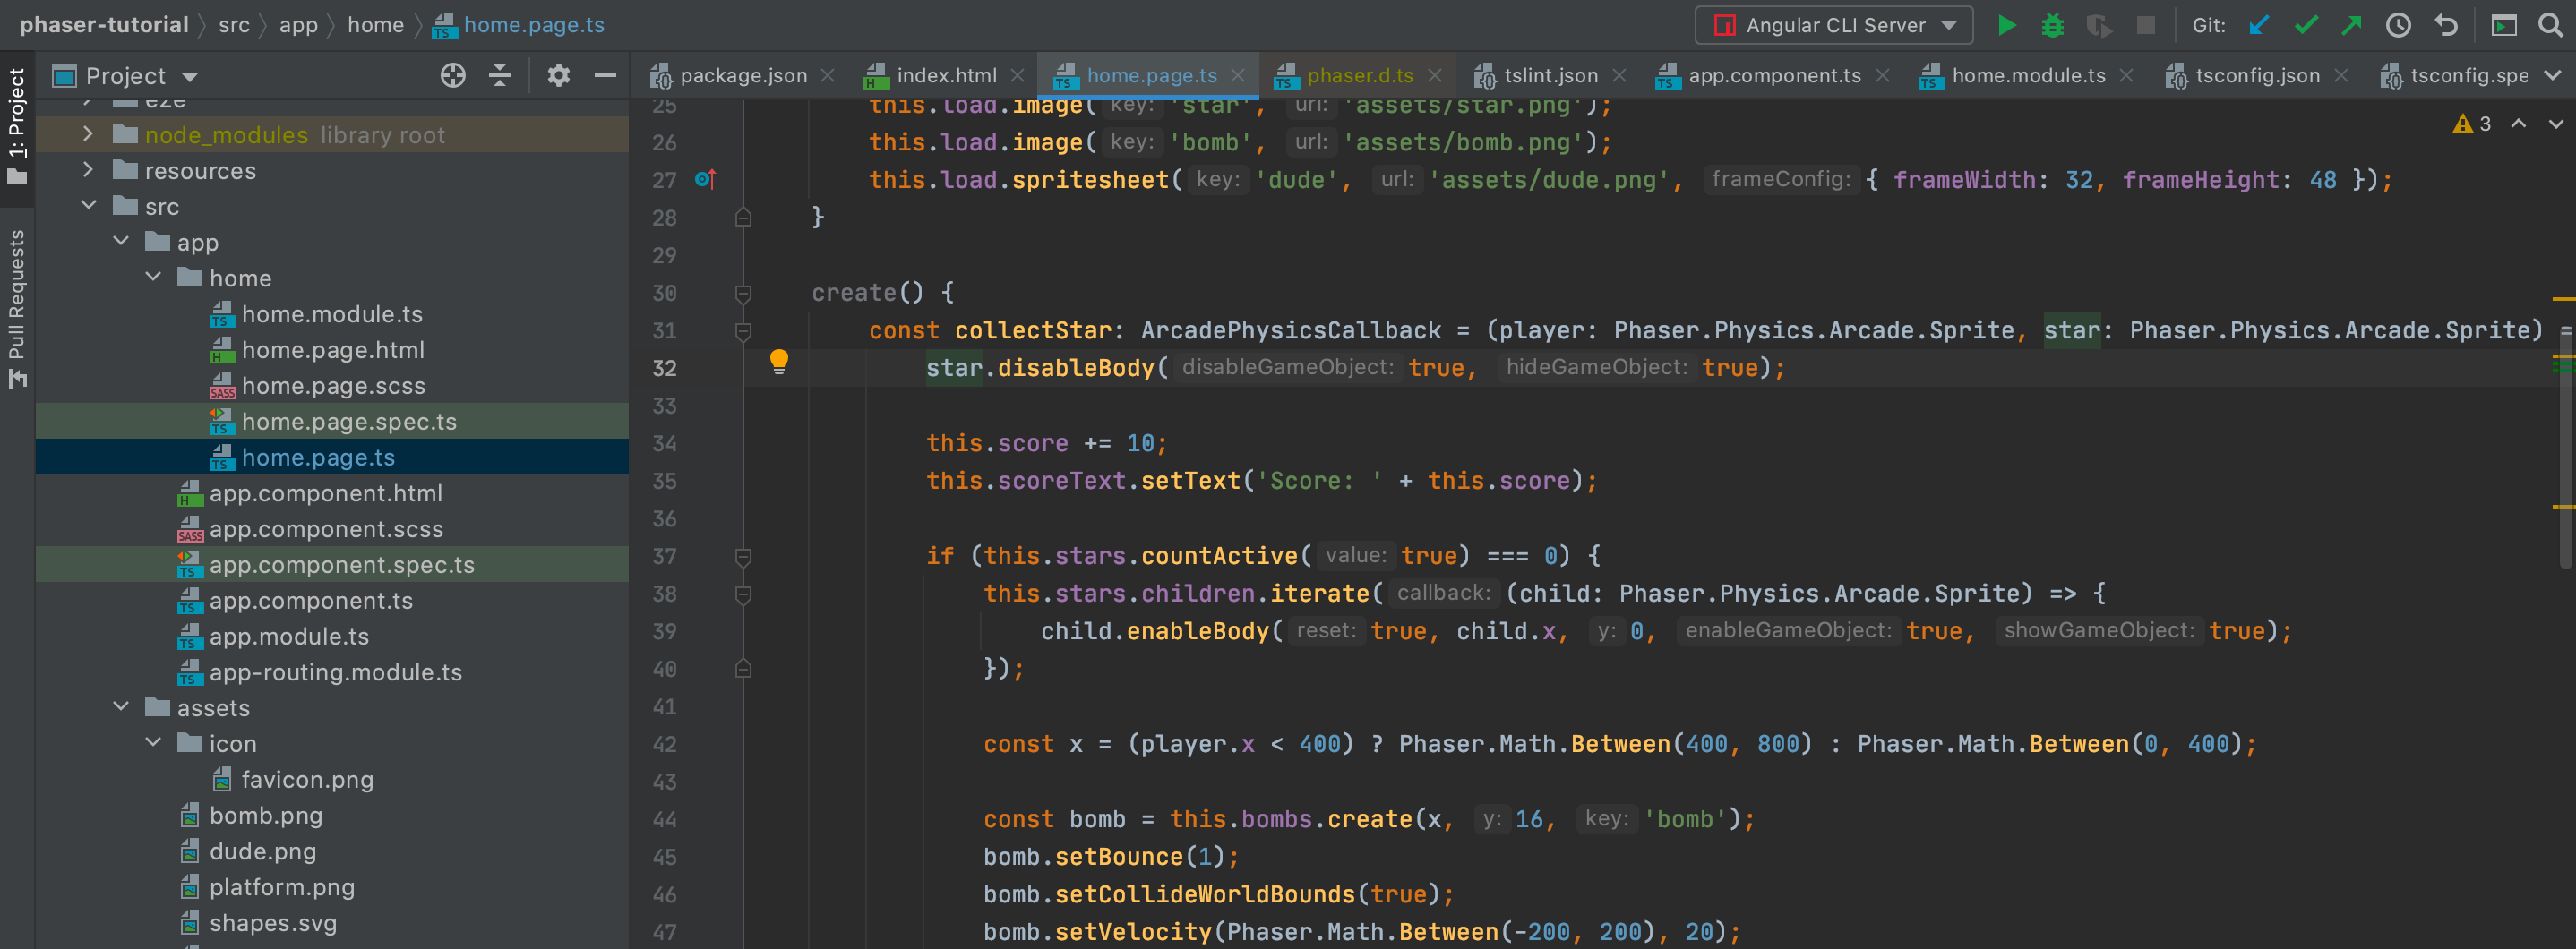
We will use the following code in our home.page.ts file:
我们将在home.page.ts文件中使用以下代码:
import { Component, OnInit } from '@angular/core';
import Phaser from 'phaser';


class GameScene extends Phaser.Scene {
    constructor(config) {
        super(config);
    }


    preload() {
    }


    create() {
    }


    update() {
    }
}


@Component({
    selector: 'app-home',
    templateUrl: 'home.page.html',
    styleUrls: ['home.page.scss'],
})
export class HomePage implements OnInit {
    phaserGame: Phaser.Game;
    config: Phaser.Types.Core.GameConfig;


    constructor() {
        this.config = {
            type: Phaser.AUTO,
            width: 800,
            height: 600,
            physics: {
                default: 'arcade'
            },
            parent: 'game',
            scene: GameScene
        };
    }


    ngOnInit(): void {
        this.phaserGame = new Phaser.Game(this.config);
    }
}
This will result in a simple, blank Phaser component on top of which you can build your game or application.
这将导致一个简单的空白Phaser组件,您可以在其上面构建游戏或应用程序。
将游戏构建到iOS / Android应用中 (Building the game into an iOS / Android app)
To eventually build and run the game as an Android (or iOS) app, we will use the integrated Cordova plugin from Ionic:
为了最终以Android(或iOS)应用程序的形式构建和运行游戏,我们将使用Ionic的集成Cordova插件:
> ionic cordova platform add android
> ionic cordova run android
Good luck!
祝好运!
翻译自: https://medium.com/swlh/easy-peasy-setup-of-a-phaser-3-project-with-ionic-fb4f4dc01625
ionic项目配置包名


 已为社区贡献8条内容

所有评论(0)