如何获得与Ionic 4和Firebase一起使用的推送通知
by Filip Jerga 由Filip Jerga如何获得与Ionic 4和Firebase一起使用的推送通知 (How to get push notifications working with Ionic 4 and Firebase)完整的分步教程,可帮助您正确定位iOS和Android (A full step-by-step tutorial that will get ...
by Filip Jerga
由Filip Jerga
如何获得与Ionic 4和Firebase一起使用的推送通知 (How to get push notifications working with Ionic 4 and Firebase)
完整的分步教程,可帮助您正确定位iOS和Android (A full step-by-step tutorial that will get you on the right track for iOS and Android)
Setting up push notifications can be truly frustrating and time consuming. So I went through all of the setups and prepared this tutorial for you.
设置推送通知确实令人沮丧且耗时。 因此,我完成了所有设置并为您准备了本教程。
先决条件 (Prerequisite)
Ionic 4 should already be installed.
Ionic 4应该已经安装。
栏目导航 (Section navigation)
1.软件包安装 (1. Package installation)
Open your Ionic project in the coding editor of your choice, and open your terminal as well. Navigate to your project’s folder.
在您选择的编码编辑器中打开您的Ionic项目,并同时打开您的终端。 导航到项目的文件夹。
First, we will install all of the required packages.
首先,我们将安装所有必需的软件包。
What we need to install:
我们需要安装什么:
-
Cordova plugin for firebase:
ionic cordova plugin add cordova-plugin-firebase用于Firebase的Cordova插件:
ionic cordova plugin add cordova-plugin-firebaseCordova插件ionic cordova plugin add cordova-plugin-firebase -
Firebase native package: since Ionic 4 is in beta, check your Ionic-native packages in
package.jsonand install the same version as other Ionic-native packages. Finally, let’s type:npm install --save @ionic-native/firebase@5.0.0-beta.14Firebase本机软件包:由于Ionic 4是beta版,请在
package.json检查您的Ionic本机软件包,并安装与其他Ionic本机软件包相同的版本。 最后,输入:npm install --save @ionic-native/firebase@5.0.0-beta.14
-
One last package, AngularFire 2. This is a library for Angular and Firebase:
npm install --save angularfire2 firebase最后一个包AngularFire 2 。 这是Angular和Firebase的库:
npm install --save angularfire2 firebase
Packages install, done! Let’s move to the second section.
软件包安装完成! 让我们转到第二部分。
2.适用于iOS和Android的Firebase设置 (2. Firebase setup for iOS and Android)
Before we will start all of the setup, I need to warn you that you cannot test your push notifications on iOS emulator. To test it out you need to have an Apple Developer account, which costs around $99USD per year. I suggest you to go through iOS setup anyway so it will give you a better understanding for future projects.
在我们开始所有设置之前,我需要警告您,您无法在iOS模拟器上测试推送通知。 要测试它,您需要拥有一个Apple Developer帐户,该帐户的费用约为每年$ 99USD。 我建议您无论如何都要进行iOS安装,这样可以使您对以后的项目有更好的了解。
Note: The steps starting here are very important, so please be patient. Read slowly and make sure you get everything right. Looking for issues after all of the setup can be very frustrating, trust me — I am speaking from my own experience.
注意:从这里开始的步骤非常重要,因此请耐心等待。 慢慢阅读并确保一切正确。 在完成所有设置后寻找问题会非常令人沮丧,请相信我-我是根据自己的经验讲的。
的iOS (iOS)
Navigate to the Firebase page and login to a console. If you don’t have a project created yet, do it now. You should see this screen.
导航到Firebase页面并登录到控制台。 如果您尚未创建项目,请立即执行。 您应该会看到此屏幕。
Click on the iOS button and you’ll see this:
单击iOS按钮,您将看到以下内容:
Now we need to provide our iOS bundle ID and this has to be the same as in your Ionic project. Let’s say I want to have the bundle name com.filipjerga.angularcourse, then I need to do the following:
现在,我们需要提供我们的iOS捆绑包ID,该ID必须与您的Ionic项目中的ID相同。 假设我要使用包名称com.filipjerga.angularcourse ,那么我需要执行以下操作:
Open your Ionic projects and navigate to “config.xml” file. Let’s inspect the widget element. The Id attribute holds the unique identifier of your application. I said before if you specified your bundle name to com.filipjerga.angularcourse in Firebase, the id in your Ionic project has to be the same! You can also leave the id as you have it already in your Ionic project but then you need to change it in Firebase.
打开您的Ionic项目,然后导航到“ config.xml”文件。 让我们检查小部件元素。 Id属性保存应用程序的唯一标识符。 我之前说过,如果您在Firebase中的com.filipjerga.angularcourse中指定捆绑包名称,则Ionic项目中的ID必须相同! 您也可以将ID保留在Ionic项目中,但要在Firebase中进行更改。
After you get the value of id, don’t forget to provide it to your Firebase application as the bundle ID.
获得id的值后,请不要忘记将其作为捆绑包ID提供给Firebase应用程序。
That should be everything in the first step of registering the application. This step is crucial, so double check the value of id on the widget and bundle ID of your Firebase application.
那应该是注册应用程序的第一步中的所有内容。 此步骤至关重要,因此请仔细检查小部件上的id值和Firebase应用程序的捆绑包ID 。
Leave the other fields blank and click “Register app”.
将其他字段留空,然后单击“注册应用程序”。
Now we need to download “GoogleService-Info.plist”.
现在我们需要下载“ GoogleService-Info.plist”。
When it’s downloaded, paste it into a base folder of your projects. You can see a folder structure in my project here.
下载后,将其粘贴到项目的基本文件夹中。 您可以在我的项目中看到一个文件夹结构。
We can skip all of the further steps, as they are not required for the Ionic project setup. You should have your IOS application ready.
我们可以跳过所有其他步骤,因为Ionic项目设置不需要这些步骤。 您应该已经准备好IOS应用程序。
安卓系统 (Android)
The following steps for Android are almost the same as for the iOS setup:
Android的以下步骤几乎与iOS设置相同:
- Click ‘add app’ for Android, same as we did in iOS before. 单击Android的“添加应用”,就像之前在iOS中一样。
-
The Android package name needs to be the same as our widget id, in my case:
com.filipjerga.angularcourse在我的情况下,Android包名称必须与我们的小部件ID相同:
com.filipjerga.angularcourse -
Next, download
google-services.json. Same as before with the iOS file, we need to copy it to the base folder of our applications接下来,下载
google-services.json。 与iOS文件相同,我们需要将其复制到应用程序的基本文件夹中 - Click “Next” until you are on the last step, which you can skip, and you should end up with both applications created. 单击“下一步”,直到您可以跳过的最后一步,最后应创建两个应用程序。
Yay! Congrats! But it’s still too early to cheer.
好极了! 恭喜! 但这还为时过早。
3.推送通知代码的实现 (3. Push notification code implementation)
包导入 (Package importing)
The time has come to finally warm up our fingers by typing some code. We will start with importing the packages we installed before.
现在终于可以通过键入一些代码来使我们的手指热身了。 我们将从导入之前安装的软件包开始。
-
Go to
app.module.ts转到
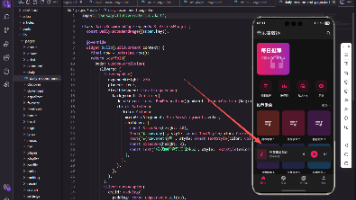
app.module.ts - Your file should look like this: 您的文件应如下所示:
You can see Firebase in the providers array, and AngularFirestoreModule and AngularFireModule in imports.
您可以在providers数组中看到Firebase ,并在导入中看到AngularFirestoreModule和AngularFireModule 。
But where did the config object came from ? You can see lot of information there as “apiKey, authDomain” and so on.
但是, config对象是从哪里来的呢? 您可以在其中看到很多信息,例如“ apiKey,authDomain”等等。
To answer this we need go back to our Firebase console and create a web app.
为了回答这个问题,我们需要回到Firebase控制台并创建一个Web应用程序 。
You need to click on a web platform icon on the right from the Android icon (see the image above). When the web app is selected you will be presented with your own config object.
您需要单击Android图标右侧的网络平台图标(请参见上图)。 选择Web应用程序后,您将看到自己的配置对象。
Now it’s time to copy whole config object to app.module.ts in our Ionic projects. Please make sure you change it for your config object! Mine will not work for you.
现在是时候将整个配置对象复制到我们的Ionic项目中的app.module.ts中。 请确保为配置对象更改它! 我的不会为你工作。
Now we can start working on the implementation of the push notification service.
现在,我们可以开始实施推送通知服务。
推送通知服务 (Push notification service)
Let’s create a new service. Call it what you like. I will call mine fcm.service.ts. FCM stands for Firebase Cloud Messaging.
让我们创建一个新服务。 随便叫什么。 我会打电话给我fcm.service.ts 。 FCM代表Firebase Cloud Messaging。
First, let’s take a look at the service implementation. I will explain it line by line.
首先,让我们看一下服务实现。 我将逐行解释。
If we want to send a push notification to a device, we need to get an unique identifier of the device. In this case it’s called a token.
如果要向设备发送推送通知,则需要获取设备的唯一标识符。 在这种情况下,它称为token 。
We need to check for a platform specific device, because of an additional step in the iOS setup. iOS requires explicit permissions to receive push notifications.
由于iOS设置中需要执行其他步骤,因此我们需要检查特定于平台的设备。 iOS需要明确的权限才能接收推送通知。
Now we need to store this token somewhere, but where? We will store tokens in the Firebase database. You can see, I am creating device collections and I am filling them with data that contains the token and just a testing UserId. Perfect! Now, we have stored our token and we can subscribe to notifications.
现在我们需要将此令牌存储在某个地方,但是在哪里? 我们将令牌存储在Firebase数据库中 。 您可以看到,我正在创建设备集合,并在其中填充data 包含token和仅测试UserId 。 完善! 现在,我们已经存储了令牌,我们可以订阅通知。
Subscribing to notifications is actually very simple. We just need to call this.firebase.onNotificationOpen()
订阅通知实际上非常简单。 我们只需要调用this.firebase.onNotificationOpen()
Amazing. Service checked!
惊人。 服务已检查!
All of this is nice but kinda useless, since we are not using our service yet. Let’s fix it!
所有这些都很好,但是有点用处,因为我们还没有使用我们的服务。 让我们修复它!
Move to your app.component.ts and write the following:
移至您的app.component.ts 并编写以下内容:
Especially important here is the function notificationSetup.
这里特别重要的是函数notificationSetup 。
We are getting an unique token of the device first.
我们首先获得该设备的唯一令牌。
We are also subscribing to incoming notifications from Firebase.
我们还订阅了Firebase的传入通知。
When the message is received, we need to check, again, for specific platforms. On iOS your message text is under aps.alert . On Android it’s under body.
收到消息后,我们需要再次检查特定的平台。 在iOS上,您的消息文本位于aps.alert下。 在Android上,它位于body之下。
Then we will just simply display the received message as a Toast.
然后,我们仅将接收到的消息显示为Toast 。
Now the code setup is done. We are getting very close! It’s time to test it out.
现在,代码设置完成。 我们越来越近了! 现在该进行测试了。
4.在Android上测试推送通知 (4. Test push notifications on Android)
All of the required setup for Android should be done right now. You can start emulating your app by:
Android所需的所有设置都应立即完成。 您可以通过以下方式开始模拟您的应用程序:
ionic cordova emulate android
ionic cordova emulate android
or
要么
ionic cordova build android and open your build manually in Android Studio.
ionic cordova build android并在Android Studio中手动打开您的构建。
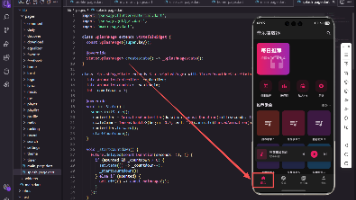
Let’s launch our applications and go to a Home menu, so we will see a push notification there. Make sure your application was launched properly in emulator and you have no errors.
让我们启动我们的应用程序并转到Home菜单,这样我们将在其中看到推送通知。 确保您的应用程序已在模拟器中正确启动,并且没有错误。
Go back to your browsers to your Firebase Applications. Now it’s time to inspect our Firebase Database. You can find the database option in the left panel under the Develop category.
返回浏览器,找到Firebase应用程序。 现在是时候检查我们的Firebase数据库了。 您可以在左侧面板的“ 开发”类别下找到数据库选项。
After your application was launched in emulators, the code from app.component.ts we wrote a few moments ago ran. No wonder our database is populated. In the “saveToken” function we specified the “devices” collection and we saved the token with the user id as a document into this devices collection. That is what we see in our database.
在模拟器中启动您的应用程序后,我们刚才编写的app.component.ts中的代码运行了。 难怪我们的数据库已被填充。 在“ saveToken”功能中,我们指定了“ devices”集合,并将带有用户ID的令牌作为文档保存到该devices集合中。 这就是我们在数据库中看到的。
In my case, I have multiple tokens in my database but you should have only one since we’ve run our app the first time. You will create a new document per unique device/emulator you are running your app on.
就我而言,我的数据库中有多个令牌,但是由于我们是第一次运行应用程序,因此您应该只有一个令牌。 您将在运行应用程序的每个唯一设备/仿真器上创建一个新文档。
Now it’s time to copy this token in order to send push notification to a specific device.
现在是时候复制此令牌,以便将推送通知发送到特定设备。
Navigate to the left panel to a grow tab and click on cloud messaging.
导航到左侧面板的“增长”选项卡 ,然后单击云消息传递。
Now we need to fill in the necessary data. Enter the text of your message and provide the token of the device from the database we just copied.
现在我们需要填写必要的数据。 输入您的消息文本,并从刚刚复制的数据库中提供设备的令牌。
When you are sending a message, open your emulated device simultaneously and watch what happens.
发送消息时,请同时打开仿真设备并观察会发生什么。
Send a message, aaaaand Congrats! Now your Android setup is done and you are able to send push notifications! Isn’t that awesome?
发信息,aaaaand恭喜! 现在,您的Android设置已完成,您可以发送推送通知! 那不是很棒吗?
5. iOS推送通知预设置 (5. iOS push notification pre-setup)
Buckle up guys, iOs setup is coming. Let’s separate this setup into multiple steps, so we will not have a panic attack. Let’s dig in!
扣上安全带,iOs设置即将到来。 让我们将此设置分为多个步骤,这样我们就不会出现恐慌发作。 让我们开始吧!
First, build your application for iOS: ionic cordova build ios
首先,构建适用于iOS的应用程序: ionic cordova build ios
Open your Xcode, and find your built app in platforms/ios/nameofyourapp.xcodeproj . Open it.
打开您的Xcode,并在platforms/ios/nameofyourapp.xcodeproj找到您构建的应用程序。 打开它。
This should open a tree structure of your application on the left side. Double Click the root file of this structure. This will open an additional menu with more settings for your app.
这应该在左侧打开应用程序的树形结构。 双击此结构的根文件。 这将为您的应用程序打开一个包含更多设置的附加菜单。
Sign in with your developer account.
使用您的开发者帐户登录。
5. Open the top “Capabilities” tab and enable “Push Notifications”.
5.打开顶部的“功能”选项卡,然后启用“推送通知”。
6. Navigate to your Apple developer account page. Under “Certificates” select “All” and click "+" to add a new certificate.
6.导航到您的Apple开发人员帐户页面 。 在“证书”下,选择“所有”,然后单击“ +"以添加新证书。
Enable the Apple Push Notification service and proceed to the next step.
启用Apple Push Notification服务,然后继续下一步。
Now let’s choose your application.
现在让我们选择您的应用程序。
We need to request a certificate. On your Mac, go to “Keychain Access” -> “Certificate Assistant” -> “Request a Certificate From a Certificate Authority”.
我们需要索取证书 。 在Mac上,转到“钥匙串访问”->“证书助手”->“从证书颁发机构请求证书”。
Complete all the necessary information — your email and common name — and save it to disk.
完成所有必要的信息-您的电子邮件和通用名-并将其保存到磁盘。
In the Apple Console proceed to the next step and upload your certificate request.
在Apple Console中,继续执行下一步,然后上传您的证书申请。
In the next step your certificate should be created and you can download it. You will need it later.
在下一步中,应该创建您的证书,然后可以下载它。 您稍后将需要它。
Now we need to create a service key to enable Apple push notifications. Under “Keys” select “All” . Choose your key name. Enable “Apple Push Notifications service (APNs)”.
现在,我们需要创建一个服务密钥来启用Apple推送通知。 在“键”下,选择“全部”。 选择您的密钥名称。 启用“ Apple Push Notifications服务(APN)”。
Click “Continue” and confirm your key. Never share such data with others. You can now download your key.
单击“继续”并确认您的密钥。 切勿与他人共享此类数据。 您现在可以下载密钥。
Now we need to go back to Firebase.
现在我们需要回到Firebase。
In Firebase, open your iOS application and navigate to “Cloud Messaging”.
在Firebase中,打开您的iOS应用程序,然后导航到“ Cloud Messaging”。
We need to upload our APN Authentication Key we generated a while ago. Click “Upload”.
我们需要上传我们之前生成的APN身份验证密钥。 点击“上传”。
Provide all the information and upload the key.
提供所有信息并上传密钥。
First, upload your “.p8” file, downloaded from the Apple console earlier. Enter your Key ID. You can get the App ID prefix from the Apple console in “Identifiers”->“App IDs”->“Your App”->“Prefix”.
首先,上传您的“ .p8”文件,该文件是先前从Apple控制台下载的。 输入您的密钥ID。 您可以从Apple控制台的“标识符”->“应用程序ID”->“您的应用程序”->“前缀”中获取应用程序ID前缀。
That’s it. Tears of joy are running down my face.
而已。 欢乐的眼泪在我的脸上流淌。
We can test Push Notifications on iOS. Let’s not forget we need to use a real device.
我们可以在iOS上测试推送通知。 别忘了我们需要使用真实的设备。
6.在iOS上测试推送通知 (6. Test push notification on iOS)
First, we need to build our applications so let’s run: ionic cordova build ios
首先,我们需要构建我们的应用程序,因此让我们运行: ionic cordova build ios
In Xcode you can run your application on a device connected by USB with your computer.
在Xcode中,您可以在通过USB与计算机连接的设备上运行应用程序。
Let’s wait until everything is launched. We can now repeat the steps to send push notifications from Section 4, because it is the same as on Android.
让我们等到一切启动。 现在,我们可以重复执行第4节中的发送推送通知的步骤,因为它与Android上的相同。
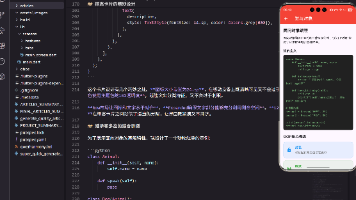
Remember that you need to use a new token now, that was generated for your iOS device. Go to Databases, get a new token, and send a push notification. Your result should look like this.
请记住, 您现在需要使用为您的iOS设备生成的新令牌 。 转到数据库,获取新令牌,然后发送推送通知。 您的结果应如下所示。
I hope you have been successful with setting up your push notifications. It takes some time and patience to get everything right, but the outcome and benefits are amazing.
希望您成功设置了推送通知。 正确解决所有问题需要花费一些时间和耐心,但结果和收益却是惊人的。
If you like my tutorial and you are interested in more, you can check out my course on Udemy: Ionic 4 Crash Course with Heartstone API and Angular.
如果您喜欢我的教程,并且对更多内容感兴趣,则可以查看有关Udemy:使用Heartstone API和Angular的Ionic 4 Crash课程的课程。
For a full project see my Github Repo.
有关完整项目,请参阅我的Github回购 。
Happy Coding!
编码愉快!
Filip
菲利普

开源鸿蒙跨平台开发社区汇聚开发者与厂商,共建“一次开发,多端部署”的开源生态,致力于降低跨端开发门槛,推动万物智联创新。
更多推荐
 0
0 0
0- 0


 已为社区贡献16条内容

所有评论(0)