

ml/dl模型部署
This is the second part of our II part series.
这是我们第二部分系列的第二部分。
-
How to deploy your ML model on Smart Phones. PART-II
如何在智能手机上部署您的ML模型。 第二部分
The gist of our project is:
我们项目的要点是:
We are creating a simple app to differentiate the cats-vs-dogs classifier. The objective is to learn how to deploy our models in mobile devices(with Flutter).
我们正在创建一个简单的应用程序,以区分cats-vs-dogs分类器。 目的是学习如何在移动设备(使用Flutter)中部署我们的模型。
Since in our last blog we created a simple dogs-vs-cats classifier. We can now work on our flutter app. This is going to be simple as we are not doing anything fancy we are just taking input from the camera and processing it with our model to get the desired result.
从上一个博客开始,我们创建了一个简单的dogs-vs-cats分类器。 现在,我们可以使用Flutter应用程序了。 这将变得很简单,因为我们没有做任何花哨的事情,我们只是从相机获取输入并使用我们的模型对其进行处理以获得所需的结果。
第1步: (Step 1:)
Create a Flutter project.
创建一个Flutter项目。
-
If you don’t have flutter. INSTALL IT! (android-studio vs vs-code choose your path samurai)
如果你没有扑打。 安装它! (android-studio vs vs-code选择您的武士路径)
-
Start a new project: Read this if you don’t know how to start a flutter project.
开始一个新项目:如果您不知道如何开始一个扑朔迷离的项目,请阅读此内容。
第2步: (Step 2:)
Add dependencies:
添加依赖项:
name: dogs_vs_cats_app
description: A new Flutter application.


publish_to: 'none' # Remove this line if you wish to publish to pub.dev


version: 1.0.0+1


environment:
  sdk: ">=2.7.0 <3.0.0"


dependencies:
  flutter:
    sdk: flutter
  cupertino_icons: ^0.1.3
  ## Add These imports
  camera:
  tflite: ^1.0.5
  image:
  path_provider:
  path:


dev_dependencies:
  flutter_test:
    sdk: flutter
flutter:
  uses-material-design: true
  assets:
    - assets/labels.txt
    - assets/cat_dog.tflite
Here we are just adding some dependencies for loading our tflite model and to read and write our captured image.
在这里,我们只是添加一些依赖项来加载tflite模型以及读取和写入捕获的图像。
-
camera: to use the camera.
Ç相机:使用相机。
-
tflite: to run tflite format file.
tflite :运行tflite格式的文件。
-
image: to save images to the device.
image :将图像保存到设备。
-
path_provider: for locating files.
path_provider :用于查找文件。
-
path: for manipulating file strings.
path :用于处理文件字符串。
Now You will see this yellow line on your android studio. (P.S If you are using vs-code just run flutter pub get to install dependencies). Now run ‘GET Dependencies’.
现在,您将在Android Studio上看到此黄线。 (PS:如果您使用的是vs代码,只需运行flutter pub get安装依赖项)。 现在运行“ GET Dependencies”。

And here we also add our tflite model and a new file called labels.txt containing our labels.
在这里,我们还添加了tflite模型和一个包含标签的名为label.txt的新文件。
android {
    compileSdkVersion 28


    sourceSets {
        main.java.srcDirs += 'src/main/kotlin'
    }


    lintOptions {
        disable 'InvalidPackage'
    }
    // Add these for decompressing tflite files.
    aaptOptions {
        noCompress 'tflite'
        noCompress 'lite'
    }
    defaultConfig {
        // TODO: Specify your own unique Application ID (https://developer.android.com/studio/build/application-id.html).
        applicationId "com.example.dogs_vs_cats_app"
        minSdkVersion 21 // Might needs to change this.
        targetSdkVersion 28
        versionCode flutterVersionCode.toInteger()
        versionName flutterVersionName
    }


    buildTypes {
        release {
            // TODO: Add your own signing config for the release build.
            // Signing with the debug keys for now, so `flutter run --release` works.
            signingConfig signingConfigs.debug
        }
    }
}
Because our “tflite” file is a compressed form of our model we must add it to android/app/build.gradle .
由于我们的“ tflite”文件是模型的压缩形式,因此必须将其添加到android/app/build.gradle 。
Add addOptions to the android block as shown in code.
如代码所示,将addOptions添加到android块中。
Side note: Also, update minSdk Version to 21 or “tflite” plugin might not work.
旁注:另外,将minSdk版本更新为21或“ tflite”插件可能不起作用。
第三步: (Step 3:)
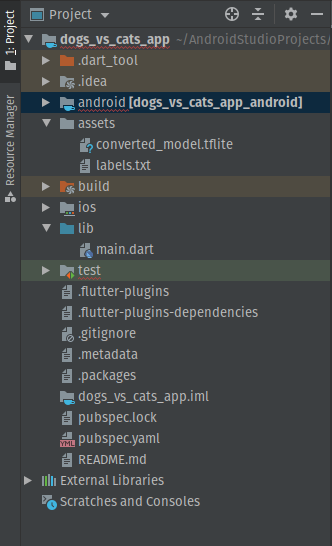
Create an assets folder and add the labels.txt and compressed_model.tflite files. That is how your file structure will look like.
创建一个资产文件夹,并添加labels.txt和compressed_model.tflite文件。 这就是您的文件结构的样子。
labels.txt is a simple file containing labels.
labels.txt是一个包含标签的简单文件。
Dog
Cat第4步:(Step 4:)
Remove Everything from your main.dart file and add these lines.
从main.dart文件中删除所有内容,然后添加以下行。
import 'package:flutter/material.dart';
import 'package:camera/camera.dart';
import 'package:path/path.dart';
import 'package:path_provider/path_provider.dart';


Future<void> main() async {
  WidgetsFlutterBinding.ensureInitialized();


  final cameras = await availableCameras();


  final firstCamera = cameras.first;


  runApp(
    MaterialApp(
      theme: ThemeData(primarySwatch: Colors.pink),
      home: Camera(
        camera: firstCamera,
      ),
    ),
  );
}
Nothing too fancy here, if you know anything about flutter development we are just initializing our main function with home as a new stateful widget.
这里没什么好想的,如果您对颤动开发有所了解,我们只是将home的主要功能初始化为一个新的有状态小部件。
We name our new stateless widget Camers . Be careful now to import the default camera imports from flutter.
我们将新的无状态小部件Camers 。 现在要小心,要从flutter导入默认的相机导入。
We will create our own class.
我们将创建自己的类。
Here we will take the camera description as an input parameter.
在这里,我们将摄像机描述作为输入参数。
class Camera extends StatefulWidget {
  final CameraDescription camera;


  const Camera({
    Key key,
    @required this.camera,
  }) : super(key: key);


  @override
  CameraState createState() => CameraState();
}
Our camera module needs a controller so we are initializing it with CameraController.
我们的相机模块需要一个控制器,因此我们要使用CameraController对其进行初始化。
This class is where our first screen will reside. All our code might look complex but it is pretty simple to display our data(images) from our camera.
此类是我们第一个屏幕所在的位置。 我们所有的代码可能看起来都很复杂,但是从摄像机显示我们的数据(图像)非常简单。
The code simply declares our camera controller and initialize it in initState() function.
该代码只是声明了我们的相机控制器,并在initState()函数中对其进行了初始化。
Here two variables we must focus on _controller _initializeControllerFuture .
在这里,我们必须关注_controller _initializeControllerFuture这两个变量。
- _controller: it is like a bus conductor. It helps us to get the tickets(images) and to save our image. _controller:就像总线导体一样。 它帮助我们获得票证(图像)并保存我们的图像。
-
_initializeControllerFuture: it is a function that promises to give us an
Future(A function which will complete in the future) to initialize our camera state. If it is getting ready we show a circularProgessBar if not we show images from the cameras._initializeControllerFuture:它是一个函数,有望向我们提供一个
Future(一个将来会完成的函数)来初始化我们的相机状态。 如果准备好了,我们将显示一个circularProgessBar,否则,我们将显示来自摄像机的图像。
We then use the Camera Preview which uses the controller to display the input images.
然后,我们使用Camera Preview,它使用控制器显示输入图像。
class CameraState extends State<Camera> {
CameraController _controller;
Future<void> _initializeControllerFuture;
@override
void initState() {
super.initState();
_controller = CameraController(
widget.camera,
ResolutionPreset.high,
);
_initializeControllerFuture = _controller.initialize();
}
@override
void dispose() {
_controller.dispose();
super.dispose();
}
@override
Widget build(BuildContext context) {
return Scaffold(
body: FutureBuilder<void>(
future: _initializeControllerFuture,
builder: (context, snapshot) {
if (snapshot.connectionState == ConnectionState.done) {
return CameraPreview(_controller);
} else {
return Center(child: CircularProgressIndicator());
}
},
),
floatingActionButtonLocation: FloatingActionButtonLocation.centerDocked,
floatingActionButton: Padding(
padding: const EdgeInsets.only(bottom: 20.0),
child: FloatingActionButton(
child: Icon(Icons.camera_alt),
onPressed: () async {
},
),
),
);
}
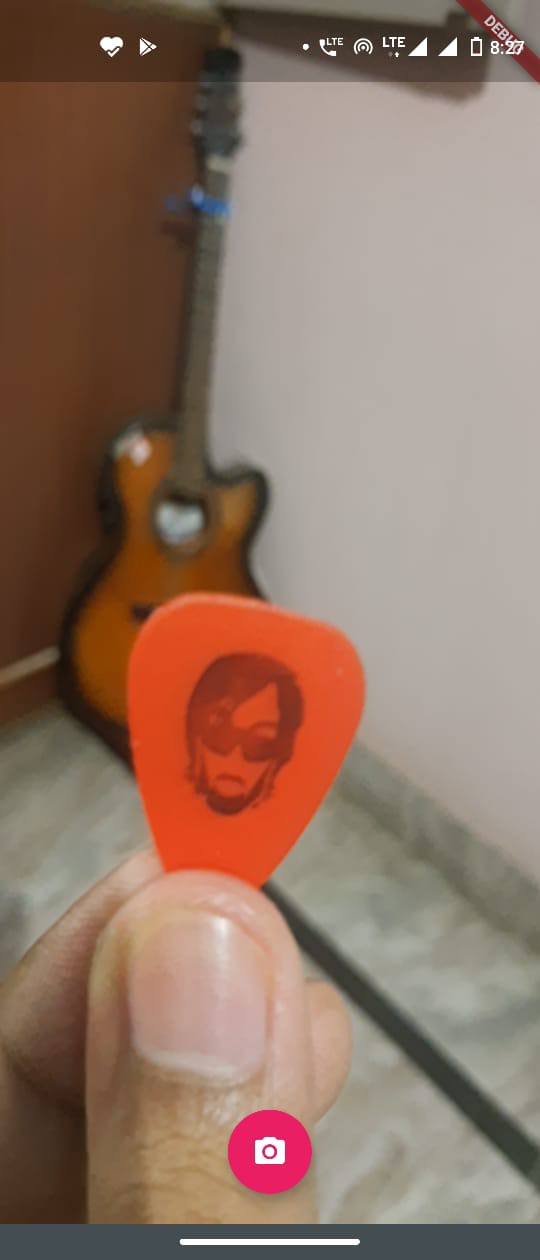
}Alright now let’s run our app. It should show you captured images from your camera. But right now our floating acting action does nothing because onclick is not implemented, let’s do that now.
好了,现在让我们运行我们的应用程序。 它应该显示您从相机捕获的图像。 但是现在,由于未实现onclick,因此我们的浮动动作不起作用,让我们现在开始。
Let’s save the image send the image path to route us to DisplayPicture Page(I will come with a better name next time).
让我们保存图像,然后将图像路径发送给我们以将其路由到DisplayPicture Page(下次我会使用更好的名称)。
Now, all we need to do is to add a floating action button to take the input.
现在,我们需要做的就是添加一个浮动操作按钮来接受输入。
We create a new stateful widget as our next page which we will use it to look at our image and calculate class from our image.
我们在下一页创建一个新的有状态小部件,它将使用它来查看图像并从图像中计算类。
child: FloatingActionButton(
  ........
        onPressed: () async {
            try {
              await _initializeControllerFuture;


              final path = join(
                (await getTemporaryDirectory()).path,
                '${DateTime.now()}.jpg',
              );
              await _controller.takePicture(path);
              Navigator.push(
                context,
                MaterialPageRoute(
                  builder: (context) => DisplayPicture(imagePath: path), # Madeup class for detecting class of image
                ),
              );
            } catch (e) {
              print(e);
            }
          }
}步骤5:(Step 5:)
Now let’s make a new file named display.dart in lib folder and write a new stateful widget.
现在,在lib文件夹中创建一个名为display.dart的新文件,并编写一个新的有状态小部件。
A simple stateful class declaration that takes image saved path
一个简单的有状态类声明,该声明采用图像保存的路径
import 'package:flutter/material.dart';
import 'dart:io' as Io;
import 'package:tflite/tflite.dart';


class DisplayPicture extends StatefulWidget {
  final String imagePath;


  const DisplayPicture({Key key, this.imagePath}) : super(key: key);


  @override
  _DisplayPictureState createState() => _DisplayPictureState();
}步骤6:(Step 6:)
Let’s Make a UI for ourDisplay class.
让我们为OurDisplay类创建一个UI。
To understand this code we must understand how setState works. Follow this. But what it does is to re-run our build function. So we can change our variable values to display new results in our widgets.
要理解此代码,我们必须了解setState的工作方式。 遵循这个。 但是它要做的是重新运行我们的构建功能。 因此,我们可以更改变量值以在小部件中显示新结果。
class _DisplayPictureState extends State<DisplayPicture> {
  var results;
  var isCaculating = false;
  @override
  Widget build(BuildContext context) {
    return Scaffold(
      appBar: AppBar(
        title: Text('Dogs Vs Cats'),
        centerTitle: true,
      ),
      body: Column(
        children: <Widget>[
          Image.file(Io.File(widget.imagePath)),
          Column(
            children: <Widget>[
              isCaculating == false
                  ? Center(
                      child: Text('Press Bottom Button to Calculate'),
                    )
                  : results == null
                      ? Center(
                          child: Column(
                            children: <Widget>[
                              CircularProgressIndicator(),
                              Text('Calculating...')
//                      Text('Press bottom button to Calculate.')
                            ],
                          ),
                        )
                      : Center(
                          child: Column(
                            children: <Widget>[
                              Text('It is a:'),
                              Text(
                                '${results}',
                                style: TextStyle(
                                    fontSize: 30, fontWeight: FontWeight.w900),
                              )
                            ],
                          ),
                        )
            ],
          ),
        ],
      ),
    );
  }
}
Here we create a simple class which relies its UI layout based on two variable results and isCalculating.
在这里,我们创建一个简单的类,该类基于两个变量results和isCalculating.来依赖其UI布局isCalculating.
- results: it contains our “result” class. a.k.a Dog vs Cats. 结果:它包含我们的“结果”类。 aka狗vs猫。
- isCalculating: it tells us to display our circular progress bar when calculating the result and to display results when calculating is done. We will redefine when we calculate our results. isCalculating:告诉我们在计算结果时显示圆形进度条,在计算完成时显示结果。 我们将在计算结果时重新定义。
Here you might need to look into a ternary operator. But it is just like if-else statements and used it to display different results.
在这里,您可能需要研究三元运算符。 但这就像if-else语句,并用它来显示不同的结果。
Now let’s add the meat of our project our Calculating button. Is does the prediction of our image. Here we define a new function getResults() to get our predictions. Add these lines in scaffold.
现在,让我们在“ Calculating按钮中添加项目的内容。 是对我们形象的预测。 在这里,我们定义了一个新函数getResults()以获取我们的预测。 将这些线添加到支架中。
floatingActionButtonLocation: FloatingActionButtonLocation.centerDocked,
      floatingActionButton: Padding(
        padding: const EdgeInsets.only(bottom: 20.0, left: 20.0),
        child: Row(
          children: <Widget>[
            FloatingActionButton.extended(
              tooltip: 'Tap to Calculate',
              label: Text('Calculate'),
              icon: Icon(Icons.memory),
              onPressed: () {
                setState(() {
                  results = null;
                  isCaculating = true;
                });
                getResults();
              },
            ),
          ],
        ),
),步骤7:(Step 7:)
Add a getResult function to get the desired class of our image. Add this function to our state class.
添加getResult函数以获取所需的图像类。 将此函数添加到我们的状态类中。
Future getResults() async {
  Future.delayed(Duration(milliseconds: 10000));
  String res = await Tflite.loadModel(
      model: "assets/cat_dog.tflite",
      labels: "assets/labels.txt",
      numThreads: 1 // defaults to 1
  );
  var recognitions = await Tflite.runModelOnImage(
      path: widget.imagePath,
      // required
      imageMean: 0.0,
      // defaults to 117.0
      imageStd: 255.0,
      // defaults to 1.0
      numResults: 1,
      // defaults to 5
      threshold: 0.2,
      // defaults to 0.1
      asynch: true // defaults to true
  );
  print(recognitions);
  setState(() {
    results = recognitions[0]['label'];
  });
  return recognitions;
}
Now we just loading our model and now giving it the image path to do classification.
现在,我们只是加载模型,然后为其提供图像路径以进行分类。
We then save our it our result variable and refresh our UI with setState function.
然后,将其保存到结果变量中,并使用setState函数刷新UI。
Read this for more details about tflite plugin. link!
阅读此内容以获得有关tflite插件的更多详细信息。 链接!
让我们来看看: (Let’s check it out:)
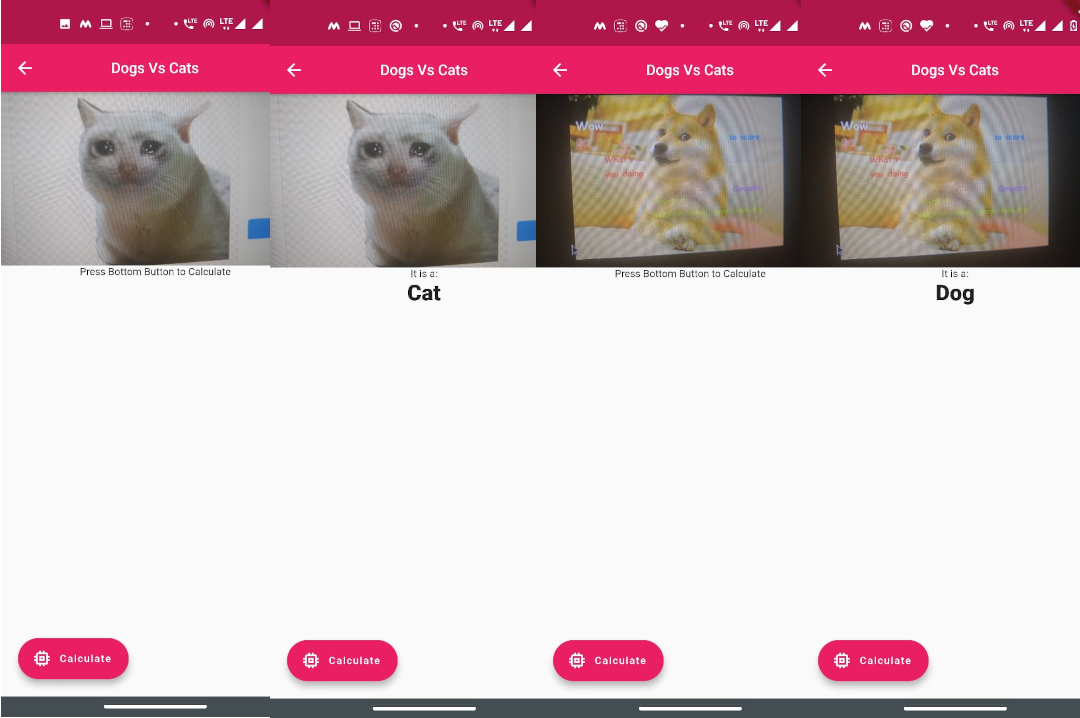
万岁,我们做到了。 现在,我们终于可以将其投放到VC,这是我们颠覆性行业的新兴公司。 (Hurray, we did it. Now we can finally pitch it to VC as our new industries-disruptive startup.)
感谢您阅读第二部分!(Thanks for reading PART II!!)
Read Part I: How to deploy your ML model on Smart Phones. PART-I
阅读第一部分:如何在智能手机上部署ML模型。 第一部分
Here is my github link. link!
这是我的github链接。 链接!
Here is my LinkedIn. link!
这是我的LinkedIn。 链接!
翻译自: https://medium.com/@tiwari.ai.harsh/how-to-deploy-your-ml-model-in-smart-phones-part-ii-7973f8bcc903
ml/dl模型部署


 已为社区贡献1条内容

所有评论(0)