kotlin button_使用Kotlin和XML的Android Button
kotlin buttonIn this tutorial, we’ll learn how to create a Button in Android apps using Kotlin programming. 在本教程中,我们将学习如何使用Kotlin编程在Android应用程序中创建Button。Android按钮概述 (Android Button Overview)Androi...
kotlin button
In this tutorial, we’ll learn how to create a Button in Android apps using Kotlin programming.
在本教程中,我们将学习如何使用Kotlin编程在Android应用程序中创建Button。
Android按钮概述 ()
Android Button class extends TextView. Button is a UI widget that is used to get click interactions from the user to trigger an action in the application.
Android Button类扩展了TextView。 Button是一个UI小部件,用于从用户获取点击交互以触发应用程序中的操作。
A button can be created in the XML layout as well as the Kotlin Activity class in the Android Studio Project.
可以在XML布局以及Android Studio项目中的Kotlin Activity类中创建一个按钮。
在XML布局中创建按钮 ()
<Button
android:id="@+id/button"
android:layout_width="wrap_content"
android:layout_height="wrap_content"
android:text="Androidly Button"/>- android:id is used to set the unique identifier on the Button. android:id用于在Button上设置唯一标识符。
- The
android:textis used to set the text inside the button. By default text is displayed in capital letters.android:text用于在按钮内设置文本。 默认情况下,文本以大写字母显示。 android:onClickis used to define the Kotlin function to be invoked in the activity when the button is clicked. It is a click listener.android:onClick用于定义单击按钮时在活动中调用的Kotlin函数。 这是一个点击监听器。- The
android:backgroundis used to set the background color/drawable on the Button.android:background用于在Button上设置背景颜色/可绘制。
android:textAllCaps="false" android:textAllCaps="false"
For more details on how to customize your Buttons in XML Layout refer to the Android Buttons Tutorial.
有关如何在XML布局中自定义按钮的更多详细信息,请参阅Android Buttons Tutorial。
按钮单击侦听器 ()
We can set button listeners programmatically too. Following are the two major listeners:
我们也可以通过编程方式设置按钮监听器。 以下是两个主要的侦听器:
setOnClickListener– triggers when a button is clicked.setOnClickListener–单击按钮时触发。setOnLongClickListner– triggers when a button is pressed for a longer duration.setOnLongClickListner–长时间按下按钮时触发。
Following code snippets has the setOnClickListener set over a button.
以下代码段在按钮上设置了setOnClickListener。
button.setOnClickListener(object : View.OnClickListener {
            override fun onClick(v: View?) {
                //your implementation goes here
            }
        })
The above code can be converted in a lambda expression to make it short.
可以将上述代码转换为lambda表达式以使其简短。
button.setOnClickListener {
      textView.text = "Androidly Buttons"
    }
Similarly, a setOnLongClickListener can be defined in the following manner.
同样,可以按以下方式定义setOnLongClickListener。
button.setOnLongClickListener {
        textView.text = "Androidly Button Long click"
        true
    }

//or
button.setOnLongClickListener {
        textView.text = "Androidly Button Long click"
        false
    }
In the above code, the last statement in each of the expressions is the return statement.
在上面的代码中,每个表达式中的最后一条语句是return语句。
- If the setOnLongClickListener returns true, it means that the setOnClickListener won’t be triggered. 如果setOnLongClickListener返回true,则意味着不会触发setOnClickListener。
- If the setOnLongClickListener returns false, it means that the setOnClickListener will be triggered. 如果setOnLongClickListener返回false,则意味着将触发setOnClickListener。
This is known as consuming events. The first case consumes the event.
这被称为消费事件 。 第一种情况消耗事件。
使用Kotlin的Android Button ()
We’ll be developing an application that increments the counter of the TextView on a Button click. We will use Kotlin to create the button. We’ll also learn about the different Button click handlers.
我们将开发一个应用程序,该应用程序在Button单击时增加TextView的计数器。 我们将使用Kotlin创建按钮。 我们还将学习不同的Button单击处理程序。
1.项目结构 (1. Project Structure)
Create a new Android Studio Project. Ensure that in the initial setup, you enable Kotlin Support. Once you’re done, following is the Project Structure that you shall see.
创建一个新的Android Studio项目。 确保在初始设置中启用了Kotlin支持。 完成后,下面是您将看到的项目结构。
2. Kotlin按钮代码 ()
The activity_main.layout file looks like the following code.
activity_main.layout文件类似于以下代码。
<?xml version="1.0" encoding="utf-8"?>
<LinearLayout xmlns:android="http://schemas.android.com/apk/res/android"
    android:id="@+id/linearLayout"
    android:layout_width="match_parent"
    android:layout_height="match_parent"
    android:gravity="center"
    android:orientation="vertical">

    <TextView
        android:id="@+id/txtCounter"
        android:layout_width="wrap_content"
        android:layout_height="wrap_content"
        android:text="@string/number_zero"
        android:textAppearance="@style/TextAppearance.AppCompat.Display2"
        android:textColor="#000" />


    <Button
        android:id="@+id/btnIncrementByOne"
        android:layout_width="wrap_content"
        android:layout_height="wrap_content"
        android:onClick="addOne"
        android:text="@string/increment_by_one" />

</LinearLayout>
We’ve used LinearLayout that holds the views linearly (horizontally or vertically).
我们使用了LinearLayout来线性(水平或垂直)保存视图。
It’s recommended to set the strings in the strings.xml file instead of hardcoding them. To fetch a string resource we use @string/name_of_string.
建议在strings.xml文件中设置字符串,而不是对其进行硬编码。 要获取字符串资源,我们使用@string/name_of_string 。
The function addOne(view: View) is defined in the MainActivity.kt Kotlin class.
函数addOne(view: View)在MainActivity.kt Kotlin类中定义。
The code for the MainActivity.kt class is given below.
MainActivity.kt类的代码如下。
package net.androidly.androidlybuttons

import android.support.v7.app.AppCompatActivity
import android.os.Bundle
import android.support.v4.content.ContextCompat
import android.view.View
import android.view.ViewGroup
import android.widget.Button
import android.widget.LinearLayout
import kotlinx.android.synthetic.main.activity_main.*

class MainActivity : AppCompatActivity(), View.OnClickListener {

    override fun onCreate(savedInstanceState: Bundle?) {
        super.onCreate(savedInstanceState)
        setContentView(R.layout.activity_main)

        var androidlyButton = Button(this)
        androidlyButton.apply {
            layoutParams = LinearLayout.LayoutParams(LinearLayout.LayoutParams.MATCH_PARENT, ViewGroup.LayoutParams.WRAP_CONTENT)
            text = "Double the value"
            setAllCaps(false)
            textSize = 20f
            id = R.id.btnDouble
        }

        androidlyButton.setOnClickListener(this)
        linearLayout.addView(androidlyButton)

        androidlyButton = Button(this)
        androidlyButton.apply {
            layoutParams = LinearLayout.LayoutParams(LinearLayout.LayoutParams.WRAP_CONTENT, ViewGroup.LayoutParams.WRAP_CONTENT)
            text = "RESET"
            textSize = 20f
            setTextColor(ContextCompat.getColor(this@MainActivity, R.color.colorPrimaryDark))
            id = R.id.btnReset
            setOnLongClickListener {
                txtCounter.text = 0.toString()
                true
            }
        }
        androidlyButton.setOnClickListener(this)
        linearLayout.addView(androidlyButton)

    }

    override fun onClick(v: View?) {
        when (v?.id) {
            R.id.btnDouble -> {
                txtCounter.text = (txtCounter.text.toString().toInt() * 2).toString()
            }
            R.id.btnReset -> {
                txtCounter.text = (-100).toString()
            }
            else -> {
            }
        }
    }

    fun addOne(view: View) {
        txtCounter.text = (txtCounter.text.toString().toInt() + 1).toString()
    }
}
Important Points:
重要事项:
import kotlinx.android.synthetic.main.activity_main.*statement automatically gets the view IDs from the xml in our class. Hence saving us from using findViewById.import kotlinx.android.synthetic.main.activity_main.*语句自动从类中的xml获取视图ID。 因此,可以避免使用findViewById。- The
fun addOne(view: View)is triggered when thebtnIncrementByOneis clicked. The(view: View)parameter must be defined in the function declaration. 单击btnIncrementByOne会触发fun addOne(view: View)。(view: View)参数必须在函数声明中定义。 - Create a Button programmatically and set it in the parent view(LinearLayout here) using the following code.
以编程方式创建一个Button,并使用以下代码在父视图(此处为LinearLayout)中进行设置。var androidlyButton = Button(this) linearLayout.addView(androidlyButton) - Instead of calling member functions on the Button class, we can use
apply{}lambda expression. 我们可以使用apply{}lambda表达式来代替在Button类上调用成员函数。 - The
layoutParamsis used to define the width and height of the button. TheMATCH_PARENTsets the width/height equal to the linear layout.WRAP_CONTENTwraps the view to the size of the content.layoutParams用于定义按钮的宽度和高度。MATCH_PARENT将宽度/高度设置为等于线性布局。WRAP_CONTENT将视图包装为内容的大小。 - We can set the id programmatically under res | values | ids.xml.
我们可以在res |下以编程方式设置id 。 价值观| ids.xml 。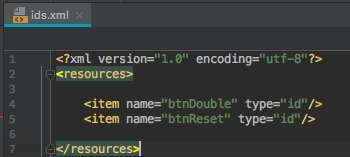
- We’ve defined the
View.OnClickListenerinterface in ourMainActivity.ktclass. Hence we need to override its onClick() function. 我们已经在MainActivity.kt类中定义了View.OnClickListener接口。 因此,我们需要重写其onClick()函数。 - Inside the
onClickfunction, we use the Kotlin when statement, which is equivalent to switch in other languages. 在onClick函数中,我们使用Kotlin when语句,等效于其他语言的switch。 - For the
onClickfunction to be triggered, you must register thesetOnClickListenerover the button with the interface using the context(this). 为了触发onClick函数,您必须使用context(this)在具有接口的按钮上注册setOnClickListener。
Output:
输出:
翻译自: https://www.journaldev.com/78/android-button-using-kotlin
kotlin button

开源鸿蒙跨平台开发社区汇聚开发者与厂商,共建“一次开发,多端部署”的开源生态,致力于降低跨端开发门槛,推动万物智联创新。
更多推荐


 0
0 0
0- 0


 已为社区贡献32条内容

所有评论(0)