平平无奇Android快速转战Kotlin教程,手把手教学,学不会算我输
apply plugin: ‘kotlin-android-extensions’
这个上面已经说过,我们创建工程的时候如果选中Include kotlin support怎会自动在gradle中生成。
4、Retrofit+RxJava
Retrofit结合RxJava能快捷的使用网络请求。
创建Service接口,Kotlin的类型是写在后面
interface RetrofitService {
/**
- 获取当天详细信息
- @param date 日期
*/
@GET(“calendar/day”)
fun calenderDay(
@Query(“date”) date: String,
@Query(“key”) key: String
): Observable
/**
- 获取近期假期
- @param date 日期
*/
@GET(“calendar/month”)
fun calenderMonth(
@Query(“date”) date: String
): Observable
/**
- 获取当年假期列表
- @param date 日期
*/
@GET(“calendar/year”)
fun calenderYear(
@Query(“date”) date: String
): Observable
}
创建Retrofit,Kotlin的class并不支持static变量,所以需要使用companion object来声明static变量,其实这个变量也不是真正的static变量,而是一个伴生对象
伴生对象可以实现静态调用,通过类名.属性名或者类名.方法名进行调用
class RetrofitUtil {
companion object {
/**
- 创建Retrofit
*/
fun create(url: String): Retrofit {
//日志显示级别
val level: HttpLoggingInterceptor.Level = HttpLoggingInterceptor.Level.BODY
//新建log拦截器
val loggingInterceptor: HttpLoggingInterceptor = HttpLoggingInterceptor(HttpLoggingInterceptor.Logger {
message -> Logger.e("OkHttp: " + message)
})
loggingInterceptor.level = level
// okHttpClientBuilder
val okHttpClientBuilder = OkHttpClient().newBuilder()
okHttpClientBuilder.connectTimeout(60, TimeUnit.SECONDS)
okHttpClientBuilder.readTimeout(10, TimeUnit.SECONDS)
//OkHttp进行添加拦截器loggingInterceptor
//okHttpClientBuilder.addInterceptor(loggingInterceptor)
return Retrofit.Builder()
.baseUrl(url)
.client(okHttpClientBuilder.build())
.addConverterFactory(GsonConverterFactory.create())
.addCallAdapterFactory(RxJava2CallAdapterFactory.create())
.build()
}
val retrofitService: RetrofitService = RetrofitUtil.getService(Constants.REQUEST_BASE_URL, RetrofitService::class.java)
/**
- 获取ServiceApi
*/
fun getService(url: String, service: Class): T {
return create(url).create(service)
}
}
}
通过伴生对象,结合Retrofit结合RxJava 我们直接就可以调用接口了
RetrofitUtil
.retrofitService
.calenderDay(date,“933dc930886c8c0717607f9f8bae0b48”)
.subscribeOn(Schedulers.io())
.observeOn(AndroidSchedulers.mainThread())
.subscribe({ result ->
view?.showDayCalentarData(result)
Logger.e(result.toString())
}, { error ->
view?.showError(error.message.toString())
Logger.e(error.message.toString())
})
5、使用对象声明
在写项目的时候,一般会将常量统一写到一个类里面,然后设置静态变量,由于在Kotlin中不存在静态变量,所有就有对象声明的存在,对象声明比较常用的地方就是在这里,对象声明用Objcet关键字表示。
object Constants {
val REQUEST_BASE_URL = “http://v.juhe.cn/”
val KEY = “1be865c0e67e3”
}
使用的时候直接类名加.加变量名,如Constants.REQUEST_BASE_URL
6、使用数据类
Kotlin有专门的数据类,就是用data修饰的类
首先我们先看一下json数据:
{
“reason”:“Success”,
“result”:{
“data”:{
“date”:“2018-4-4”,
“weekday”:“星期三”,
“animalsYear”:“狗”,
“suit”:“订盟.纳采.冠笄.拆卸.修造.动土.安床.入殓.除服.成服.移柩.安葬.破土.启攒.造仓.”,
“avoid”:“作灶.开光.嫁娶.开市.入宅.”,
“year-month”:“2018-4”,
“lunar”:“二月十九”,
“lunarYear”:“戊戌年”
}
},
“error_code”:0
}
再来看一下我的数据类:
data class CalentarDayBean(
val reason: String,
val result: CalentarDayResult,
val error_code: Int
)
data class CalentarDayResult(
val data: CalentarDayData
)
data class CalentarDayData(
val date: String,
val weekday: String,
val animalsYear: String,
val suit: String,
val avoid: String,
val yearMonth: String,
val holiday: String,
val lunar: String,
val lunarYear: String,
val desc: String
)
就是如此方便
7、MVP
kotlin的MVP和java原理一模一样我先定义了IBaseModel和IBaseView
IBaseModel
interface IBaseModel {
fun onDestroy()
fun attachView(view: T)
}
IBaseView
interface IBaseView {
fun showLoading()
fun hideLoading()
fun showMessage(message: String)
fun killMyself()
}
然后完成ICalentarContract,这个类似合同类的接口把P和V的所有方法全部写在一起,看起来代码格外清楚
interface ICalentarContract {
/**
- 对于经常使用的关于UI的方法可以定义到IBaseView中,如显示隐藏进度条,和显示文字消息
*/
interface View : IBaseView {
fun showDayCalentarData(calentarDayBean: CalentarDayBean)
fun showError(errorMsg: String)
}
/**
- Model层定义接口,外部只需关心Model返回的数据,无需关心内部细节,如是否使用缓存
*/
interface Model : IBaseModel<ICalentarContract.View> {
fun getDayCalentarData(date: String)
}
}
然后activity去实现ICalentarContract.View,presenter去实现ICalentarContract.Model
class CalentarDatePresenter : ICalentarContract.Model {
…
}
class MainActivity : AppCompatActivity(), ICalentarContract.View {
…
}
so easy~~~ 到这里我们的Demo就完成了,可以尽情玩乐。
项目地址:待上传。。。。。。。。。。。。。
好了,到这里我们基本掌握了Kotlin在安卓中的应用,那么接下来就需要去学习一下kotlin设计模式以及一些进阶知识~
进阶
一、Kotlin设计模式
本文只列出几个常用的设计模式
1、观察者模式( observer pattern )
Example
interface TextChangedListener {
fun onTextChanged(newText: String)
}
class PrintingTextChangedListener : TextChangedListener {
override fun onTextChanged(newText: String) = println(“Text is changed to: $newText”)
}
class TextView {
var listener: TextChangedListener? = null
var text: String by Delegates.observable(“”) { prop, old, new ->
listener?.onTextChanged(new)
}
}
Usage
val textView = TextView()
textView.listener = PrintingTextChangedListener()
textView.text = “Lorem ipsum”
textView.text = “dolor sit amet”
Output
Text is changed to: Lorem ipsum
Text is changed to: dolor sit amet
2、策略模式( strategy pattern )
Example
class Printer(val stringFormatterStrategy: (String) -> String) {
fun printString(string: String) = println(stringFormatterStrategy.invoke(string))
}
val lowerCaseFormatter: (String) -> String = { it.toLowerCase() }
val upperCaseFormatter = { it: String -> it.toUpperCase() }
Usage
val lowerCasePrinter = Printer(lowerCaseFormatter)
lowerCasePrinter.printString(“LOREM ipsum DOLOR sit amet”)
val upperCasePrinter = Printer(upperCaseFormatter)
upperCasePrinter.printString(“LOREM ipsum DOLOR sit amet”)
val prefixPrinter = Printer({ "Prefix: " + it })
prefixPrinter.printString(“LOREM ipsum DOLOR sit amet”)
Output
lorem ipsum dolor sit amet
LOREM IPSUM DOLOR SIT AMET
Prefix: LOREM ipsum DOLOR sit amet
3、单例模式(singleton pattern)
Example
class Singletone private constructor() {
init {
println(“Initializing with object: $this”)
}
companion object {
val getInstance =SingletonHolder.holder
}
private object SingletonHolder {
val holder = Singletone()
}
fun print() = println(“Printing with object: $this”)
}
Usage
Singletone.getInstance.print()
Singletone.getInstance.print()
Output
Initializing with object: advance.Singletone@266474c2
Printing with object: advance.Singletone@266474c2
Printing with object: advance.Singletone@266474c2
4、工厂模式(Factory Method)
Example
interface Currency {
val code: String
}
class Euro(override val code: String = “EUR”) : Currency
class UnitedStatesDollar(override val code: String = “USD”) : Currency
enum class Country {
UnitedStates, Spain, UK, Greece
}
class CurrencyFactory {
fun currencyForCountry(country: Country): Currency? {
when (country) {
Country.Spain, Country.Greece -> return Euro()
Country.UnitedStates -> return UnitedStatesDollar()
else -> return null
}
}
}
Usage
val noCurrencyCode = “No Currency Code Available”
val greeceCode = CurrencyFactory().currencyForCountry(Country.Greece)?.code() ?: noCurrencyCode
println(“Greece currency: $greeceCode”)
val usCode = CurrencyFactory().currencyForCountry(Country.UnitedStates)?.code() ?: noCurrencyCode
println(“US currency: $usCode”)
val ukCode = CurrencyFactory().currencyForCountry(Country.UK)?.code() ?: noCurrencyCode
println(“UK currency: $ukCode”)
Output
Greece currency: EUR
US currency: USD
UK currency: No Currency Code Available
5、代理模式(Protection Proxy)
Example
interface File {
fun read(name: String)
}
class NormalFile : File {
override fun read(name: String) = println(“Reading file: $name”)
}
//Proxy:
class SecuredFile : File {
val normalFile = NormalFile()
var password: String = “”
override fun read(name: String) {
if (password == “secret”) {
println(“Password is correct: $password”)
normalFile.read(name)
} else {
println(“Incorrect password. Access denied!”)
}
}
}
Usage
val securedFile = SecuredFile()
securedFile.read(“readme.md”)
securedFile.password = “secret”
securedFile.read(“readme.md”)
Output
Incorrect password. Access denied!
Password is correct: secret
Reading file: readme.md
6、建造者模式(builder pattern)
Example
// Let’s assume that Dialog class is provided by external library.
// We have only access to Dialog public interface which cannot be changed.
class Dialog() {
fun showTitle() = println(“showing title”)
fun setTitle(text: String) = println(“setting title text $text”)
fun setTitleColor(color: String) = println(“setting title color $color”)
fun showMessage() = println(“showing message”)
fun setMessage(text: String) = println(“setting message $text”)
fun setMessageColor(color: String) = println(“setting message color $color”)
fun showImage(bitmapBytes: ByteArray) = println(“showing image with size ${bitmapBytes.size}”)
fun show() = println(“showing dialog $this”)
}
//Builder:
class DialogBuilder() {
constructor(init: DialogBuilder.() -> Unit) : this() {
init()
}
private var titleHolder: TextView? = null
private var messageHolder: TextView? = null
private var imageHolder: File? = null
fun title(init: TextView.() -> Unit) {
titleHolder = TextView().apply { init() }
}
fun message(init: TextView.() -> Unit) {
messageHolder = TextView().apply { init() }
}
fun image(init: () -> File) {
imageHolder = init()
}
fun build(): Dialog {
val dialog = Dialog()
titleHolder?.apply {
dialog.setTitle(text)
dialog.setTitleColor(color)
dialog.showTitle()
}
messageHolder?.apply {
dialog.setMessage(text)
dialog.setMessageColor(color)
dialog.showMessage()
}
imageHolder?.apply {
dialog.showImage(readBytes())
}
return dialog
}
class TextView {
var text: String = “”
var color: String = “#00000”
}
}
Usage
//Function that creates dialog builder and builds Dialog
fun dialog(init: DialogBuilder.() -> Unit): Dialog {
return DialogBuilder(init).build()
}
val dialog: Dialog = dialog {
title {
text = “Dialog Title”
}
message {
text = “Dialog Message”
color = “#333333”
}
image {
File.createTempFile(“image”, “jpg”)
}
}
dialog.show()
Output
setting title text Dialog Title
setting title color #00000
showing title
setting message Dialog Message
setting message color #333333
showing message
showing image with size 0
showing dialog Dialog@5f184fc6
2、相关书籍
个人认为还是需要找一本书籍好好地阅读一遍,一下提供了相关书籍可以选择适合自己的。
NO.1
《Kotlin for Android Developers》
Kotlin是编写Android应用程序的新官方语言,多亏了这本书,你很快就能写出代码。直奔主题,实用和完整的例子,它将在开发Android应用程序的同时展示你的语言。学习Kotlin并开始使用这个强大而现代的语言再次享受Android开发。
NO.2
《Kotlin开发快速入门与实战》
学习本书之前不需要具备任何的计算机专业背景,任何有志于APP开发的读者都能利用本书从头学起。
自我介绍一下,小编13年上海交大毕业,曾经在小公司待过,也去过华为、OPPO等大厂,18年进入阿里一直到现在。
深知大多数初中级Android工程师,想要提升技能,往往是自己摸索成长或者是报班学习,但对于培训机构动则近万的学费,着实压力不小。自己不成体系的自学效果低效又漫长,而且极易碰到天花板技术停滞不前!
因此收集整理了一份《2024年Android移动开发全套学习资料》,初衷也很简单,就是希望能够帮助到想自学提升又不知道该从何学起的朋友,同时减轻大家的负担。
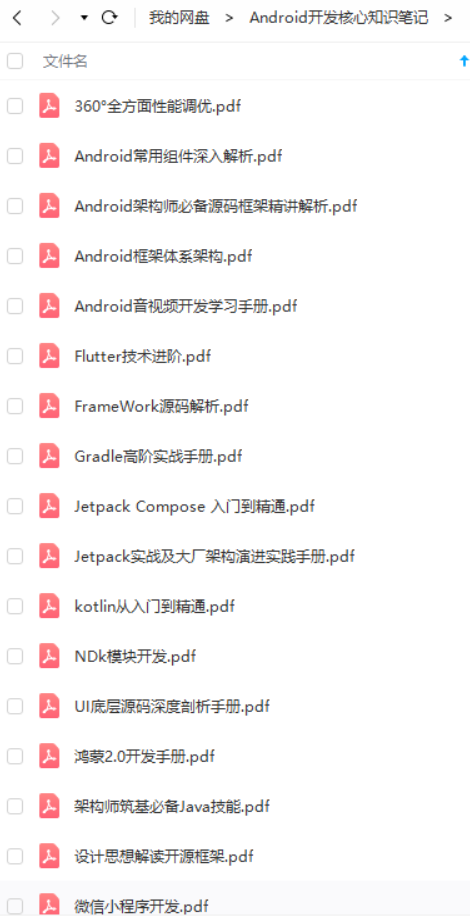
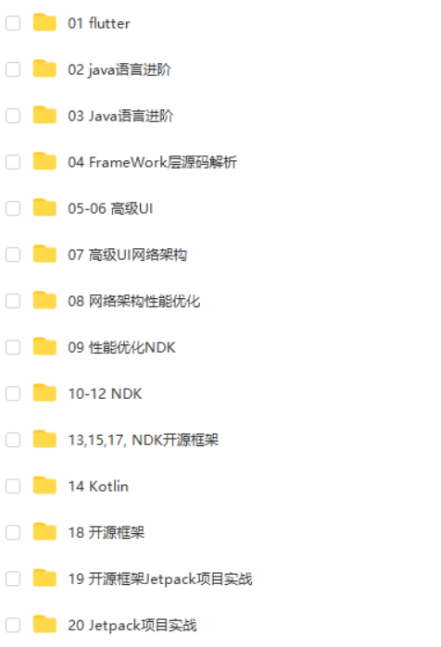
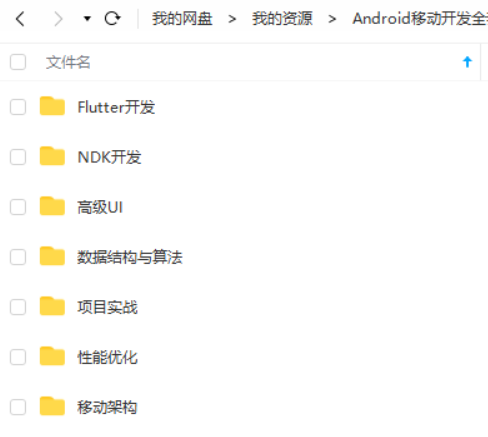
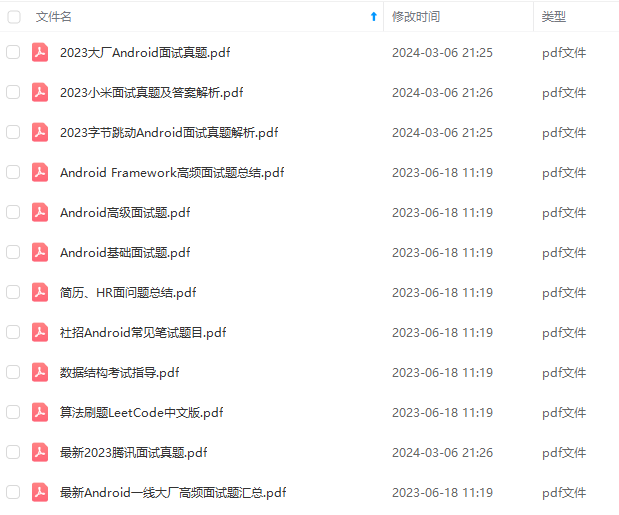
既有适合小白学习的零基础资料,也有适合3年以上经验的小伙伴深入学习提升的进阶课程,基本涵盖了95%以上Android开发知识点,真正体系化!
由于文件比较大,这里只是将部分目录截图出来,每个节点里面都包含大厂面经、学习笔记、源码讲义、实战项目、讲解视频,并且会持续更新!
如果你觉得这些内容对你有帮助,可以扫码获取!!(备注:Android)

学习分享
在当下这个信息共享的时代,很多资源都可以在网络上找到,只取决于你愿不愿意找或是找的方法对不对了
很多朋友不是没有资料,大多都是有几十上百个G,但是杂乱无章,不知道怎么看从哪看起,甚至是看后就忘
如果大家觉得自己在网上找的资料非常杂乱、不成体系的话,我也分享一套给大家,比较系统,我平常自己也会经常研读。
2021最新上万页的大厂面试真题
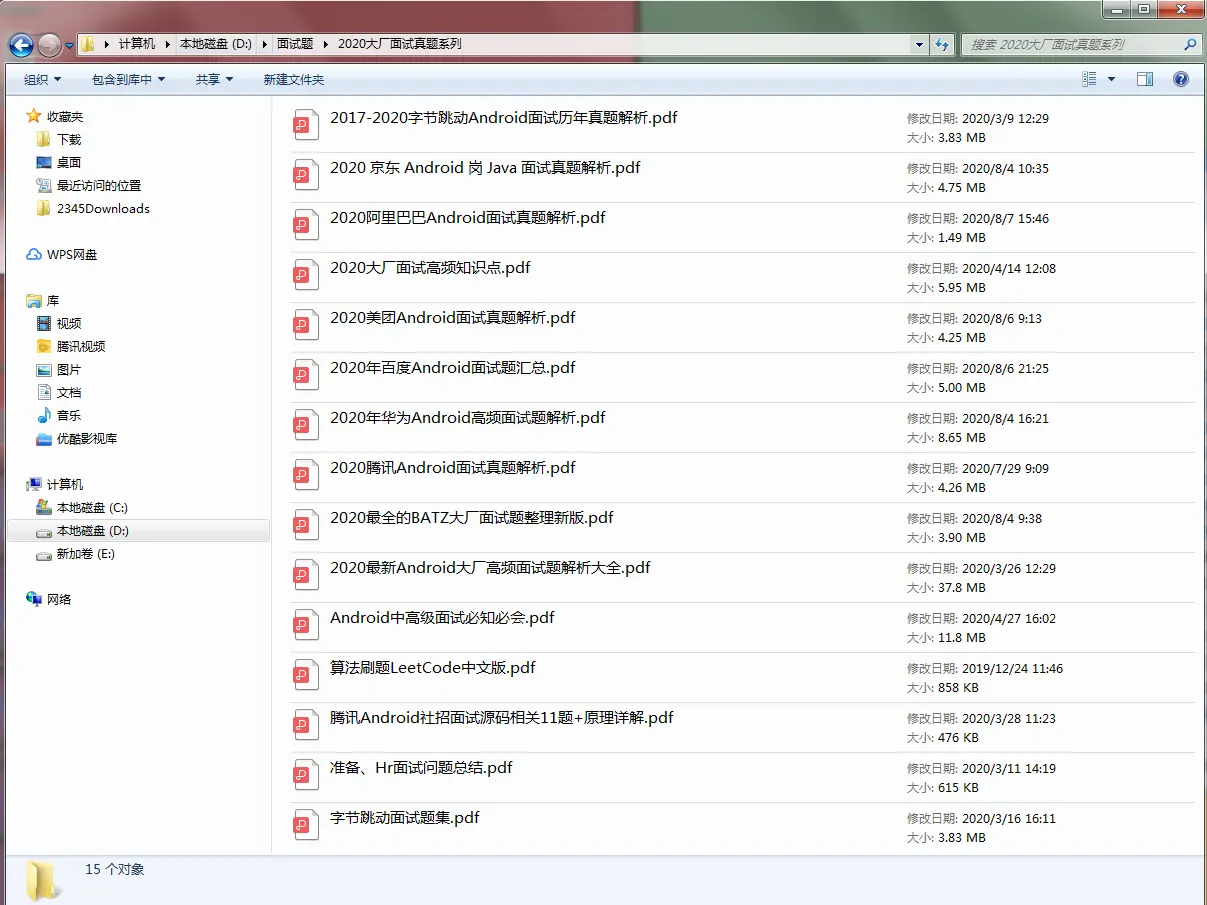
七大模块学习资料:如NDK模块开发、Android框架体系架构…

只有系统,有方向的学习,才能在段时间内迅速提高自己的技术。
这份体系学习笔记,适应人群:
**第一,**学习知识比较碎片化,没有合理的学习路线与进阶方向。
**第二,**开发几年,不知道如何进阶更进一步,比较迷茫。
第三,到了合适的年纪,后续不知道该如何发展,转型管理,还是加强技术研究。如果你有需要,我这里恰好有为什么,不来领取!说不定能改变你现在的状态呢!
由于文章内容比较多,篇幅不允许,部分未展示内容以截图方式展示
《Android学习笔记总结+移动架构视频+大厂面试真题+项目实战源码》,点击传送门即可获取!
很多朋友不是没有资料,大多都是有几十上百个G,但是杂乱无章,不知道怎么看从哪看起,甚至是看后就忘
如果大家觉得自己在网上找的资料非常杂乱、不成体系的话,我也分享一套给大家,比较系统,我平常自己也会经常研读。
2021最新上万页的大厂面试真题
[外链图片转存中…(img-o1hlmjMZ-1712406772909)]
七大模块学习资料:如NDK模块开发、Android框架体系架构…
[外链图片转存中…(img-B3bKp9AT-1712406772909)]
只有系统,有方向的学习,才能在段时间内迅速提高自己的技术。
这份体系学习笔记,适应人群:
**第一,**学习知识比较碎片化,没有合理的学习路线与进阶方向。
**第二,**开发几年,不知道如何进阶更进一步,比较迷茫。
第三,到了合适的年纪,后续不知道该如何发展,转型管理,还是加强技术研究。如果你有需要,我这里恰好有为什么,不来领取!说不定能改变你现在的状态呢!
由于文章内容比较多,篇幅不允许,部分未展示内容以截图方式展示
《Android学习笔记总结+移动架构视频+大厂面试真题+项目实战源码》,点击传送门即可获取!

开源鸿蒙跨平台开发社区汇聚开发者与厂商,共建“一次开发,多端部署”的开源生态,致力于降低跨端开发门槛,推动万物智联创新。
更多推荐
 29
29 0
0- 0


 已为社区贡献14条内容

所有评论(0)