ListView
·
ListView
参考:
- ListView class
- 《Flutter技术入门与实战》
ListView表示的是列表,常见属性:
-
scrollDirection - 列表的排序方向,类型为Axis
enum Axis { /// Left and right. /// /// See also: /// /// * [TextDirection], which disambiguates between left-to-right horizontal /// content and right-to-left horizontal content. horizontal, /// Up and down. vertical, } -
children - 列表元素,为
Widget类型
官方的例子:
class MyApp extends StatelessWidget {
  // This widget is the root of your application.
  @override
  Widget build(BuildContext context) {
    return MaterialApp(
      title: 'IconButton',
      home: Scaffold(
        appBar: AppBar(
          title: Text('ListView'),
        ),
        body: ListView(
          scrollDirection: Axis.vertical,
          children: <Widget>[
            Container(
              height: 50,
              color: Colors.amber[400],
              child: Center(child: Text('List 1')),
            ),
            Container(
              height: 50,
              color: Colors.amber[500],
              child: Center(child: Text('List 2')),
            ),
            Container(
              height: 50,
              color: Colors.amber[600],
              child: Center(child: Text('List 3')),
            ),
          ],
        )
      ),
    );
  }
}
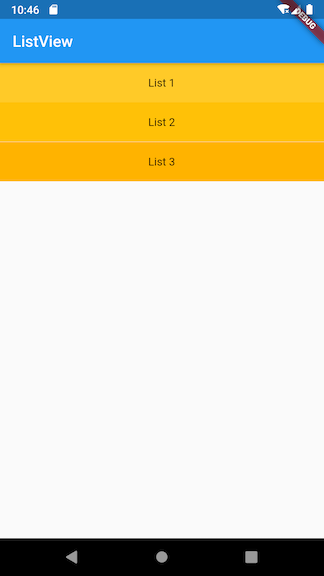
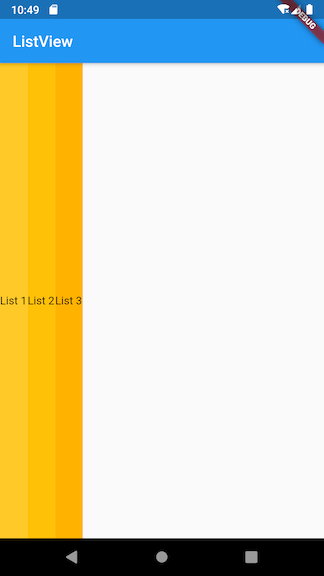
如果将上面的例子的scrollDirection修改为Axis.horizontal,效果如下
有些大的列表,需要按需构建item,此时就需要使用itemBuilder,其类型为IndexedWidgetBuilder
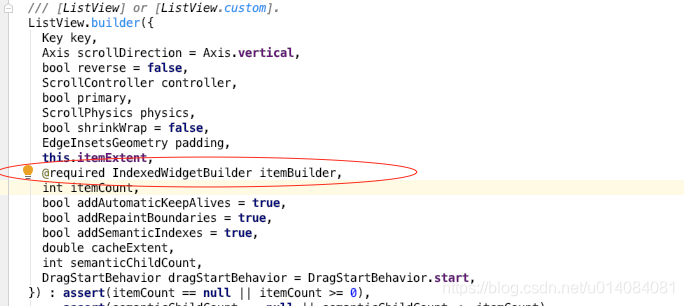
typedef IndexedWidgetBuilder = Widget Function(BuildContext context, int index);
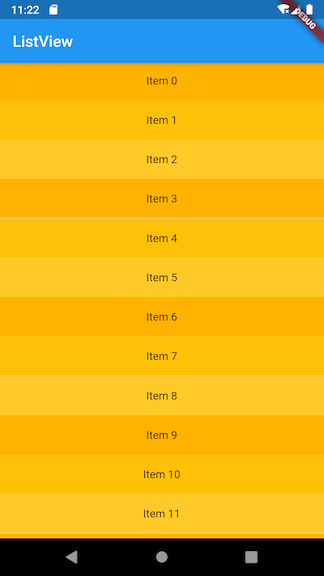
如下的例子:
class MyApp extends StatelessWidget {

  final List<String> items = List<String>.generate(50, (i) => "Item $i");
  final List<int> colorCodes =  <int>[600, 500, 400];

  @override
  Widget build(BuildContext context) {
    return MaterialApp(
      title: 'IconButton',
      home: Scaffold(
        appBar: AppBar(
          title: Text('ListView'),
        ),
        body: ListView.builder(
            itemCount: items.length,
            itemBuilder: (context, index) {
              return Container(
                height: 50,
                color: Colors.amber[colorCodes[index % colorCodes.length]],
                child: Center(child: Text(items[index]),),
              );
            },
        ),
      ),
    );
  }
}

开源鸿蒙跨平台开发社区汇聚开发者与厂商,共建“一次开发,多端部署”的开源生态,致力于降低跨端开发门槛,推动万物智联创新。
更多推荐
 0
0 0
0- 0


 已为社区贡献9条内容

所有评论(0)