

待办清单 bmob
A short example of how easy it is to build a CRUD App using the Flutter framework.
一个简短的示例,说明使用Flutter框架构建CRUD应用有多么容易。
About one year ago, I noticed some mobile app framework which I immediately was interested to learn: The Flutter SDK. I was fascinated how easy and straight forward it is to build apps which this framework. So I decided to have a deeper look how things work there. As at this time there was not much material to learn flutter (besides the massive documentation from google). This is why I wanted to share some of my knowledge (which is of course still basic) with you.
大约一年前,我注意到了一些我立即感兴趣的移动应用程序框架:Flutter SDK。 使我着迷的是,使用此框架构建应用程序是多么容易和直接。 因此,我决定更深入地了解那里的工作方式。 截至目前,学习颤振的材料不多(除了来自Google的大量文档)。 这就是为什么我想与您分享我的一些知识(当然这仍然是基础的)的原因。
First of all, you will need to install the flutter sdk. Please refer to the official docs at https://flutter.dev/docs/get-started/install for doing this. After you set up all the things, you are ready to scaffold your first app!
首先,您将需要安装flutter sdk。 为此,请参考https://flutter.dev/docs/get-started/install上的官方文档。 设置完所有内容之后,就可以准备安装第一个应用程序了!
Flutter comes with a powerful CLI, which lets you create an example app very easy: simply fire the following command in the directory where you want your app to live in
Flutter带有强大的CLI,可让您非常轻松地创建示例应用程序:只需在您希望应用程序所在的目录中触发以下命令
flutter create todoappThat’s it. After the command finishes, you will have your first app which is ready to run. The scaffolding creates some example app with an easy use case of state management. First of all, we have to delete all the example code to have a plain app with a simple AppBar. We do this by adjusting the main.dart file (which contains the main method, the entry point for our app). For now you can also delete the unit test file in /test. Your main.dart file will then look like this:
而已。 命令完成后,您将拥有可以运行的第一个应用程序。 脚手架创建了一个带有状态管理简单用例的示例应用程序。 首先,我们必须删除所有示例代码,以拥有带有简单AppBar的普通应用程序。 我们通过调整main.dart文件(包含main方法,即应用程序的入口点)来实现此目的。 现在,您还可以在/ test中删除单元测试文件。 您的main.dart文件将如下所示:
import 'package:flutter/material.dart';
void main() {
runApp(TodoListApp());
}
class TodoListApp extends StatelessWidget {
@override
Widget build(BuildContext context) {
return MaterialApp(
title: 'Todo list',
home: Scaffold(
appBar: AppBar(title: Text("Todo list"),),
),
);
}
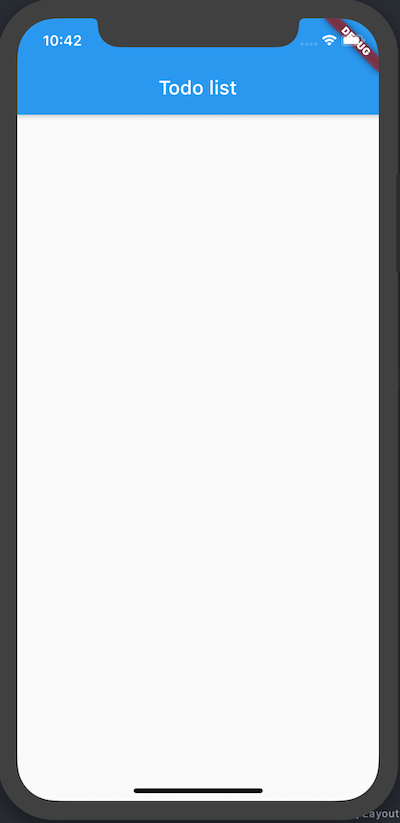
}You can now run your app (please also refer to the official docs here, because it depends on if you use emulators or real devices, as well as on your IDE / editor and operating system). I use Android Studio in combination with the ios simulator on MacOS. The app will now look like this:
现在,您可以运行您的应用程序(也请参考此处的官方文档,因为它取决于您使用的是仿真器还是真实的设备,以及您的IDE /编辑器和操作系统)。 我将Android Studio与MacOS上的ios模拟器结合使用。 该应用现在将如下所示:
Now it’s time to build some stuff. First of all, we will create a model class for our todos. I will put this file to /lib/model. The content of the file is
现在是时候构建一些东西了。 首先,我们将为待办事项创建一个模型类。 我将把这个文件放到/ lib / model 。 该文件的内容是
class Todo {
  int id;
  String title;
  String description;
  bool isDone;
}
Afterwards, we will start implementing our state management. There are quite different approaches for doing this. Flutter brings his own publish-subscribe state management (which we will use in this tutorial), but there are also things like redux etc, which all have their pros and cons. In this guide we will use the standard flutter way.
之后,我们将开始执行状态管理。 有很多不同的方法可以执行此操作。 Flutter带来了他自己的发布-订阅状态管理(我们将在本教程中使用),但是还有redux之类的东西,各有利弊。 在本指南中,我们将使用标准的抖动方式。
The first step is to create a state model class, which we will put in /lib/state. The filename is todo_model.dart and it gets the following content:
第一步是创建一个状态模型类,我们将其放在/ lib / state中。 文件名是todo_model.dart ,它包含以下内容:
import 'dart:collection';

import 'package:flutter/material.dart';
import 'package:todo_app/model/todo.dart';

class TodoModel extends ChangeNotifier {
  final List<Todo> _todos = [];

  UnmodifiableListView<Todo> get todos => UnmodifiableListView(_todos);

  void add(Todo todo) {
    _todos.add(todo);
    notifyListeners();
  }

  void toggleDone(int id) {
    var index = _todos.indexWhere((element) => element.id == id);
    _todos[index].isDone = !_todos[index].isDone;
    notifyListeners();
  }  void remove(int id) {
    _todos.removeWhere((element) => element.id == id);
    notifyListeners();
  }
}
What are we doing here? First of all, we extend the ChangeNotifier class, which is a Flutter class that allows us to access the app state and the notifier methods. We have a private list of todos in there, this is our actual data on which we work. For the usage outside of the class, we only provide an immutable view of them and some accessor method (encapsulation principle). There is no magic inside, just some List logic and the notifier calls. The notifier calls trigger the app state update and all widgets that listen to this state are then rebuilt.
我们在这里做什么? 首先,我们扩展ChangeNotifier类,这是Flutter类,允许我们访问应用程序状态和notifier方法。 我们在那里有一个待办事项的私人清单,这是我们处理工作的实际数据。 对于类之外的用法,我们仅提供它们的不变视图和某些访问器方法(封装原理)。 里面没有魔术,只有一些列表逻辑和通知程序调用。 通知程序调用触发应用程序状态更新,然后重新构建所有侦听此状态的小部件。
For the time being, it makes sense to add some dummy data, so that we can see some entries in the list view we soon will create. First, we have to add a constructor to our model class:
暂时添加一些伪数据是有意义的,以便我们可以在即将创建的列表视图中看到一些条目。 首先,我们必须在模型类中添加一个构造函数:
class Todo {
  int id;
  String title;
  String description;
  bool isDone = false;

  Todo({this.id, this.title, this.description});
}
Then we can go to our state model and initially insert some data into our list:
然后,我们可以进入状态模型,并将一些数据最初插入列表中:
final List<Todo> _todos = [
  Todo(id: 1, title: "First Todo", description: "My first todo"),
  Todo(id: 2, title: "Second todo", description: "My second todo")
];
In order to consume this state model, we have to install the provider package into our app. For this, we open the pubspec.yaml file and make the dependency section look like this:
为了使用此状态模型,我们必须将提供程序包安装到我们的应用程序中。 为此,我们打开pubspec.yaml文件,并使依赖项部分如下所示:
dependencies:
  flutter:
    sdk: flutter
  provider: 4.3.1
After running the pub get command of flutter, we can use this package. For this we wrap our whole App into a ChangeNotifierProvider (main.dart), which is connected to our Model:
在运行flutter的pub get命令后,我们可以使用此包。 为此,我们将整个应用程序包装到一个ChangeNotifierProvider (main.dart)中,该ChangeNotifierProvider与我们的模型连接:
void main() {
  runApp(
    ChangeNotifierProvider(
      create: (context) => TodoModel(),
      child: TodoListApp(),
    ),
  );
}
We can now consume this model anywhere we want. And so we do, switch do your main.dart file and change it the following way: add a TodoList widget, which is connected to our AppState:
现在,我们可以在任何需要的地方使用此模型。 接下来,切换您的main.dart文件,并通过以下方式对其进行更改:添加一个TodoList小部件,该小部件已连接到我们的AppState :
class TodoList extends StatelessWidget {
  @override
  Widget build(BuildContext context) {
    return Consumer<TodoModel>(
        builder: (context, todoList, child) => ListView.builder(
            padding: const EdgeInsets.all(8),
            itemCount: todoList.todos.length,
            itemBuilder: (BuildContext context, int index) {
              return Container(
                height: 50,
                child: Center(child: Text(todoList.todos[index].title)),
              );
            }));
  }
}
What does it do? It connects to our AppState via the Consumer widget, and then renders a ListView with the obtained data.
它有什么作用? 它通过Consumer小部件连接到我们的AppState ,然后使用获取的数据呈现ListView。
Now we only need to integrate this list into our Scaffold, so the TodoListApp Widget will look like this:
现在我们只需要将此列表集成到我们的Scaffold中,那么TodoListApp小部件将如下所示:
class TodoListApp extends StatelessWidget {
@override
Widget build(BuildContext context) {
return MaterialApp(
title: 'Todo list',
home: Scaffold(
appBar: AppBar(
title: Text("Todo list"),
),
body: TodoList(),
),
);
}
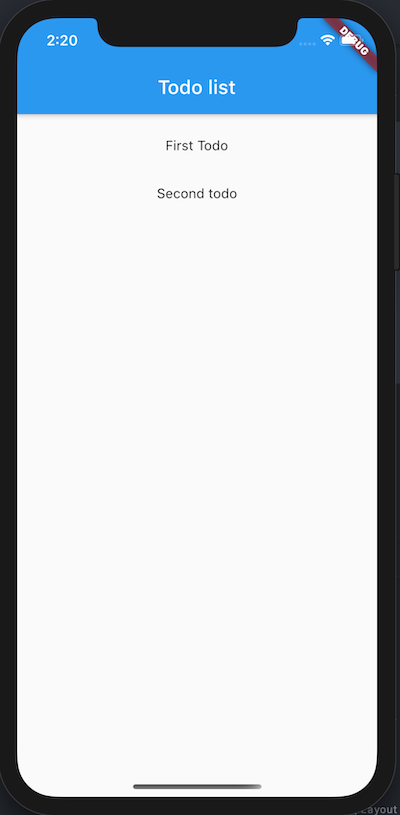
}And boom, our app looks like this now:
繁荣,我们的应用现在看起来像这样:
import 'package:flutter/material.dart';
import 'package:provider/provider.dart';
import 'package:todo_app/state/todo_model.dart';

class TodoScreen extends StatelessWidget {
  @override
  Widget build(BuildContext context) {
    return Scaffold(
      appBar: AppBar(
        title: Text("Todo list"),
      ),
      body: TodoList(),
    );
  }
}

class TodoList extends StatelessWidget {
  @override
  Widget build(BuildContext context) {
    return Consumer<TodoModel>(
        builder: (context, todoModel, child) =>
            ListView.builder(
                padding: const EdgeInsets.all(8),
                itemCount: todoModel.todos.length,
                itemBuilder: (BuildContext context, int index) {
                  return Container(
                    height: 50,
                    child: Center(child: Text(todoModel.todos[index].title)),
                  );
                }));
  }
}
The main.dart will then only contain the registration of the state provider as well as the route definitions. It will look like this:
然后main.dart将仅包含状态提供者的注册以及路由定义。 它看起来像这样:
import 'package:flutter/material.dart';
import 'package:provider/provider.dart';
import 'package:todo_app/screens/todo_screen.dart';
import 'package:todo_app/state/todo_model.dart';

void main() {
  runApp(
    ChangeNotifierProvider(
      create: (context) => TodoModel(),
      child: TodoListApp(),
    ),
  );
}

class TodoListApp extends StatelessWidget {
  @override
  Widget build(BuildContext context) {
    return MaterialApp(
      title: 'Todo list',
      initialRoute: '/',
      routes: {
        '/': (context) => TodoScreen(),
      },
    );
  }
}
Now it’s time to create the todo_form.dart widget, which will be used for creating and editing todos (we will implement create first and edit afterwards). Create the file in the screens folder and add the following code to it:
现在是时候创建todo_form.dart小部件了,该小部件将用于创建和编辑待办事项(我们将首先实现create然后进行编辑)。 在screens文件夹中创建文件,并向其中添加以下代码:
import 'package:flutter/cupertino.dart';
import 'package:flutter/material.dart';

class TodoForm extends StatelessWidget {
  @override
  Widget build(BuildContext context) {
    return Scaffold(
      appBar: AppBar(
        title: Text("Create todo"),
      ),
      body: Center(
        child: Text("This will be the add form"),
      ),
    );
  }
}
This is only some dummy content to be able to register the route. Then go to the main.dart file and add the following route to the router config:
这只是一些虚假内容,可以注册路由。 然后转到main.dart文件,并将以下路由添加到路由器配置中:
'/entry': (context) => TodoForm(),We can now easily add a material floating action button in the TodoList scaffold, which will lead us to the page. Adjust the code of the TodoScreen scaffold to contain a floating action button:
现在,我们可以轻松地在TodoList脚手架中添加一个材质浮动动作按钮,这将带我们进入页面。 调整TodoScreen脚手架的代码以包含一个浮动操作按钮:
class TodoScreen extends StatelessWidget {
  @override
  Widget build(BuildContext context) {
    return Scaffold(
      appBar: AppBar(
        title: Text("Todo list"),
      ),
      body: TodoList(),
      floatingActionButton: FloatingActionButton(
        child: Icon(Icons.add),
        onPressed: () => {Navigator.pushNamed(context, "/entry")},
      ),
    );
  }
}
If you now click this button, you are navigated to the form screen (which also contains a back button in the AppBar automatically, because we use the Flutter router).
如果现在单击此按钮,将导航到表单屏幕(由于使用Flutter路由器,该屏幕在AppBar中也自动包含一个后退按钮)。
The next step is to apply some changes to our model. As we don’t want to set the id of our todos manually, we will auto increment the id based on the last one. This can be easily done by adding the following line at the very first line of our add method:
下一步是对我们的模型进行一些更改。 由于我们不想手动设置待办事项的ID,因此我们将根据最后一个ID自动递增ID。 这可以通过在add方法的第一行添加以下行来轻松完成:
todo.id = todos.last.id + 1;We are now ready for building our form for entering todos. Our TodoForm is the first stateful widget we write in this tutorial and will be our most complex widget. Go to the todo_form.dart file and add a TodoForm widget which extends the StatefulWidget class, as well as a TodoFormState class which extends the State class. The TodoForm code will be very simple for the time being:
现在,我们准备建立输入待办事项的表格。 我们的TodoForm是我们在本教程中编写的第一个有状态小部件,它将是我们最复杂的小部件。 转到todo_form.dart文件,并添加一个扩展StatefulWidget类的TodoForm小部件以及一个扩展State类的TodoFormState类。 TodoForm代码暂时将非常简单:
class TodoForm extends StatefulWidget {
  @override
  TodoFormState createState() {
    return TodoFormState();
  }
}
In our state we will define a form key now. As we use the Form class of Flutter, we need to use this key as a global identifier of the form. Add the following as first line into the TodoFormState class:
在我们的状态下,我们现在将定义一个表单密钥。 当我们使用Flutter的Form类时,我们需要将此键用作表单的全局标识符。 将以下内容作为第一行添加到TodoFormState类中:
final _formKey = GlobalKey<FormState>();In the build method we can now return an empty form with our defined key:
在build方法中,我们现在可以使用定义的键返回一个空表单:
@override
Widget build(BuildContext context) {
  return Form(key: _formKey, child: null);
}
The whole file should now look like this:
现在,整个文件应如下所示:
import 'package:flutter/material.dart';

class TodoEntryScreen extends StatelessWidget {
  @override
  Widget build(BuildContext context) {
    return Scaffold(
        appBar: AppBar(
          title: Text("Create todo"),
        ),
        body: TodoForm());
  }
}

class TodoForm extends StatefulWidget {
  @override
  TodoFormState createState() {
    return TodoFormState();
  }
}

class TodoFormState extends State<TodoForm> {
  final _formKey = GlobalKey<FormState>();

  @override
  Widget build(BuildContext context) {
    return Form(key: _formKey, child: null);
  }
}
While it absolutely amazing that we have a form now, we should teach it to do some stuff. Flutter offers a class called TextEditingController. This is a helper which will store the value and all meta info about the according field. It will help us to access and store the values which we enter into the form. As we only have title and description, we will add two controllers:
尽管现在有了表格绝对令人惊讶,但我们应该教它做一些事情。 Flutter提供了一个名为TextEditingController的类。 这是一个帮助程序,它将存储值和有关相应字段的所有元信息。 这将帮助我们访问和存储输入到表单中的值。 因为只有标题和描述,所以我们将添加两个控制器:
final titleController = TextEditingController();
final descriptionController = TextEditingController();
Those controllers are registered in the state and will hold the value, to free up all resources on unload, we also need to dispose it when the state itself is disposed. This is very easy, by overriding the lifecycle method dispose().
这些控制器在状态中注册,并会保存该值,以释放所有资源,以在卸载时释放状态,我们还需要在处理状态本身时对其进行处理。 通过重写生命周期方法dispose() ,这非常容易。
@override
void dispose() {
  titleController.dispose();
  descriptionController.dispose();
  super.dispose();
}
We are now ready to add our textfields to the form. In order to render them nicely, we will wrap them into a column. Add the following code behind the child property of the form, where currently null is explicitly set:
现在,我们准备将文本字段添加到表单中。 为了更好地渲染它们,我们将它们包装到一列中。 在表单的child属性后面添加以下代码,其中当前显式设置为null :
Column(children: <Widget>[
TextFormField(
controller: titleController,
),
TextFormField(
controller: descriptionController,
),
RaisedButton(
child: Text("Save"),
onPressed: () => {},
)
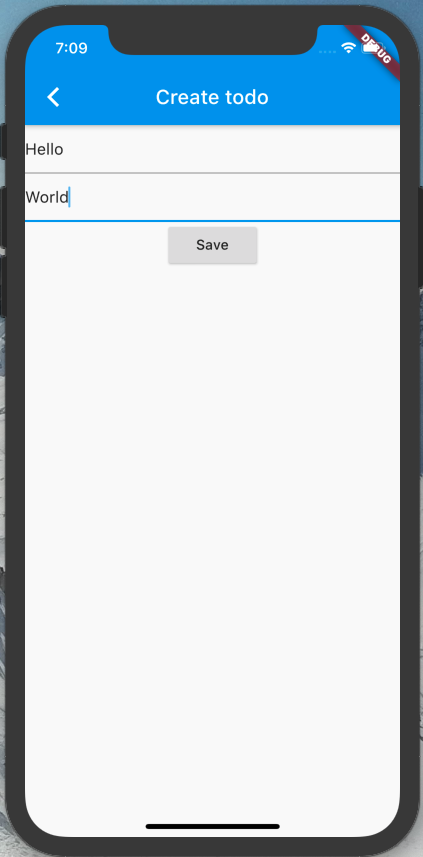
])We see the two fields there, which are bound to our controllers, as well as a save button. If you start the app now, the todo form will look like this (I entered the hello world manually):
我们在此处看到绑定到控制器的两个字段以及一个保存按钮。 如果您现在启动应用程序,则待办事项表单将如下所示(我手动进入了hello世界):
The only thing missing now is the save logic. First, we create a method which will add a new todo:
现在唯一缺少的是保存逻辑。 首先,我们创建一个将添加新的待办事项的方法:
void createTodo(addTodo) {
  var todo = new Todo(
      title: titleController.text,
      description: descriptionController.text
  );
  addTodo(todo);
  Navigator.pop(context);
}
Note how we access the value of the controllers for getting the title and description. Another interesting thing is that we pass in our add method, as we cannot directly use a consumer in this method, but only in our render method (functional programmers will smile now). The last line will return us to the TodoList screen, by removing the last navigation move from the navigation stack. The “go back” is also reflected in the transition of the screens.
注意我们如何访问控制器的值以获取标题和描述。 另一个有趣的事情是我们传入了add方法,因为我们不能直接在此方法中使用使用者,而只能在我们的render方法中使用(函数式程序员现在会微笑)。 通过从导航堆栈中删除最后的导航移动,最后一行将使我们返回TodoList屏幕。 屏幕的转换也反映了“返回”。
The child of our form will now contain a consumer for adding a todo:
我们表单的子级现在将包含用于添加待办事项的使用者:
@override
Widget build(BuildContext context) {
  return Form(
      key: _formKey,
      child: Consumer<TodoModel>(
          builder: (context, todoModel, child) => Column(children: <Widget>[
                TextFormField(
                  controller: titleController,
                ),
                TextFormField(
                  controller: descriptionController,
                ),
                RaisedButton(
                  child: Text("Save"),
                  onPressed: () => {createTodo(todoModel.add)},
                )
              ])));
}
We use the add method of our TodoModel as parameter for the createTodo method. If you start the app now, you are able to create a todo and it will directly appear in the TodoList.
我们将TodoModel的add方法用作createTodo方法的参数。 如果立即启动应用程序,则可以创建一个待办事项,它将直接出现在TodoList中。
The next step is to add a checkbox to tick todos as done. In fact this is really easy. Instead of a Container we will render a Row now, and set the mainAxisAlignment to spaceBetween. Beneath the Text widget, we will also have a Checkbox widget now which will display the current done state, as well as change it on tick:
下一步是添加一个复选框,以完成标记待办事项。 实际上,这确实很容易。 现在,我们将取代Row而不是Container,并将mainAxisAlignment设置为spaceBetween 。 在“文本”窗口小部件下方,我们现在还将有一个“复选框”窗口小部件,它将显示当前的完成状态,并在勾选时进行更改:
class TodoList extends StatelessWidget {
  @override
  Widget build(BuildContext context) {
    return Consumer<TodoModel>(
        builder: (context, todoModel, child) => ListView.builder(
            padding: const EdgeInsets.all(8),
            itemCount: todoModel.todos.length,
            itemBuilder: (BuildContext context, int index) {
              return Container(
                height: 50,
                child: Row(
                    mainAxisAlignment: MainAxisAlignment.spaceBetween,
                    children: [
                      Text(todoModel.todos[index].title),
                      Checkbox(
                        value: todoModel.todos[index].isDone,
                        onChanged: (bool newValue) =>
                            {todoModel.toggleDone(todoModel.todos[index].id)},
                      )
                    ]),
              );
            }));
  }
}
Now we can easily set todos to done and vice versa.
现在,我们可以轻松地将待办事项设置为已完成,反之亦然。
Of course we also want to edit todos or see their description. We can reuse the todo form for doing so. In order to let the TodoForm know which todo it should load, we have to pass the route our todoId as parameter. In our todo_form file, we add a class which defines the parameter structure our widget will extract:
当然,我们也想编辑待办事项或查看其描述。 我们可以重复使用待办事项表单。 为了让TodoForm知道应该加载哪个todo,我们必须将todoId的路由作为参数传递。 在我们的todo_form文件中,添加一个类,该类定义小部件将提取的参数结构:
class ScreenArguments {
  final int todoId;

  ScreenArguments(this.todoId);
}
We can now simply pass this thing to the route. Let’s go to our TodoScreen and make some changes there. We will move the label to the center, the checkbox to the left side and an edit button to the right side. The edit button will then navigate us to the form screen and pass the todoId as argument. The itemBuilder of our list will now look like this:
现在,我们可以简单地将此东西传递给路线。 让我们转到TodoScreen并在那里进行一些更改。 我们将标签移到中间,复选框移到左侧,编辑按钮移到右侧。 然后,编辑按钮将导航到表单屏幕,并将todoId作为参数传递。 现在,我们列表的itemBuilder如下所示:
return Container(
  height: 50,
  child: Row(
      mainAxisAlignment: MainAxisAlignment.spaceBetween,
      children: [
        Checkbox(
          value: todoModel.todos[index].isDone,
          onChanged: (bool newValue) =>
          {todoModel.toggleDone(todoModel.todos[index].id)},
        ),
        Text(todoModel.todos[index].title),
        IconButton(
          icon: Icon(Icons.edit),
          onPressed: () => {
            Navigator.pushNamed(context, "/entry",
                arguments:
                    ScreenArguments(todoModel.todos[index].id))
          },
        )
      ]),
);
As you can see we added an IconButton, which on press will navigate to the form page with a ScreenArguments object.
如您所见,我们添加了一个IconButton ,按下该按钮将导航到带有ScreenArguments对象的表单页面。
The todoList will now look like this:
现在,todoList将如下所示:

As our TodoModel is not ready yet to read a todo by id, we have to implement this method:
由于我们的TodoModel还没有准备好通过id读取待办事项,因此我们必须实现以下方法:
Todo read(int id){
  return _todos.firstWhere((element) => element.id == id);
}
Our form screen is nearly ready to display the current values of the todo. For accessing the screen arguments and setting the value of the textfields, we need to add the following code to the TodoFormState class, and call it in the first step of the build method:
我们的表单屏幕几乎可以显示待办事项的当前值。 为了访问屏幕参数并设置文本字段的值,我们需要将以下代码添加到TodoFormState类,并在build方法的第一步中调用它:
void loadTodoForEdit(BuildContext context){
  final ScreenArguments arguments = ModalRoute.of(context).settings.arguments;
  if(arguments != null && arguments.todoId != null){
    isEditForm = true;

    var todo = new TodoModel().read(arguments.todoId);
    titleController.text = todo.title;
    descriptionController.text = todo.description;
  }
}
We also add a boolean field isEditForm to the class, which will be needed to determine the save action and display the delete button). The method needs the context as argument because we need to extract the route param from it. After extracting the argument (in case it is a valid integer), we set isEditForm to true and load the todo and set its values into the textfields. When we navigate to the edit page now via the edit button, our textfields are prefilled with the data of the todo.The next step is to implement the update and delete methods in our TodoModel class:
我们还向该类添加了一个布尔字段isEditForm ,这将是确定保存操作并显示删除按钮所必需的。 该方法需要上下文作为参数,因为我们需要从中提取路由参数。 提取参数后(如果它是一个有效的整数),我们将isEditForm设置为true并加载待办事项并将其值设置到textfields中。 当我们现在通过编辑按钮导航到编辑页面时,我们的文本字段已预先填充了待办事项的数据。下一步是在TodoModel类中实现update和delete方法:
void update(int id, String newTitle, String newDescription) {
  var todo = _todos.firstWhere((todo) => todo.id == id);
  todo.title = newTitle;
  todo.description = newDescription;
  notifyListeners();
}

void delete(int id){
  _todos.removeWhere((todo) => todo.id == id);
  notifyListeners();
}
In our TodoForm we add the following methods:
在我们的TodoForm中,添加以下方法:
void editTodo(Function editTodo) {
  editTodo(editableTodo.id, titleController.text, descriptionController.text);
  Navigator.pop(context);
}

void deleteTodo(Function deleteTodo) {
  deleteTodo(editableTodo.id);
  Navigator.pop(context);
}
We can now display the delete button conditionally, as well as changing the text and the listener of the save button. In order to be able to access the todo in the build function, we will create a field on top of our class:
现在,我们可以有条件地显示“删除”按钮,以及更改文本和“保存”按钮的侦听器。 为了能够在build函数中访问待办事项,我们将在类顶部创建一个字段:
var editableTodo;Then we adjust the code of our loadTodoForEdit method that it looks like this:
然后我们调整loadTodoForEdit方法的代码,如下所示:
void loadTodoForEdit(BuildContext context) {
  final ScreenArguments arguments = ModalRoute.of(context).settings.arguments;
  if (arguments.todoId != null) {
    isEditForm = true;

    editableTodo = new TodoModel().read(arguments.todoId);
    titleController.text = editableTodo.title;
    descriptionController.text = editableTodo.description;
  }
}
Instead of creating a local Todo, we will initialize the class field now (which is totally fine as it is a State class). To finish the logic in our form, we render the delete button conditionally and change the listener and text of the state button conditionally:
现在,我们将初始化class字段,而不是创建本地的Todo (因为它是State类,所以很好)。 为了完成表单中的逻辑,我们有条件地渲染“删除”按钮,并有条件地更改状态按钮的侦听器和文本:
RaisedButton(
  child: Text(isEditForm ? "Update" : "Save"),
  onPressed: () => {
    isEditForm
        ? editTodo(todoModel.update)
        : createTodo(todoModel.add)
  },
),
isEditForm
    ? RaisedButton(
        child: Text("Delete"),
        onPressed: () => deleteTodo(todoModel.delete),
      )
    : new Container()
Note: we have to return some placeholder element as a column must not contain null elements.
注意:我们必须返回一些占位符元素,因为列不能包含空元素。
And that was basically it. We have a todolist app now which can do all CRUD functionality!
基本上就是这样。 我们现在有一个todolist应用程序,可以执行所有CRUD功能!
You can access the full sourcecode at: https://github.com/mrwdlr/todo-flutter
您可以在以下位置访问完整的源代码: https : //github.com/mrwdlr/todo-flutter
翻译自: https://medium.com/swlh/building-a-todolist-in-flutter-ed3f1d927658
待办清单 bmob


 已为社区贡献8条内容

所有评论(0)