一文读懂Flutter布局原则——‘约束下降,尺寸上升’
前言上一篇简单学习了flutter开发与调试,先学习Flutter布局。Flutter布局依赖于很多特定的布局对象。本片对常用的布局对象进行讲解和使用。要理解一句话Constraints go down. Sizes go up. Parent sets position.谷歌翻译为约束下降,尺寸上升,名称功能...
前言
上一篇简单学习了flutter开发与调试,先学习Flutter布局。Flutter布局依赖于很多特定的布局对象。本片对常用的布局对象进行讲解和使用。要理解一句话
Constraints go down. Sizes go up. Parent sets position.
谷歌翻译:约束下降,尺寸上升,父亲设置位置
更通顺一点的话:约束下降,尺寸上升,子位父设。
通俗一点讲就是:
- 一个子部件的约束(最大最小宽度/高度)是从他的父亲那儿来设置的。
- 一个部件首先会遍历他的子部件们,挨个告诉他的子组件,我给你的约束是多少,然后询问子组件,你想多大。
- 知道孩子们想要多大后,这个部件会一个一个把他的孩子按一定方向(竖直或者水平)放好。
- 最后这个部件会告诉他的父元素我想要多大(当然,这个大小也在他父元素传下来的约束之内)。
仔细阅读你就会发现,这套规则可以无限套娃:
一个爷爷带着自己的孩子和几个孙子去电影院看电影,包了3号影厅。
爷爷告诉爸爸:你管好自己的孩子,只能在这个3号厅里看!(最大值,约束下降)
然后爷爷问爸爸:你想多少个位置?
爸爸又给他的孩子说:你们只能在这个3号厅看,每个人最多占5个座位!(约束下降)
然后问孩子:你想多大?
这时候孩子一个个回复爸爸了:
大儿子说:我想要6个座位躺着看,可是你最多只让我占5个,5个就5个叭。(约束条件内,尺寸上升)
二儿子说:我想要2个座位和我女朋友看。(尺寸上升)
三儿子说:我只要1个位置就好了
这时候父亲开始划分位置(假设水平排列):(子位父设)
大儿子,你躺在第一排1-5号座位叭;二儿子,你和你女朋友去第一排6-7号座位;三儿子,你去第一排8号座位。
把孩子安排好以后,父亲一看我的孩子们占用了第一排1-8号位置。就回复爷爷:我想要9个位置。(尺寸再次上升)
爷爷听完回答又把父亲的位置搞定。
根据以上的限制Flutter布局有以下特点:
- 一个元素只能在他父元素的约束下决定自己大小
- 一个元素不知道他自己被放在了哪个地方,因为他的位置是由他的父元素决定的
- 父元素的位置和大小又取决于父元素的父元素,所以如果不考虑整个‘族谱’,根本不能看出一个元素的大小和位置
- 如果父亲没有足够的子元素对齐信息,那么子元素的对齐信息会被忽略(字面意思,没太理解)
代码
为了深入理解,这里有29个简单的例程与讲解:
- 全部都是红色
  @override
  Widget build(BuildContext context) {
    return Container(color: red);
  }
屏幕的子元素就是Container,屏幕强制Container和自己一样大,占满屏幕。
- 加个大小,不管用?
  @override
  Widget build(BuildContext context) {
    return Container(width: 100, height: 100, color: red);
  }
加上width和height的限制并不能生效,因为Container的大小被屏幕强制设成和屏幕一样大了。
- 加个Center
  @override
  Widget build(BuildContext context) {
    return Center(
      child: Container(width: 100, height: 100, color: red),
    );
  }
终于有效果了,屏幕让他的子元素Center和自己一样大,Center就告诉Container了:你想多大?记得你不能比我大!
Container说:我只想100100.于是乎100100的大小终于生效了!!
- 修改对齐方式
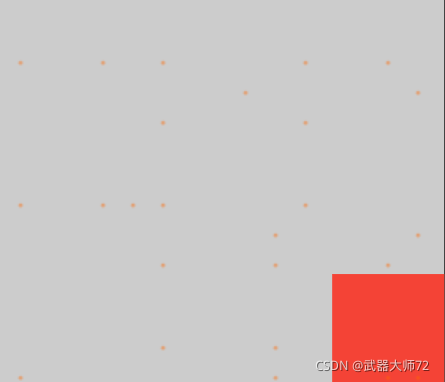
  @override
  Widget build(BuildContext context) {
    return Align(
      alignment: Alignment.bottomRight,
      child: Container(width: 100, height: 100, color: red),
    );
  }
如上代码用Align对象包裹Container,就可以实现啦
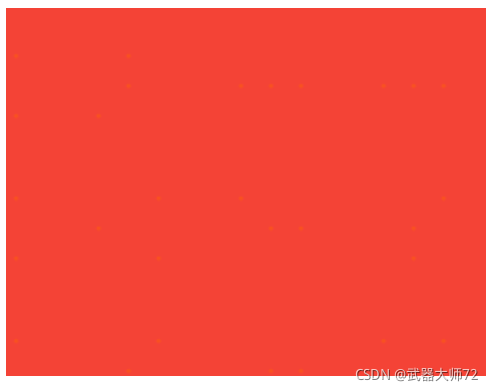
- 无限大(全是红色)
  @override
  Widget build(BuildContext context) {
    return Center(
      child: Container(
          width: double.infinity, height: double.infinity,
          color: red),
    );
  }
Container想要无限大,根据约束下降的原则,不能超越其父元素Center的大小。那就限制为Center的大小,即充满屏幕的大小。
效果图如例1
- 没有大小(全是红色)
  @override
  Widget build(BuildContext context) {
    return Center(
      child: Container(color: red),
    );
  }
Container没有子元素的时候,也就是说没有尺寸上升,并且其本身也没有设定大小,所以综合考虑族谱以后得出一个结论,本例的Container没有固定的大小。这时候Container就充满屏幕,这是由Container的特性决定的。
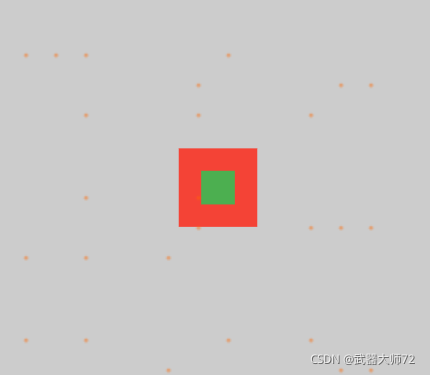
- 加点绿色
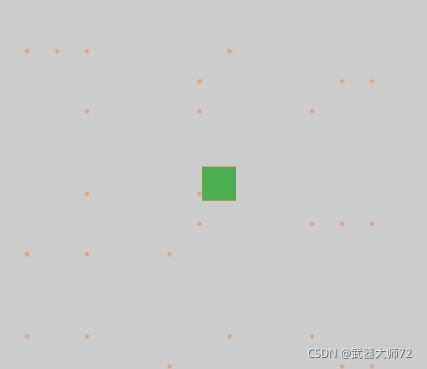
  @override
  Widget build(BuildContext context) {
    return Center(
      child: Container(
        color: red,
        child: Container(color: green, width: 30, height: 30),
      ),
    );
  }
我们先看红色Container,由父元素Center传下来的约束不超过Center大小,绿色Container上升的尺寸即3030;所以红色Container的大小就是3030,和子元素绿色Container一样。效果就是红色被绿色全部盖住了!!
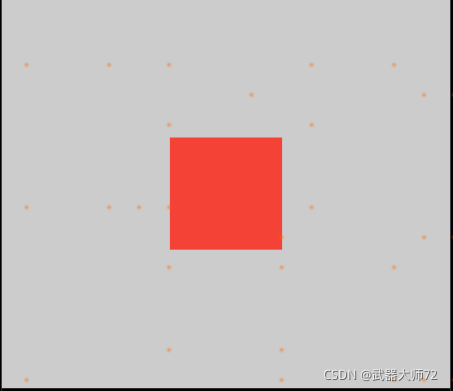
- 红配绿
  @override
  Widget build(BuildContext context) {
    return Center(
      child: Container(
        padding: const EdgeInsets.all(20.0),
        color: red,
        child: Container(color: green, width: 30, height: 30),
      ),
    );
  }
给红色Container加一个padding,红色背景不就出来了么。
- 怎么又全是红色
  @override
  Widget build(BuildContext context) {
    return ConstrainedBox(
      constraints: const BoxConstraints(
        minWidth: 70,
        minHeight: 70,
        maxWidth: 150,
        maxHeight: 150,
      ),
      child: Container(color: red, width: 10, height: 10),
    );
  }
ConstrainedBox只会对他从父级收到的约束施加额外添加约束。
这个红色Container并没有被BoxConstraints约束,而是铺满了屏幕,是因为屏幕强制ConstrainedBox和自己一样大,ConstrainedBox又告诉Container和自己一样大,所以constraints(长宽限制在70-150以内)就被忽略了。
- 终于限制住大小了
  @override
  Widget build(BuildContext context) {
    return Center(
      child: ConstrainedBox(
        constraints: const BoxConstraints(
          minWidth: 70,
          minHeight: 70,
          maxWidth: 150,
          maxHeight: 150,
        ),
        child: Container(color: red, width: 10, height: 10),
      ),
    );
  }
再一次用Center来帮忙。外面包一层Center,屏幕现在强制Center和自己一样大,Center告诉ConstrainedBox你不能比我大。ConstrainedBox的constraints属性传到子元素Container下,10小于70,最小高度和宽度都是70,Container的10*10被忽略。
- 过大过小都能限制
  @override
  Widget build(BuildContext context) {
    return Center(
      child: ConstrainedBox(
        constraints: const BoxConstraints(
          minWidth: 70,
          minHeight: 70,
          maxWidth: 150,
          maxHeight: 150,
        ),
        child: Container(color: red, width: 1000, height: 1000),
      ),
    );
  }
Container太惨了,上回被minWidth,minHeight限制住了,又被maxHeight,maxWidth限制住了!!!
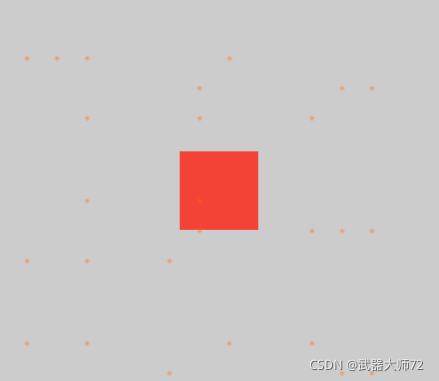
- 终于老实了
  @override
  Widget build(BuildContext context) {
    return Center(
      child: ConstrainedBox(
        constraints: const BoxConstraints(
          minWidth: 70,
          minHeight: 70,
          maxWidth: 150,
          maxHeight: 150,
        ),
        child: Container(color: red, width: 100, height: 100),
      ),
    );
  }
Container终于老实了,乖乖在70-150范围内。
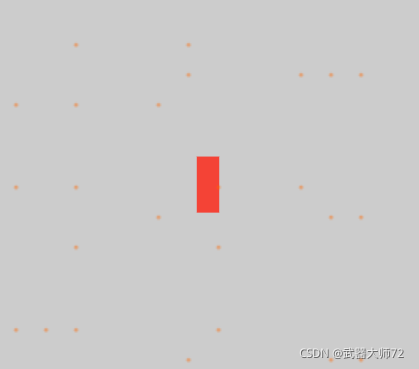
- 谁在任性
  @override
  Widget build(BuildContext context) {
    return UnconstrainedBox(
      child: Container(color: red, width: 20, height: 50),
    );
  }
UnconstrainedBox 允许子元素想多大就多大,于是乎,UnconstrainedBox不顾屏幕让他充满屏幕的约束,按照他的子元素要求显示为20*50的大小。
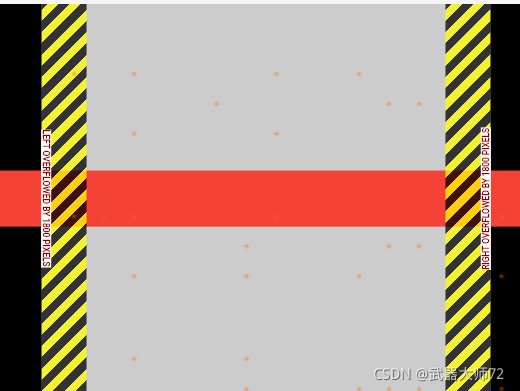
- 太任性了
  @override
  Widget build(BuildContext context) {
    return UnconstrainedBox(
      child: Container(color: red, width: 4000, height: 50),
    );
  }
UnconstrainedBox任由子元素任性,结果溢出了!!出现了黑黄线警告!!
- 更任性
  @override
  Widget build(BuildContext context) {
    return OverflowBox(
      minWidth: 0.0,
      minHeight: 0.0,
      maxWidth: double.infinity,
      maxHeight: double.infinity,
      child: Container(color: red, width: 4000, height: 50),
    );
  }
OverflowBox更厉害了,子元素超出限制的时候不会出现任何警告,是不是内部有关系呀
- 任性到报错
  @override
  Widget build(BuildContext context) {
    return UnconstrainedBox(
      child: Container(color: Colors.red, width: double.infinity, height: 100),
    );
  }
UnconstrainedBox允许自己的子元素无限大,结果在渲染的时候展示不出无限大的界面,直接报错!!
- 负责的人
  @override
  Widget build(BuildContext context) {
    return UnconstrainedBox(
      child: LimitedBox(
        maxWidth: 100,
        child: Container(
          color: Colors.red,
          width: double.infinity,
          height: 100,
        ),
      ),
    );
  }
LimitedBox是个比较负责的人物,当他收到上级UnconstrainedBox的约束:”你可以无限大!“时他觉着不能太任性,要有规矩,于是他自己做研究决定,宽度最大只能100,然后传给Container,至此任性的Container也无法任性了,乖乖的被限制在100以内的宽度。
- FittedBox
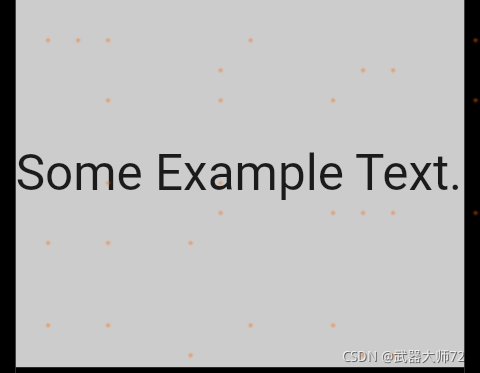
  @override
  Widget build(BuildContext context) {
    return const FittedBox(
      child: Text('Some Example Text.'),
    );
  }
FittedBox会在其父元素的约束内把子元素放大到填满所有可用区域
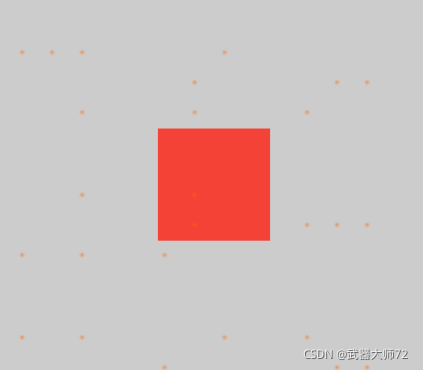
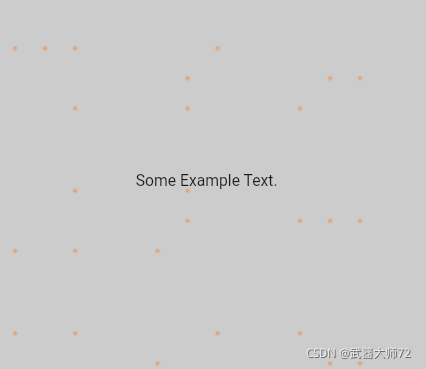
- Center又来了
  @override
  Widget build(BuildContext context) {
    return const Center(
      child: FittedBox(
        child: Text('Some Example Text.'),
      ),
    );
  }
在FittedBox外面包一层Center后会发生什么呢?
Center告诉FittedBox你可以任意大,只要别比我大就行。
Text告诉FittedBox我需要这么大(文字实际大小)。
这时候FittedBox根据FittedBox实际的大小决定了自己的大小:和Text一样大。
于是加上了Center后就没有了缩放。
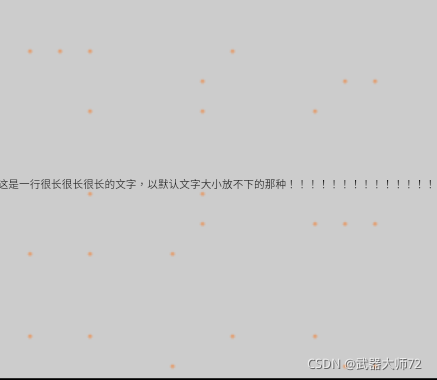
- 太长的文字
    return const Center(
      child: FittedBox(
        child: Text(
            '这是一行很长很长很长的文字,以默认文字大小放不下的那种!!!!!!!!!!!!!!!'),
      ),
    );
  }
可以了解FittedBox受Center限制,最大和屏幕一样大。那FittedBox就把Text缩放到和自己一样大。结果就如上图所示。
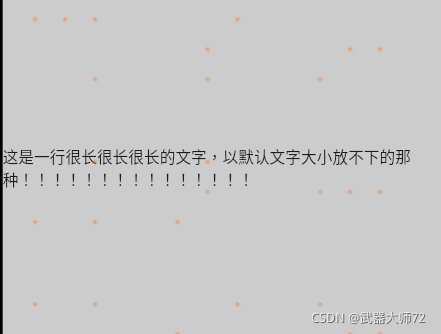
- 去掉FittedBox
  @override
  Widget build(BuildContext context) {
    return const Center(
      child: Text(
          '这是一行很长很长很长的文字,以默认文字大小放不下的那种!!!!!!!!!!!!!!!'),
    );
  }
去掉FittedBox以后,一行放不下没有缩放了,直接换行。
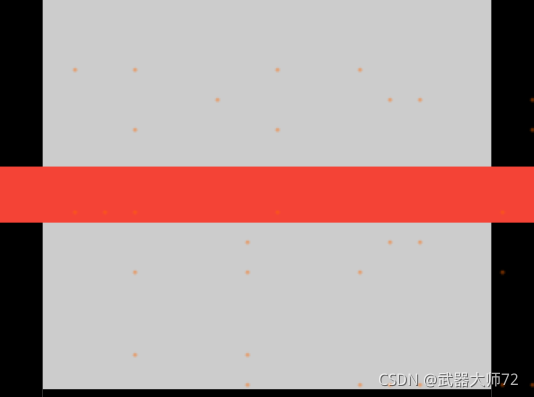
- FittedBox如何面对任性
  @override
  Widget build(BuildContext context) {
    return FittedBox(
      child: Container(
        height: 20.0,
        width: double.infinity,
        color: Colors.red,
      ),
    );
  }
FittedBox只能对有大小的子元素进行缩放,当子元素想无限大时,会直接报错。
- Row

  @override
  Widget build(BuildContext context) {
    return Row(
      children: [
        Container(color: red, child: const Text('Hello!', style: big)),
        Container(color: green, child: const Text('Goodbye!', style: big)),
      ],
    );
  }
在这里屏幕强制Row和屏幕一样大,而Row呢,和UnconstrainedBox一样,不会向下传限制。换言之,他的子元素想多大就多大。确定好子元素大小以后Row会水平把子元素一个一个排列好。
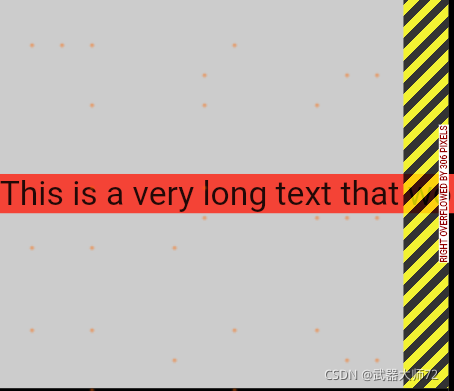
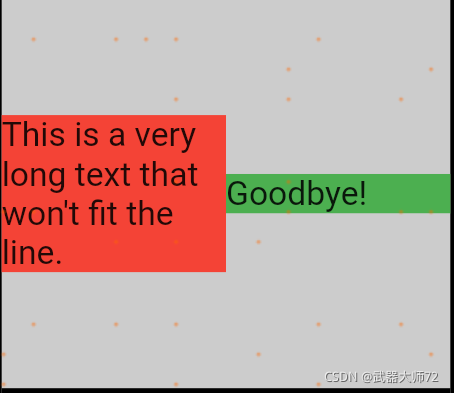
- 又收到了警
  @override
  Widget build(BuildContext context) {
    return Row(
      children: [
        Container(
          color: red,
          child: const Text(
            'This is a very long text that '
            'won\'t fit the line.',
            style: big,
          ),
        ),
        Container(color: green, child: const Text('Goodbye!', style: big)),
      ],
    );
  }
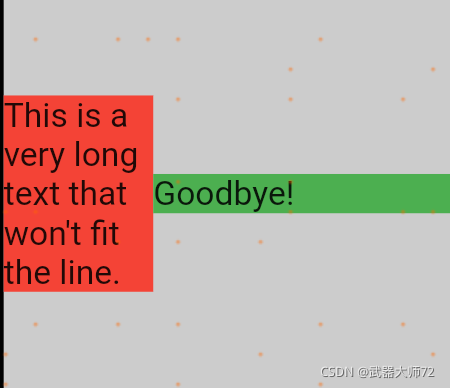
- 调皮的Expanded
  @override
  Widget build(BuildContext context) {
    return Row(
      children: [
        Expanded(
          child: Center(
            child: Container(
              color: red,
              child: const Text(
                'This is a very long text that won\'t fit the line.',
                style: big,
              ),
            ),
          ),
        ),
        Container(color: green, child: const Text('Goodbye!', style: big)),
      ],
    );
  }
在Row的有Expanded类型的孩子时,Row将忽略Expanded自己的宽度,而是根据其他孩子来定义Expanded的宽度。
- 都是Expanded
  @override
  Widget build(BuildContext context) {
    return Row(
      children: [
        Expanded(
          child: Container(
            color: red,
            child: const Text(+
              'This is a very long text that won\'t fit the line.',
              style: big,
            ),
          ),
        ),
        Expanded(
          flex:2,
          child: Container(
            color: green,
            child: const Text(
              'Goodbye!',
              style: big,
            ),
          ),
        ),
      ],
    );
  }
如果Row的孩子全都是Expanded,那么孩子们的宽度将和孩子们的flex属性成正比。
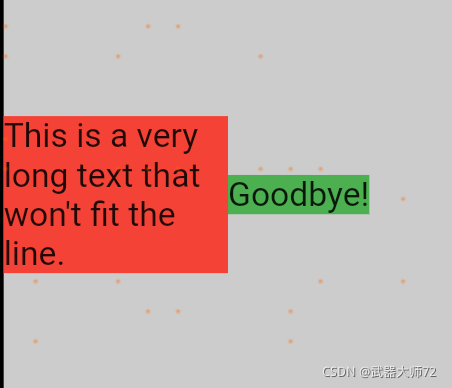
- Flexible
  @override
  Widget build(BuildContext context) {
    return Row(
      children: [
        Flexible(
          child: Container(
            color: red,
            child: const Text(
              'This is a very long text that won\'t fit the line.',
              style: big,
            ),
          ),
        ),
        Flexible(
          child: Container(
            color: green,
            child: const Text(
              'Goodbye!',
              style: big,
            ),
          ),
        ),
      ],
    );
  }
Flexible和Expanded都会忽略孩子的宽度,相比于Expanded,Flexible在分配宽度的时候会更加节俭,不会铺张浪费。
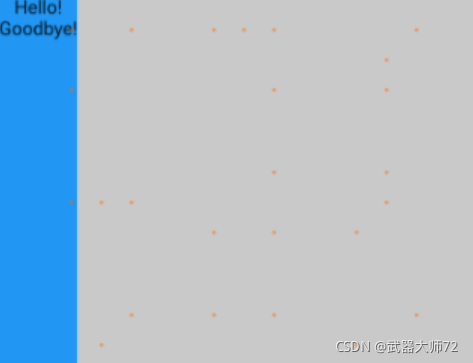
- 松散约束
  @override
  Widget build(BuildContext context) {
    return Scaffold(
      body: Container(
        color: blue,
        child: Column(
          children: const [
            Text('Hello!'),
            Text('Goodbye!'),
          ],
        ),
      ),
    );
  }
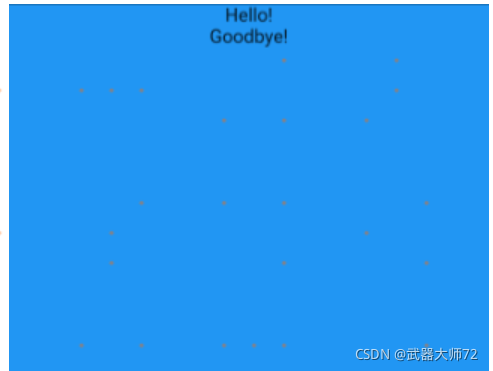
- 紧凑约束
  @override
  Widget build(BuildContext context) {
    return Scaffold(
      body: SizedBox.expand(
        child: Container(
          color: blue,
          child: Column(
            children: const [
              Text('Hello!'),
              Text('Goodbye!'),
            ],
          ),
        ),
      ),
    );
  }
紧凑与松散
有必要单独讲一下紧凑与松散这两个概念,首先可以找到相关代码:
- 紧凑约束:
BoxConstraints.tight(Size size)
   : minWidth = size.width,
     maxWidth = size.width,
     minHeight = size.height,
     maxHeight = size.height;
- 松散约束:
BoxConstraints.loose(Size size)
   : minWidth = 0.0,
     maxWidth = size.width,
     minHeight = 0.0,
     maxHeight = size.height;
可以看出,紧凑约束的最大最小值都严格等于某个值,如例二,而松散约束的则允许一个组件可以比最大值小,如例三。
总结
以上只是Flutter最基础的布局约束规则,每一种组件对于这些基础约束都有特定的应用规则。所以在实际使用过程中,要多多读源码和文档。
附上本文的代码,新建flutter项目后复制到main.dart即可。

开源鸿蒙跨平台开发社区汇聚开发者与厂商,共建“一次开发,多端部署”的开源生态,致力于降低跨端开发门槛,推动万物智联创新。
更多推荐

 2
2 0
0- 0


 已为社区贡献4条内容

所有评论(0)