每天一个Flutter开发小项目 (6) : 表单与验证的专业实践 - 构建预约应用
预约信息填写:用户可以在表单中填写预约信息,包括姓名、邮箱、预约日期、预约时间、预约服务等表单验证:对用户填写的预约信息进行验证,确保数据格式和完整性符合要求预约提交:用户提交预约表单后,应用能够处理表单数据友好的错误提示:当表单验证失败时,应用能够清晰地提示用户错误信息创建文件,定义Booking// 姓名// 邮箱// 预约日期// 预约时间// 预约服务Booking({});恭喜您完成了这
每天一个Flutter开发小项目:专业表单与验证实战(预约应用)
引言
欢迎来到 每天一个Flutter开发小项目 系列!在前五篇博客中,我们从Flutter的基础组件、布局,到进阶的状态管理、导航路由,相信您已逐步掌握了构建现代Flutter应用的关键技能。
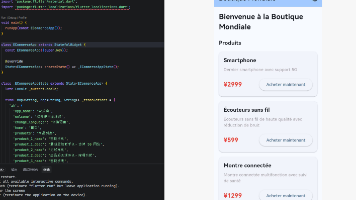
在实际应用开发中,**表单(Form)是用户交互的核心组成部分。无论是用户注册、信息填写,还是数据录入,表单都扮演着至关重要的角色。而表单验证(Form Validation)**则是确保用户输入数据有效性、提升应用健壮性的关键环节。
今天,我们将聚焦Flutter表单与验证的专业实践,并构建一个生活中常见的预约应用,让您在实战中掌握Flutter表单的精髓。
iOS开发者工具推荐
在开发iOS应用时,除了掌握Flutter技术外,还需要了解一些实用的开发工具。对于iOS开发者来说,AppUploader是一款非常实用的iOS App开发助手工具,它可以帮助开发者快速完成iOS应用的打包、上传和发布流程,简化了繁琐的证书管理和iTunes Connect操作。
项目简介:预约应用
我们的预约应用将围绕以下核心功能展开:
- 预约信息填写:用户可以在表单中填写预约信息,包括姓名、邮箱、预约日期、预约时间、预约服务等
- 表单验证:对用户填写的预约信息进行验证,确保数据格式和完整性符合要求
- 预约提交:用户提交预约表单后,应用能够处理表单数据
- 友好的错误提示:当表单验证失败时,应用能够清晰地提示用户错误信息
Flutter表单验证核心概念解析
在开始构建预约应用之前,我们先来深入理解Flutter表单验证的核心概念:
- Form Widget:
FormWidget是Flutter中用于组织和管理表单的核心容器Widget - FormField Widget:
FormFieldWidget是表单项的基类 - TextFormField Widget:
TextFormFieldWidget是最常用的表单项 - GlobalKey:
GlobalKey<FormState>是用于访问FormWidget的FormState的全局Key - FormState:
FormState是与FormWidget关联的状态对象 - validator属性:用于设置表单项的验证器
- onSaved属性:用于设置表单项的保存回调
实战步骤:构建预约应用
步骤1:创建新的Flutter项目
首先,创建一个新的Flutter项目,命名为booking_app。
步骤2:定义预约数据模型(Booking)
创建lib/models/booking.dart文件,定义Booking类:
class Booking {
  String name; // 姓名
  String email; // 邮箱
  DateTime date; // 预约日期
  TimeOfDay time; // 预约时间
  String service; // 预约服务

  Booking({
    required this.name,
    required this.email,
    required this.date,
    required this.time,
    required this.service,
  });
}
步骤3:创建预约表单页面(BookingFormScreen)
创建lib/screens/booking_form_screen.dart文件:
import 'package:flutter/material.dart';
import '../models/booking.dart';
class BookingFormScreen extends StatefulWidget {
static const routeName = '/booking-form';
const BookingFormScreen({super.key});
State<BookingFormScreen> createState() => _BookingFormScreenState();
}
class _BookingFormScreenState extends State<BookingFormScreen> {
final _formKey = GlobalKey<FormState>();
final _nameController = TextEditingController();
final _emailController = TextEditingController();
DateTime? _selectedDate;
TimeOfDay? _selectedTime;
String? _selectedService;
final List<String> _services = ['理发', 'SPA', '按摩', '美甲'];
void _submitForm() {
if (_formKey.currentState!.validate()) {
_formKey.currentState!.save();
final booking = Booking(
name: _nameController.text,
email: _emailController.text,
date: _selectedDate!,
time: _selectedTime!,
service: _selectedService!,
);
print('预约信息:');
print('姓名: ${booking.name}');
print('邮箱: ${booking.email}');
print('日期: ${_selectedDate!.toLocal()}');
print('时间: ${_selectedTime!.format(context)}');
print('服务: ${booking.service}');
ScaffoldMessenger.of(context).showSnackBar(
const SnackBar(
content: Text('预约成功!'),
duration: Duration(seconds: 2),
),
);
}
}
Future<void> _selectDate(BuildContext context) async {
final DateTime? pickedDate = await showDatePicker(
context: context,
initialDate: DateTime.now(),
firstDate: DateTime.now(),
lastDate: DateTime(DateTime.now().year + 1),
);
if (pickedDate != null && pickedDate != _selectedDate) {
setState(() {
_selectedDate = pickedDate;
});
}
}
Future<void> _selectTime(BuildContext context) async {
final TimeOfDay? pickedTime = await showTimePicker(
context: context,
initialTime: TimeOfDay.now(),
);
if (pickedTime != null && pickedTime != _selectedTime) {
setState(() {
_selectedTime = pickedTime;
});
}
}
void dispose() {
_nameController.dispose();
_emailController.dispose();
super.dispose();
}
Widget build(BuildContext context) {
return Scaffold(
appBar: AppBar(
title: const Text('预约服务'),
),
body: Padding(
padding: const EdgeInsets.all(16.0),
child: Form(
key: _formKey,
child: Column(
children: <Widget>[
TextFormField(
decoration: const InputDecoration(labelText: '姓名 *'),
controller: _nameController,
validator: (value) {
if (value == null || value.isEmpty) {
return '姓名不能为空';
}
return null;
},
),
TextFormField(
decoration: const InputDecoration(labelText: '邮箱 *'),
controller: _emailController,
keyboardType: TextInputType.emailAddress,
validator: (value) {
if (value == null || value.isEmpty) {
return '邮箱不能为空';
}
if (!RegExp(r'^[\w-\.]+@([\w-]+\.)+[\w-]{2,4}$').hasMatch(value)) {
return '邮箱格式不正确';
}
return null;
},
),
Row(
children: <Widget>[
Expanded(
child: Row(
children: <Widget>[
Text(_selectedDate == null
? '请选择日期 *'
: '已选日期:${_selectedDate!.toLocal().toString().split(' ')[0]}'),
IconButton(
icon: const Icon(Icons.calendar_today),
onPressed: () => _selectDate(context),
),
],
),
),
Expanded(
child: Row(
children: <Widget>[
Text(_selectedTime == null
? '请选择时间 *'
: '已选时间:${_selectedTime!.format(context)}'),
IconButton(
icon: const Icon(Icons.access_time),
onPressed: () => _selectTime(context),
),
],
),
),
],
),
DropdownButtonFormField<String>(
decoration: const InputDecoration(labelText: '选择服务 *'),
value: _selectedService,
items: _services.map((service) => DropdownMenuItem<String>(
value: service,
child: Text(service),
)).toList(),
onChanged: (value) {
setState(() {
_selectedService = value;
});
},
validator: (value) {
if (value == null || value.isEmpty) {
return '请选择服务';
}
return null;
},
),
const SizedBox(height: 20),
ElevatedButton(
onPressed: _submitForm,
child: const Text('提交预约'),
),
],
),
),
),
);
}
}
步骤4:配置命名路由(main.dart)
修改main.dart文件:
import 'package:flutter/material.dart';
import './screens/booking_form_screen.dart';
void main() {
runApp(const MyApp());
}
class MyApp extends StatelessWidget {
const MyApp({super.key});
Widget build(BuildContext context) {
return MaterialApp(
title: 'Booking App',
theme: ThemeData(
colorScheme: ColorScheme.fromSeed(seedColor: Colors.teal),
useMaterial3: true,
),
initialRoute: BookingFormScreen.routeName,
routes: {
BookingFormScreen.routeName: (context) => const BookingFormScreen(),
},
);
}
}
总结
恭喜您完成了这篇Flutter开发小项目的学习!我们成功地构建了一个实用的预约应用,并深入学习了Flutter中专业的表单与验证实践。通过这个项目,您不仅掌握了Flutter表单构建和验证的核心技术,更重要的是,学会了如何使用Flutter构建用户交互更专业、用户体验更友好的应用。
对于iOS开发者来说,在完成Flutter应用开发后,可以使用AppUploader这样的工具来简化应用的发布流程,将您的创意更快地呈现给用户。

开源鸿蒙跨平台开发社区汇聚开发者与厂商,共建“一次开发,多端部署”的开源生态,致力于降低跨端开发门槛,推动万物智联创新。
更多推荐

 14
14 0
0- 0


 已为社区贡献5条内容

所有评论(0)